If you’ve ever had chicken breast turn out dry, I get it… It’s the worst. This Ninja air fryer chicken breast stays juicy because we’re keeping two things in check: the thickness and the doneness, so it cooks through without going past that point where it starts drying out fast.
Let’s be honest, chicken breast has a tiny window between not done yet and overcooked, so we’re aiming for that sweet spot where it’s just cooked through and still moist.
If you want to see this Ninja air fryer chicken breast recipe in action, watch the video below and give it a like… it seriously helps so much. And hit subscribe for more easy air fryer dinners and chicken recipes you’ll actually make on repeat.
Why you’ll love this air fryer chicken recipe
This recipe is simple, fast, and really dependable once you learn the little “even the thickness” trick, because even chicken cooks more evenly and gives you way less stress at the end. It also uses basic pantry spices, so you’re not hunting down anything weird at 6 pm… how can you not love that?!
Note: Air fryers don’t all cook the same, and mine is a Ninja air fryer, so think of the cook time as a starting point, not a rule. Start checking a little early the first time you make it, then you’ll know the perfect timing for your own air fryer, your chicken size, and how thick your chicken breasts usually are.
Texture + flavor
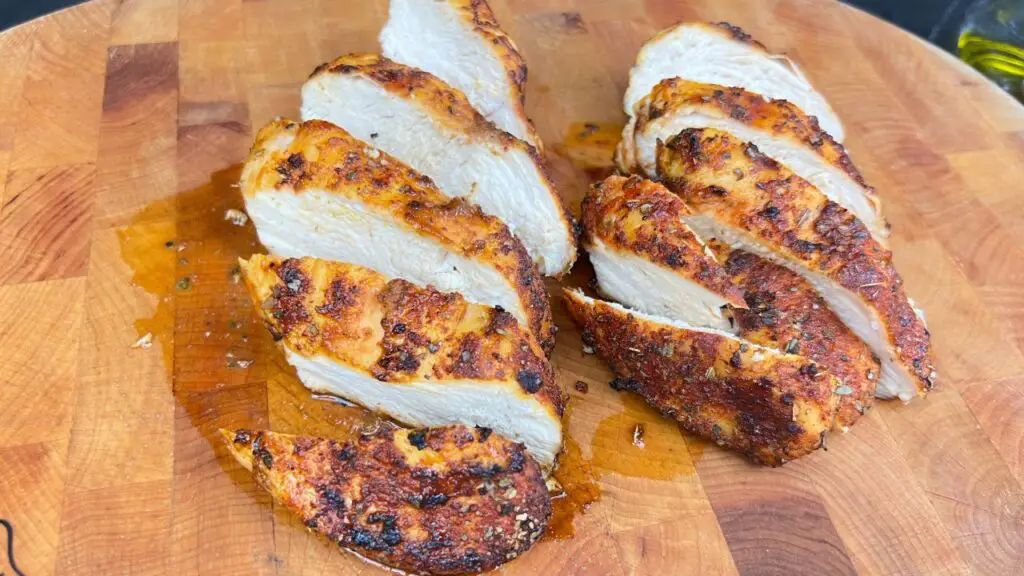
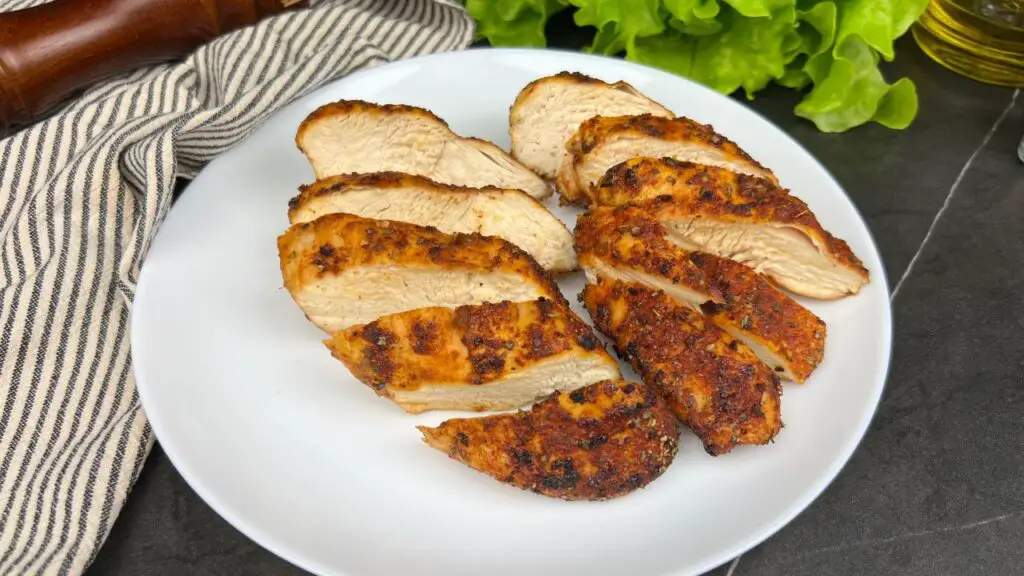
The chicken breast gets lightly browned outside and savory from the spices, and the inside stays tender and moist when you pull it right at cooked through, not a minute past. That’s the whole goal here: fully cooked and safe, but still juicy.
When it’s cooked right, it slices cleanly and feels soft when you bite into it, not tough or stringy. It’s one of those simple things that just works, and I love having it in my back pocket for busy nights.
Note: For food safety, chicken is commonly recommended at an internal temperature of 165°F (74°C).
Air fryer chicken breast ingredients

- 2 medium-sized chicken breasts, about 6.5 oz each (about 180 g each)
- 1/4 tsp of salt (about 1.5 g)
- 1/4 tsp of black pepper (about 0.6 g)
- 1 tsp of paprika (about 2.3 g)
- 1/2 tsp of garlic powder (about 1.6 g)
- 1/2 tsp of dried oregano (about 0.5 g)
- 1 tsp of light brown sugar (about 4 g)
- 1 tbsp of cooking oil (about 14 g)
Note: The gram amounts for spices are always approximate because brands grind differently, but they’re close enough for cooking.
Equipment you’ll need
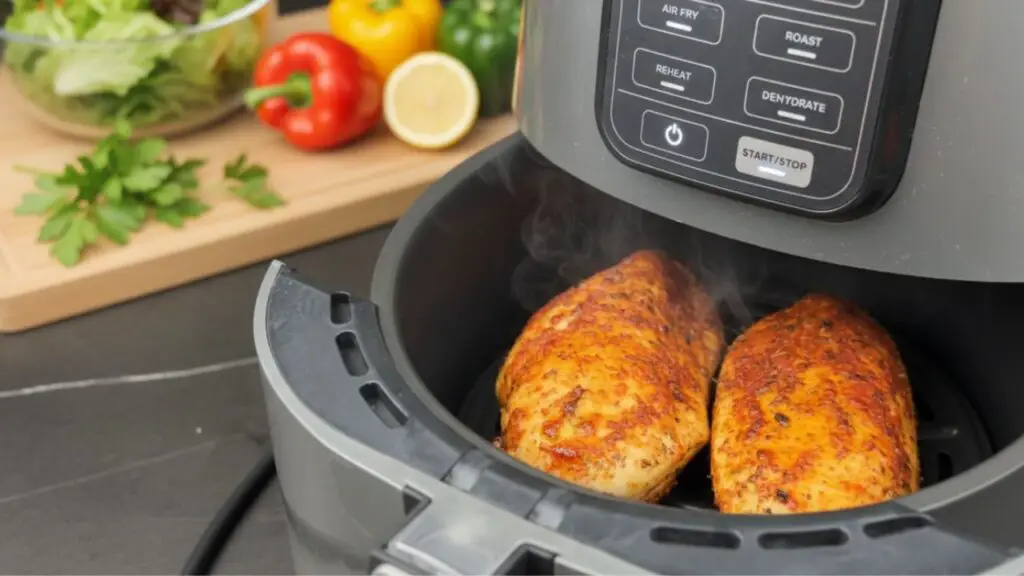
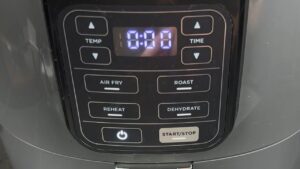
This is made in my Ninja air fryer, like the one below. I like it because it cooks really consistently, and it’s quick to get going.

TAP ON IMAGE TO VIEW PRICE
- Air fryer with a basket
- Parchment paper
- Rolling pin
- Small bowl
- Tongs
- Instant meat thermometer, optional but helpful
How to make this Ninja air fryer chicken breast
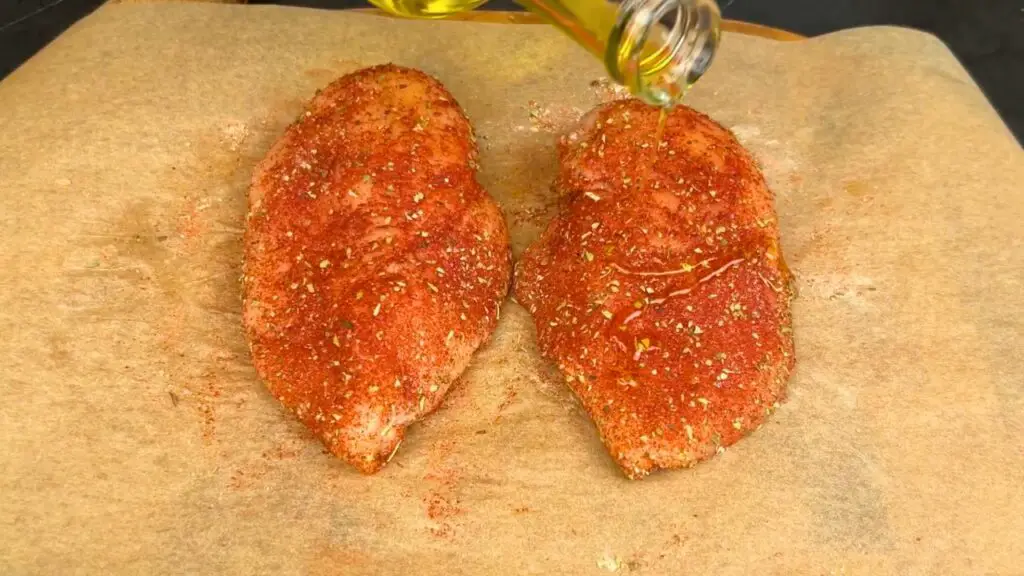
Step 1: Mix together 1/4 tsp of salt, 1/4 tsp of black pepper, 1/2 tsp of garlic powder, 1 tsp of paprika, 1/2 tsp of dried oregano, and 1 tsp of light brown sugar.
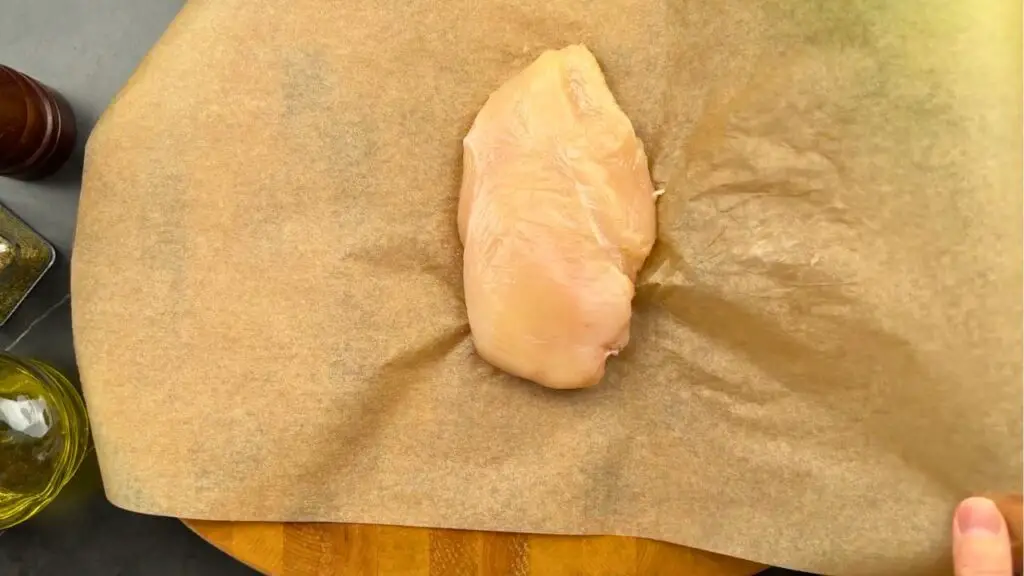
Step 2: Place 1 of the chicken breasts on a sheet of parchment paper, fold the parchment paper over it, then lightly bash the thickest part with a rolling pin until the thickness looks more even. Repeat with the second chicken breast.
Step 3: Sprinkle the seasoning mixture over both chicken breasts, and try to use about half first so you still have plenty left when you turn them over. Rub the seasoning in until the coating looks even, then turn both chicken breasts over and use the rest of the seasoning mixture on the other face, rubbing until both faces look evenly coated.
Step 4: Drizzle 1 tbsp of neutral oil over both chicken breasts, then rub the oil over the surface so the chicken looks lightly coated all over.
Top Tip: If you’re using garlic salt instead of 1/2 tsp of garlic powder, skip 1/4 tsp of salt so the chicken doesn’t come out too salty.
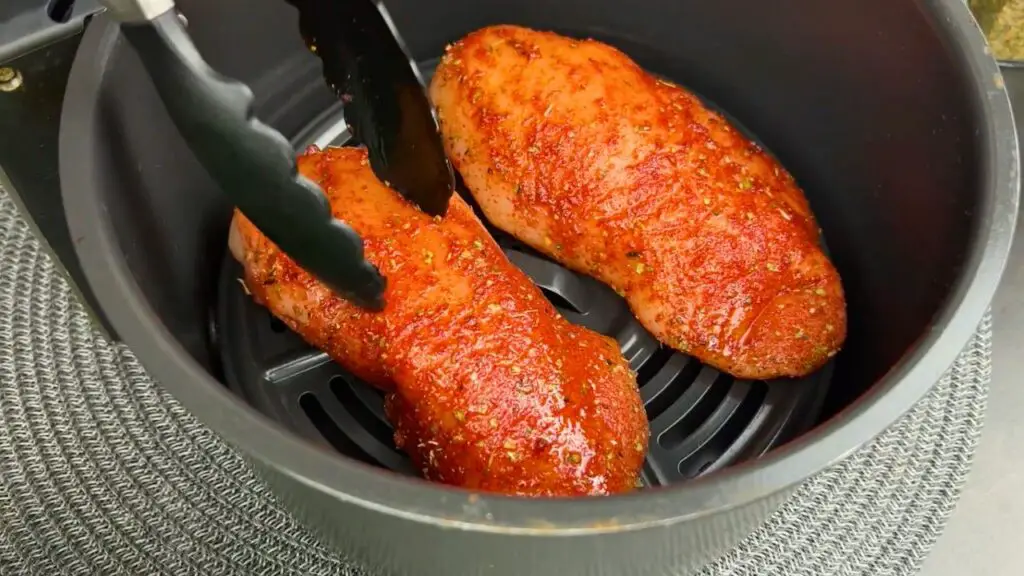
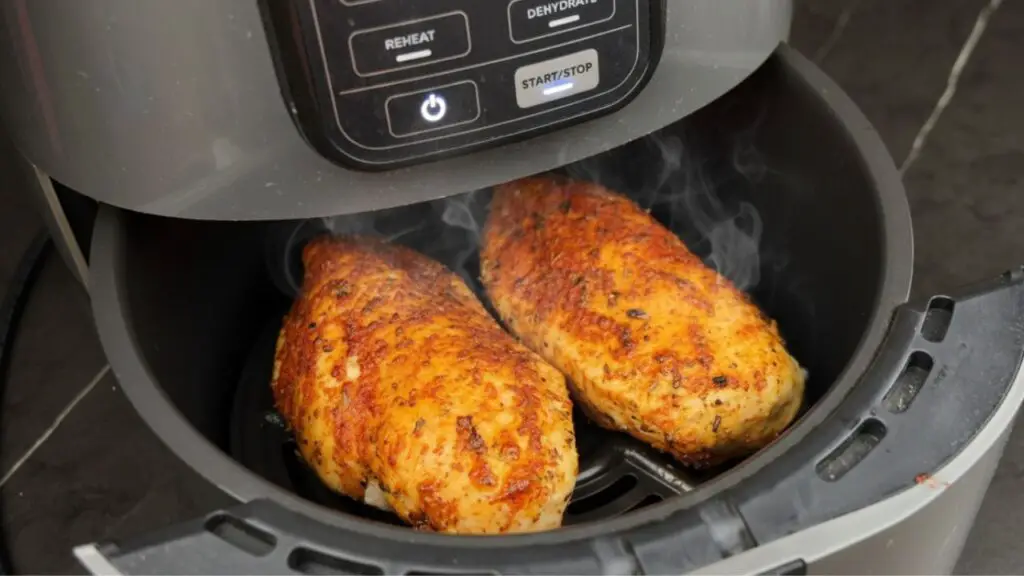
Step 5: Preheat your air fryer for a few minutes, then place the chicken breasts in the air fryer basket with a little space between them.
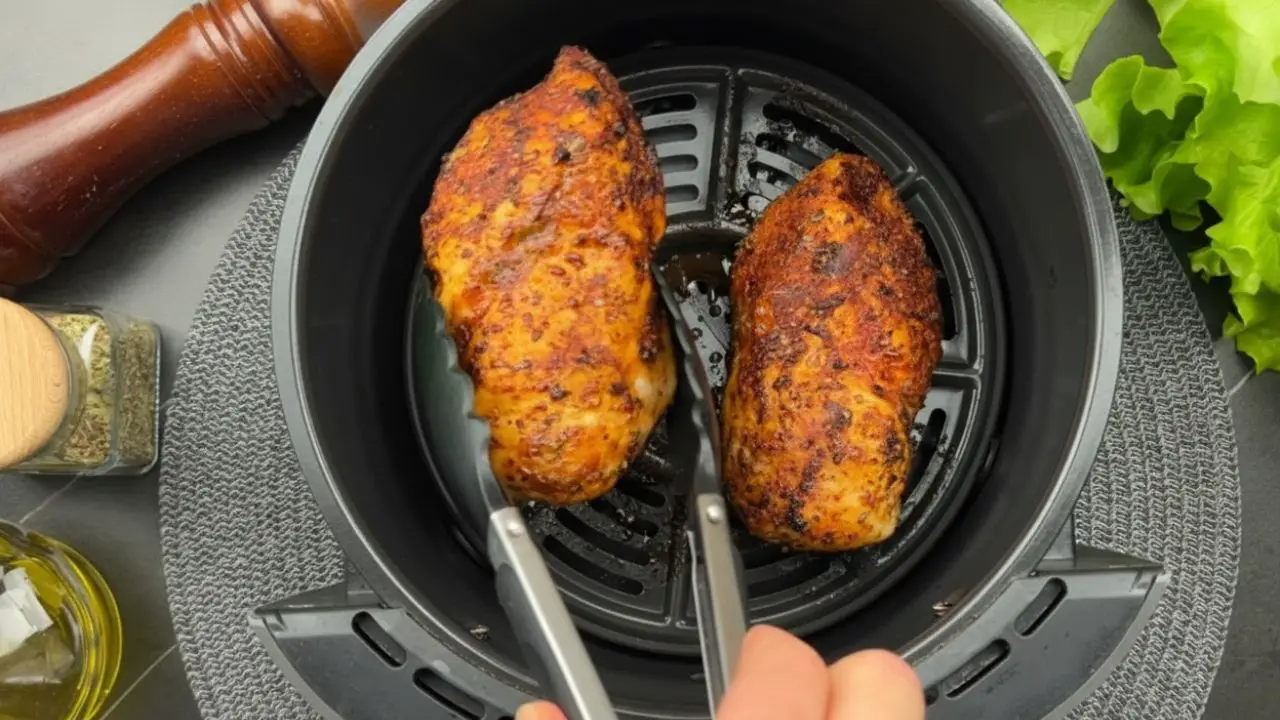
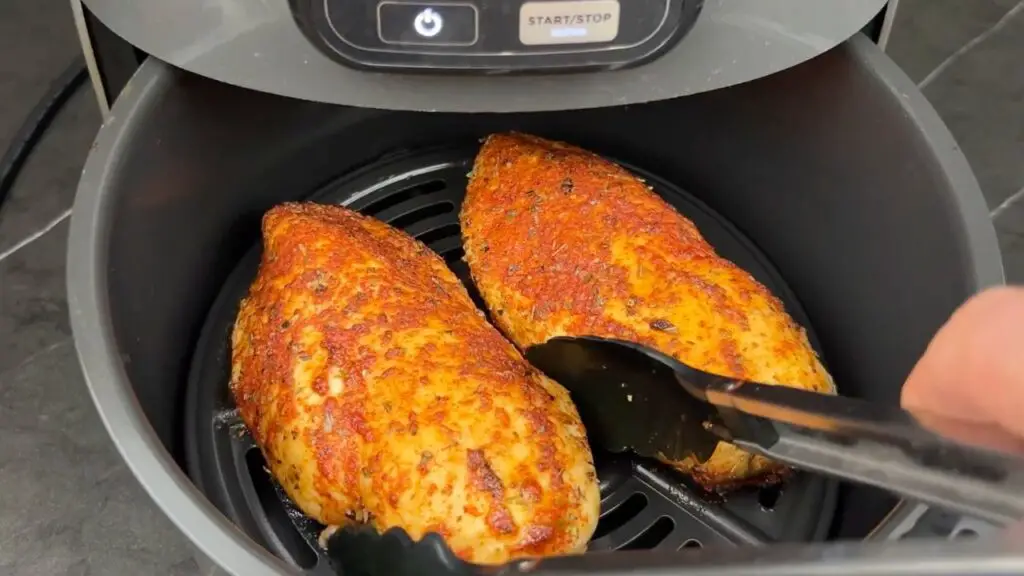
Step 6: Cook at 400°F (200°C) for about 15 minutes, flipping halfway through, until the chicken is hot all the way through and the internal temperature hits 167°F (75°C) in the thickest part.
Step 7: Let the chicken rest for 1 to 2 minutes, then slice and serve.
Note: If you’re using a large chicken breast, add another 3 to 4 minutes, and start checking early so you don’t overcook it.
Related Recipe: If you liked this air fryer chicken breast recipe, you’ll probably like my extra crispy air fryer chicken wings recipe here too.
)
Juicy Air Fryer Chicken Breast (Easy, Never Dry)
2
servings10
minutes15
minutes285
kcal25
minutesThis air fryer chicken breast is juicy, well-seasoned, and simple to make, but the little details really matter. I’ll walk you through the timing, temperature, and a few small steps that help it cook evenly, because chicken breast can dry out fast if it goes even a bit past done.
Keep the screen of your device on
Ingredients
2 pieces chicken breasts (medium size)
1/4 tsp (about 1.4 g) salt
1/4 tsp (about 0.6 g) black pepper
1 tsp (about 2.3 g) paprika
1/2 tsp (about 0.8 g) garlic powder
1/2 tsp (about 0.3 g) dried oregano
1 tsp (about 5 g) light brown sugar
1 tbsp (about 12 g) neutral oil
Directions
- Mix salt, black pepper, garlic powder, paprika, dried oregano, and light brown sugar in a small bowl for seasoning.
- Place the chicken breast on parchment paper, cover, and gently flatten with a rolling pin to ensure even thickness.
- Sprinkle seasoning mixture evenly across both sides of chicken breasts and press gently to adhere.
- Preheat the air fryer. Drizzle oil over chicken breasts and rub it in for an even coating.
- Place seasoned chicken breasts in the air fryer basket. Set the air fryer to 200°C (400°F) and cook for 15 minutes.
- Flip chicken halfway through cooking time to ensure even cooking. Check that the internal temperature reaches 75°C (167°F).
Equipment
 Ninja Air Fryer Check it out on Amazon here
Recipe Video
Notes
- Air fryer timing will vary: Different air fryers cook a little differently, so use the time as a guide and let doneness decide the finish. Check the thickest part with a thermometer and pull the chicken as soon as it hits a safe temperature, because chicken breast dries out fast if it goes past done.
- Doneness target you want: Aim for 167°F, which is 75°C in the thickest part for this recipe, and make sure the center is no longer pink. The USDA safe minimum for poultry is 165°F, which is 74°C, so you are looking for just cooked through, not pushed way past that.
- Fix dry or uneven chicken: If it turns out dry, you likely cooked it a little too long, or the thick end was much thicker than the rest, so shorten the cook time next round and even out the thickness more. If it is cooked on the outside but not through in the middle, lower the heat slightly and add time, or just keep the same temp and cook a few more minutes while checking the thickest part.
- Seasoning is flexible: Use this seasoning mixture as written, or swap in any seasoning you love, like a store-bought chicken blend, Cajun seasoning, taco seasoning, or lemon pepper. Just watch the salt level, because some blends already have a lot of salt.
- Let the chicken rest: Let the cooked chicken rest for 1 to 2 minutes before slicing. That short rest helps the juices settle, so it stays juicy when you cut it.
- Use a quick doneness check: A meat thermometer is the easiest way to avoid dry chicken, because you can pull it right when it hits temp. If you do not have one, slice into the thickest part and look for meat that is fully white with clear juices.
- Add a little moisture after slicing: If you are serving it later, slice it and spoon a little of the resting juices over the top. It keeps the slices moist, especially for salads and sandwiches.
Nutrition Facts
- Serving Size: 1g
- Total number of serves: 2
- Calories: 285kcal
- Fat: 12g
- Carbohydrates: 3g
- Protein: 41g
Like this recipe?
Check Out @FoodHow on Pinterest.
Like our Facebook Page!
Follow us on Facebook
Storage and reheating
Let the chicken cool, then store it in an airtight container in the fridge for up to 3 to 4 days.
Reheat in the air fryer at a lower temperature until warmed through, and start checking early. If you have a thermometer, warm it to a safe temperature without pushing it way past that.
Common issues and easy fixes
- The chicken is too dry; it likely cooked too long, or the breast was extra thick in one spot.
- If it’s not cooked through; it needs a few more minutes, and checking the thickest part is the fastest way to know.
- If the outside is getting too dark; your air fryer may run hot, so drop the cook time slightly and rely on the thermometer.
More recipes and comments
If you enjoyed this Ninja air fryer chicken breast recipe, then check out more chicken recipes and more air fryer recipes on my YouTube channel here… I have a bunch you’ll probably want to make next.

- Crispy Air Fryer Chicken Strips – Better Than McDonald’s! – These air fryer chicken strips are golden, crunchy, and juicy on the inside, with way less oil than fast food. Perfect for dipping, weeknight dinners, or picky eaters.
- How To Cook Ribs in Air Fryer (Easy Recipe) – Tender, flavorful ribs cooked right in the air fryer with minimal prep and big results. This method gives you juicy meat with a deliciously caramelized exterior.
- Crispy Air Fryer Pork Belly (Crispiest Crackling Ever!) – This air fryer pork belly delivers ultra-crispy crackling with juicy, melt-in-your-mouth meat. An easy way to get restaurant-style results at home.
And if you try this one, leave a comment or question about this air fryer chicken breast in the comments below, or in the YouTube video comments. I’ll do my best to reply to everyone.