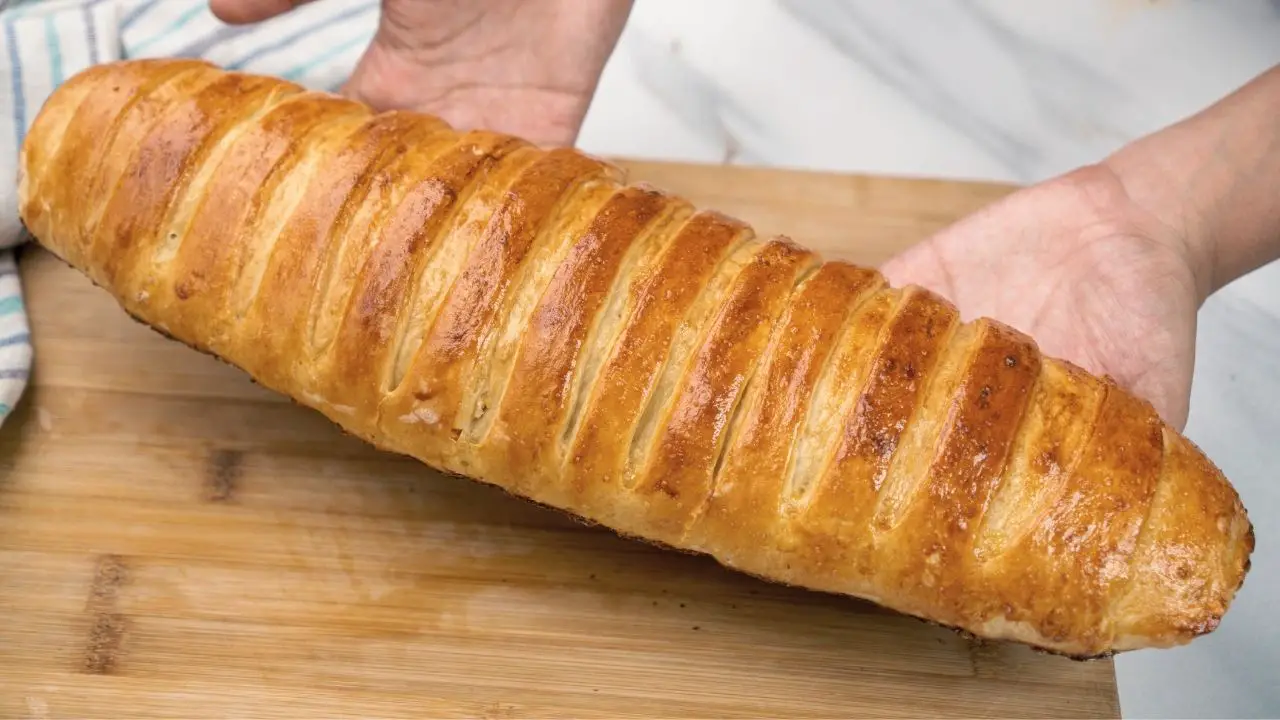
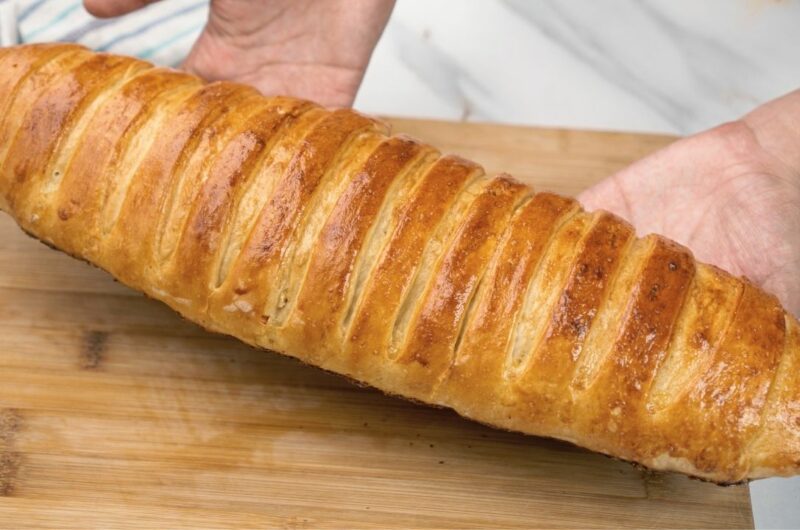
At first glance, this loaf captures attention with its unique appearance, hinting at something special even before the first bite. But don’t let its standout look fool you. The beauty of this recipe lies in its simplicity. With this simple homemade bread recipe from scratch, even a novice baker can recreate this artisanal wonder at home using basic ingredients and straightforward steps.
Come join me on Facebook here for easy recipes, cozy bakes, and little kitchen tips from my kitchen to yours.
Ready to surprise yourself and your loved ones?
Let’s get baking!
Ingredient List for This Simple Homemade Bread Recipe
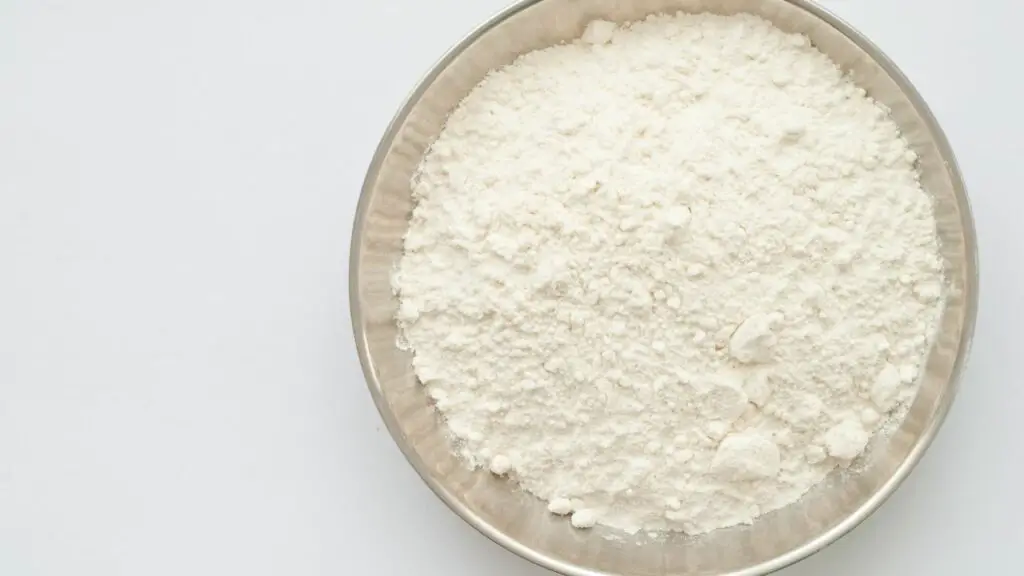
All-Purpose Flour (300g): All-purpose flour is a versatile choice for bread because it balances the texture between chewy bread and softer varieties. If you want to experiment, you can try bread flour for more chewiness or cake flour for a softer crumb.
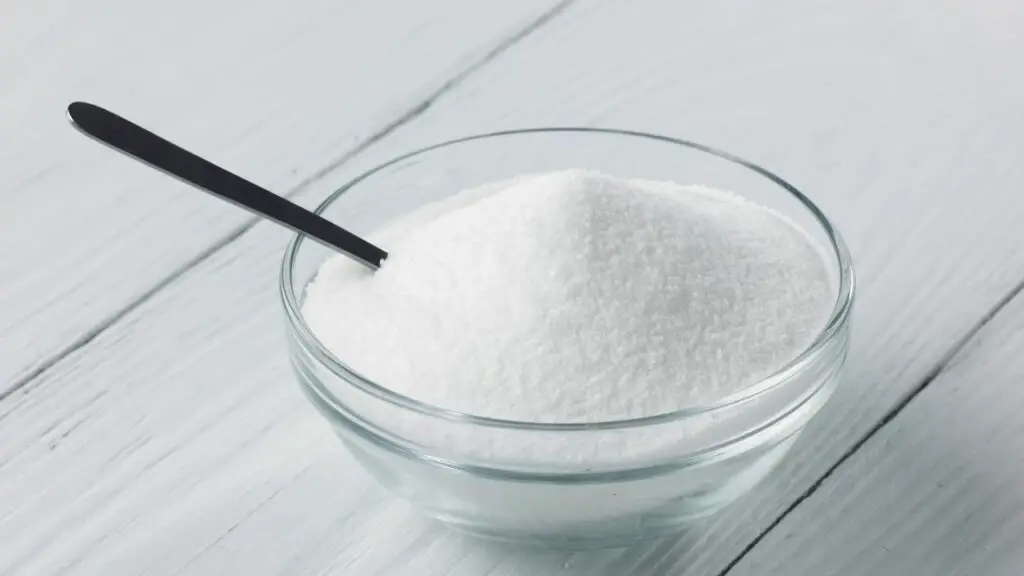
Granulated Sugar (30g): Granulated sugar has a multifaceted role—it feeds the yeast, adds a hint of sweetness, and aids in browning the bread during baking.
While honey or molasses can replace it, I prefer granulated sugar for its neutral taste and easy integration into the dough.

Salt (4g): Salt is an essential ingredient as it enhances the flavor of the bread, regulates yeast activity, and strengthens the dough structure. You can adjust the salt quantity to your taste, but I do recommend NOT leaving it out altogether.
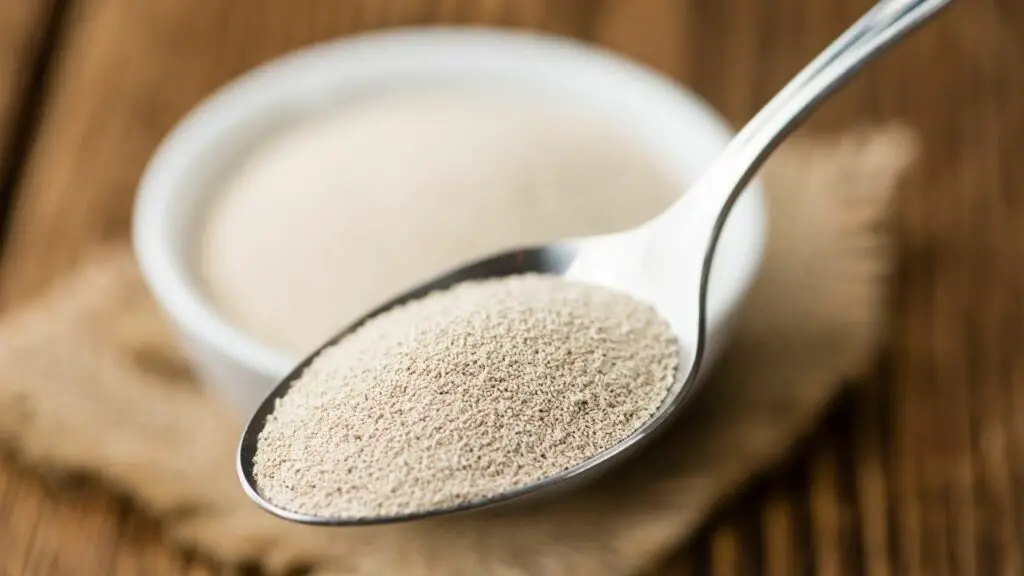
Dry Yeast (10g): Dry yeast serves as the primary leavening agent responsible for the dough’s fermentation and subsequent rise. Fresh yeast can be an alternative, but it requires different handling.
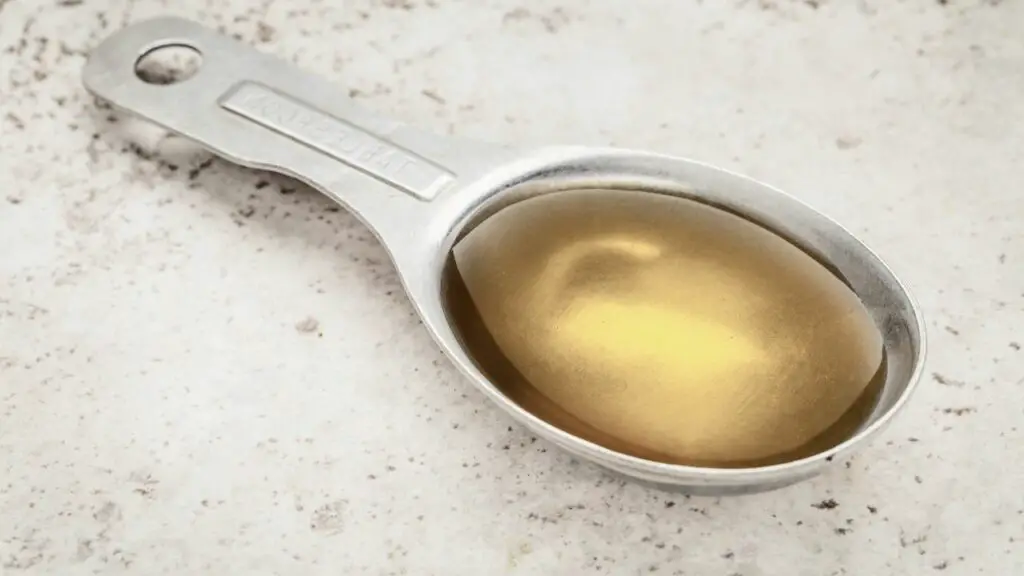
Vegetable Oil (2 tablespoons): Vegetable oil adds moisture, tenderness, and a mild flavor to the bread. While I often use butter, olive oil, or coconut oil, many opt for vegetable oil for its neutral taste, which is why I use it for this bread recipe.

Lukewarm Milk (200ml): I opt for lukewarm milk in this recipe because its temperature is crucial. It’s warm enough to activate the yeast effectively, usually around 110-115°F (43-46°C), without being too hot to harm it. This helps the dough rise properly.
Additionally, the lukewarm milk brings moisture that results in a soft, tender texture and enhances the bread’s overall flavor, adding a unique richness that water alone can’t achieve. So, I recommend sticking with lukewarm milk for the best results in this homemade bread.
Let’s Make It From Scratch – Step-by-Step Guide
Step 1: Combine All Ingredients in a Bowl
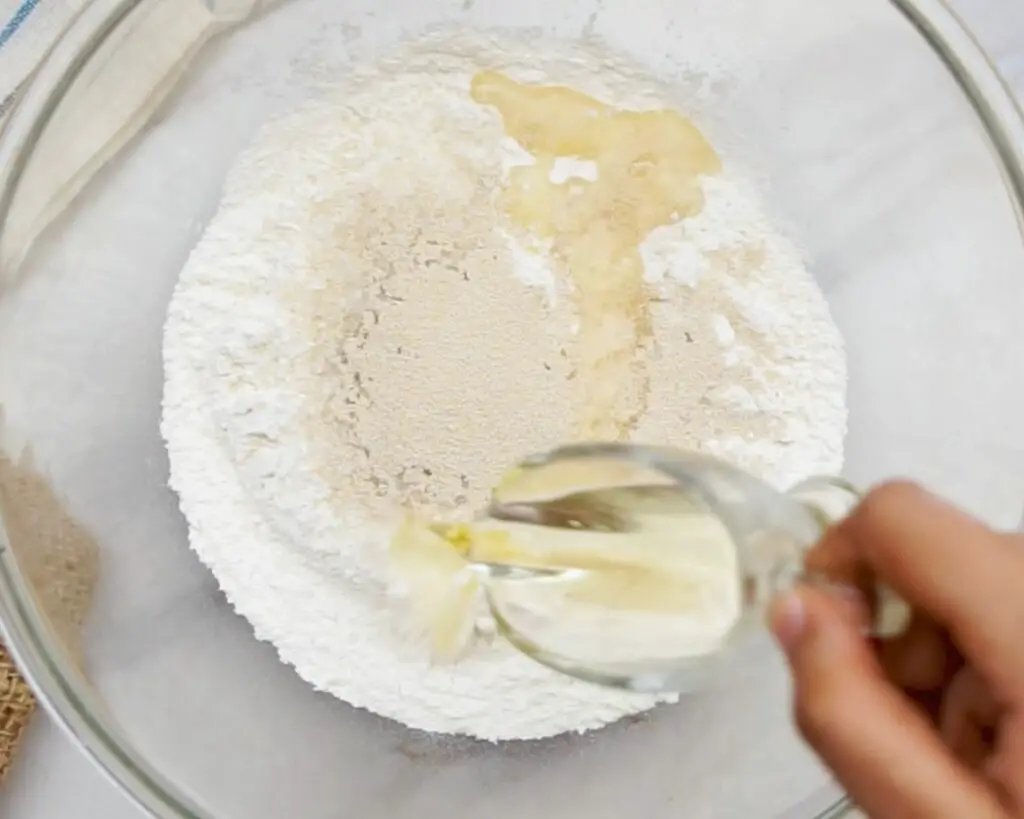
In a large mixing bowl, blend the flour, sugar, salt, dry yeast, vegetable oil, and lukewarm milk. Stir until all ingredients meld together, forming a unified dough. I like to use my hand for mixing as that seems to be the best way.
Step 2: Knead on a Floured Surface
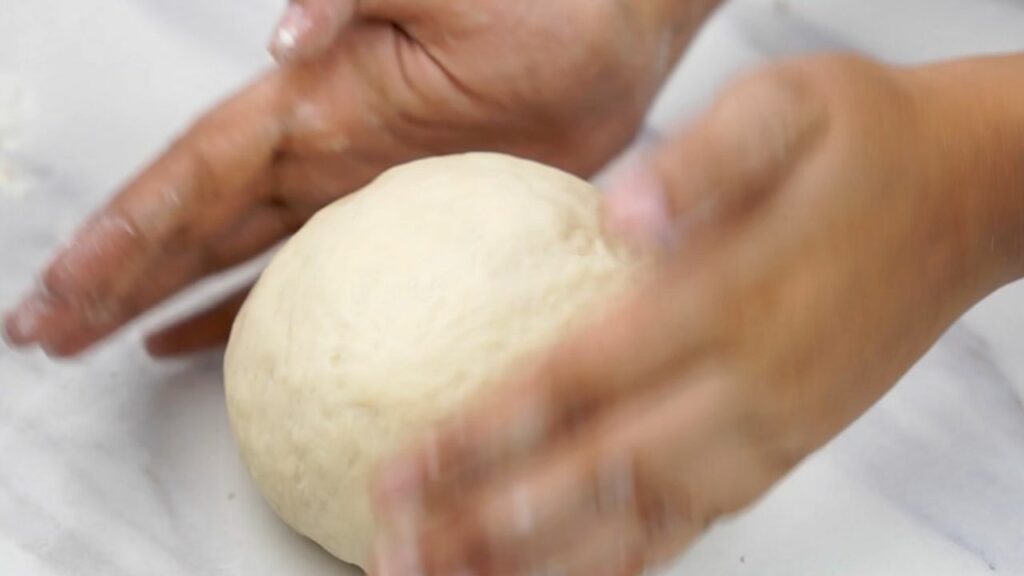
Turn the dough out onto a surface lightly dusted with flour. Knead for approximately 10 minutes, aiming for a smooth and elastic texture.
Step 3: Roll the Dough into an Oval Shape
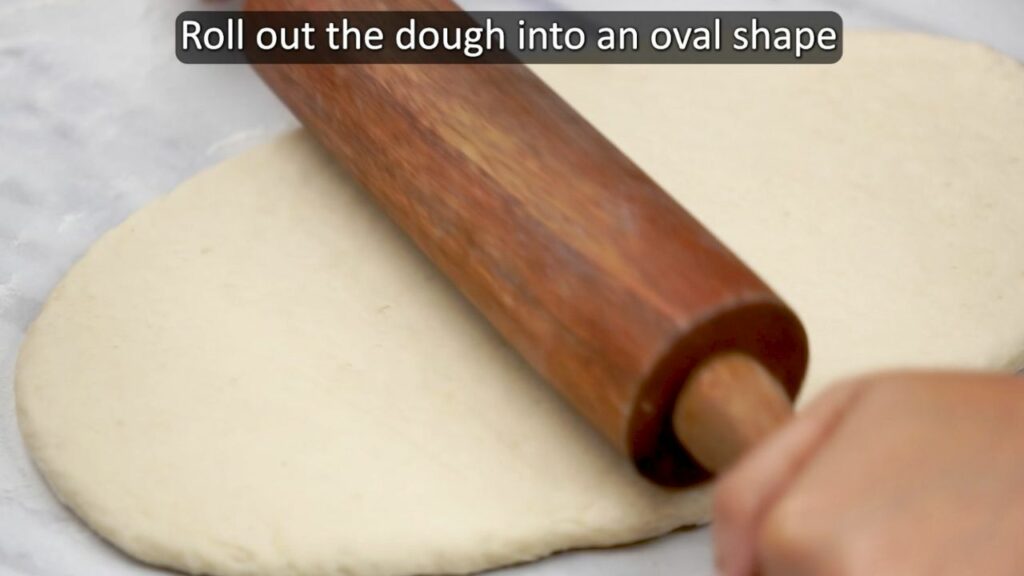
Next, shape your kneaded dough into a ball. Then, using a rolling pin, gently roll it into an oval shape.
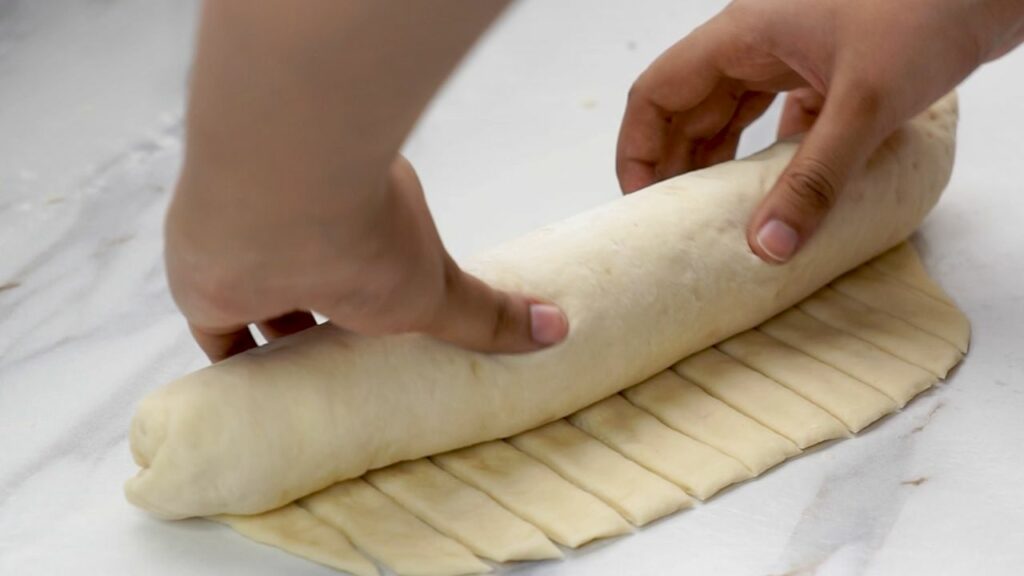
Step 4: Tightly Roll the Dough
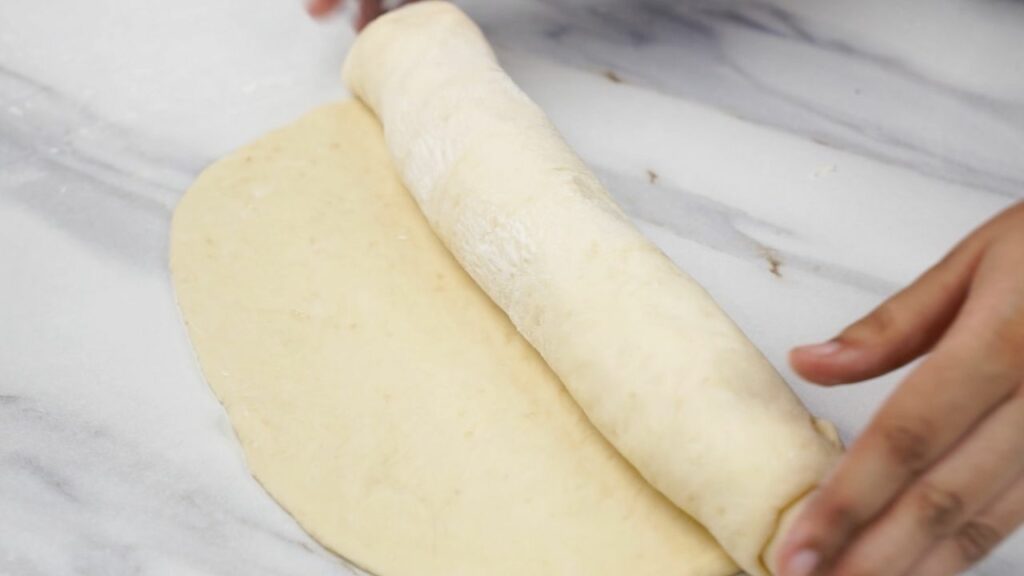
Begin rolling the dough from one end, ensuring it’s done tightly. As you progress, remember to tuck in the ends to achieve a neat appearance. You can see me doing it in the video below.
Step 5: Cut The Dough
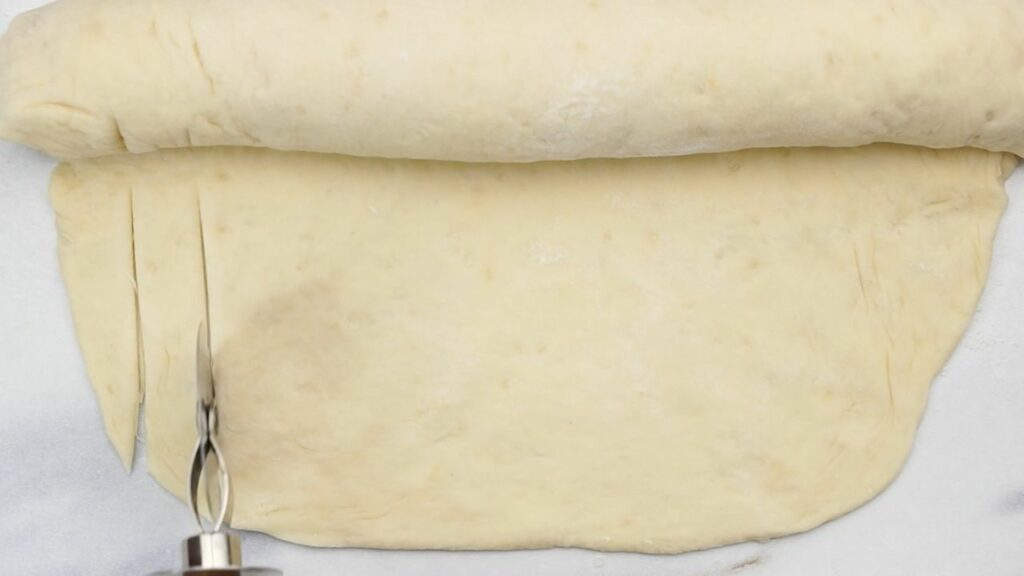
Pause when about 4 inches of the dough remains unrolled. With a dough cutter, create even ribbons from this section, ensuring they stay attached to the main roll.
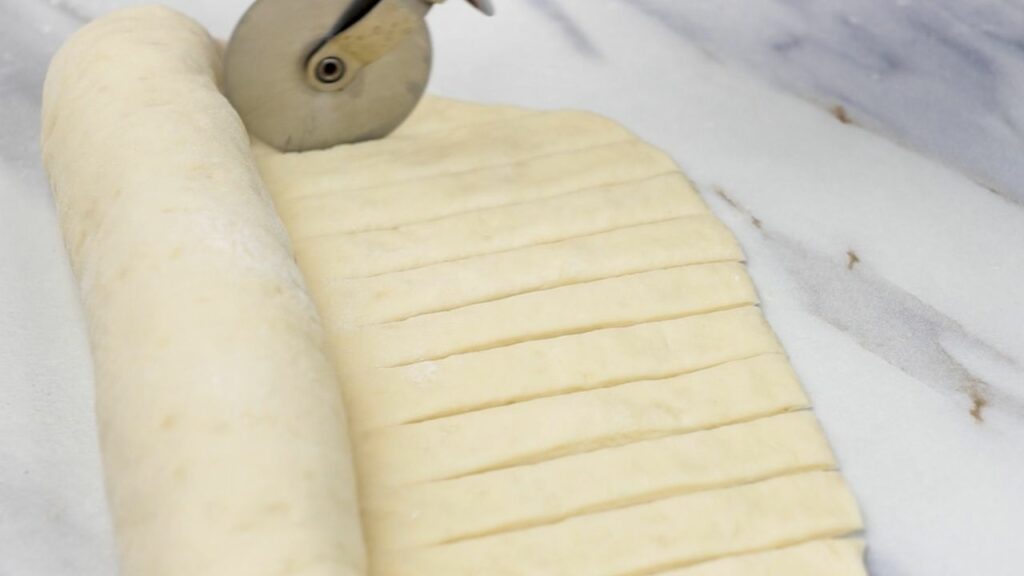
This step can be visually intricate, so do check out the video recipe below for clarity.
Step 6: Finish the Rolling Process
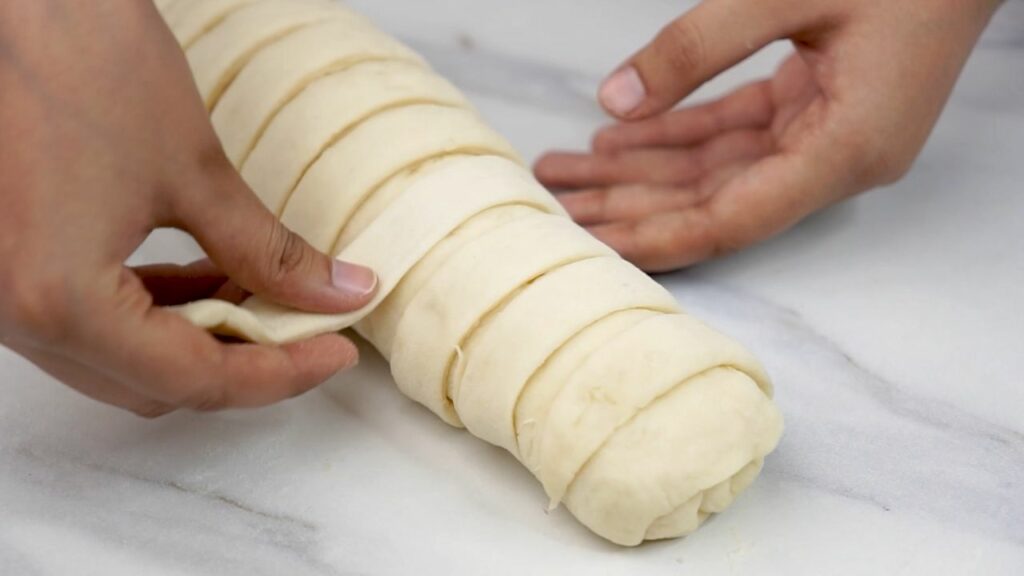
Proceed with rolling, making sure the ribbons are securely tucked in and won’t come undone during baking.
Step 7: Set the Dough for Rising
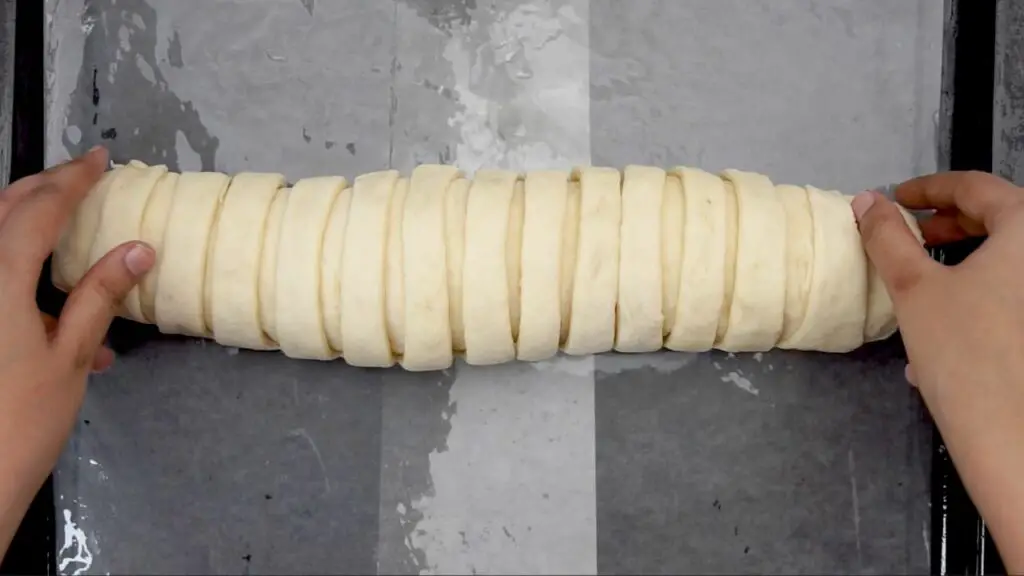
Place the rolled dough onto a parchment-paper-covered baking tray. Cover it with a clean kitchen towel and allow it to rest in a warm spot for around 30 minutes.
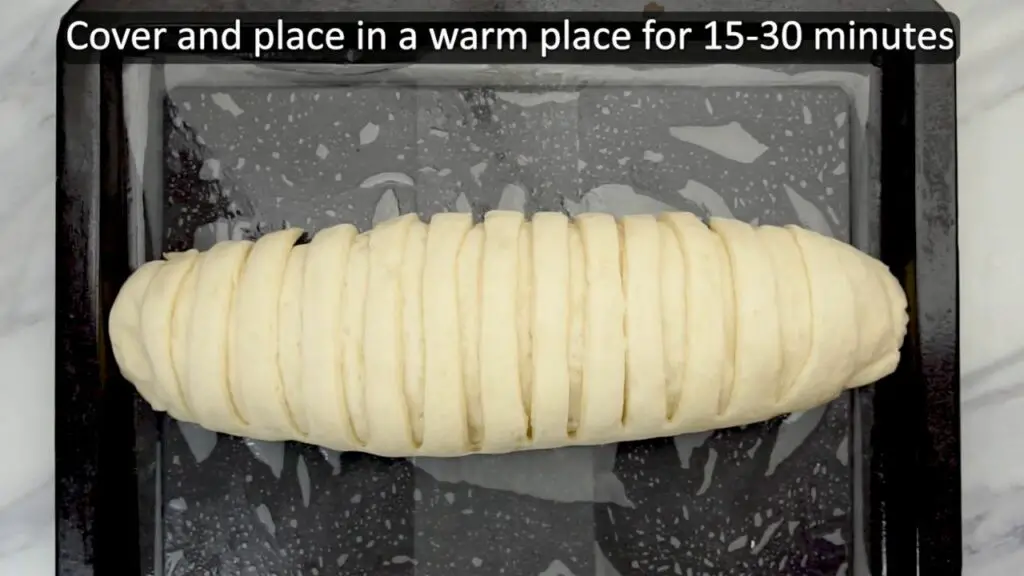
The dough should noticeably double in size during this period.
Step 8: Brush With the Egg Wash for a Golden Crust
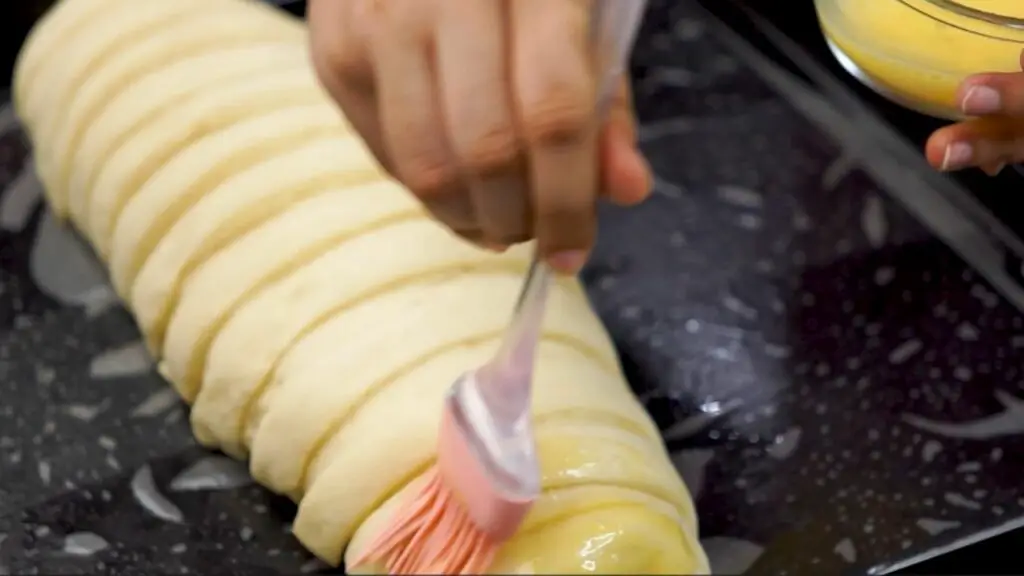
Before baking, brush the dough gently with an egg wash. This will help achieve a consistent, golden-brown crust.
Step 9: Bake until Perfectly Golden Brown
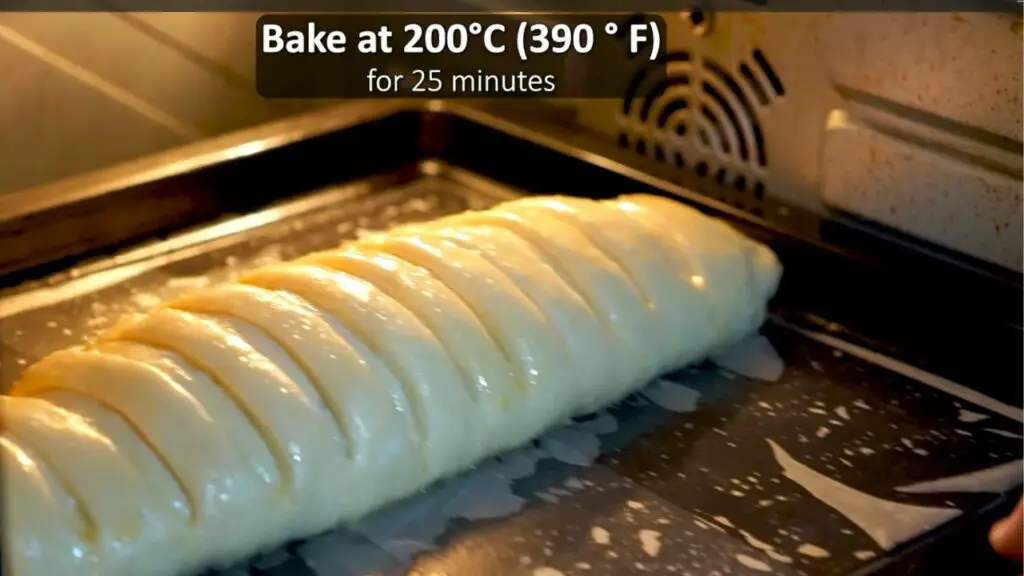
Bake the bread in a preheated oven set at 390°F (200°C) for about 25 minutes.

You’ll know the bread is done when the crust is golden brown, and your kitchen is filled with an irresistible aroma.
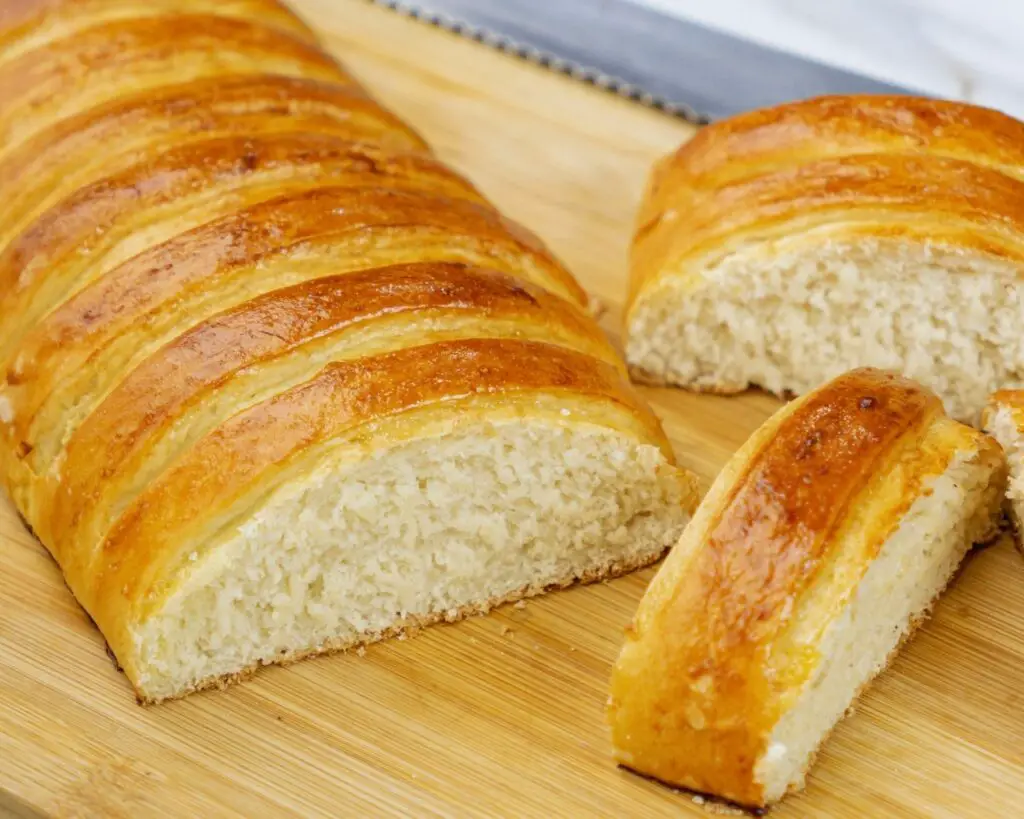
Step 10: Relish the Freshly Baked Bread
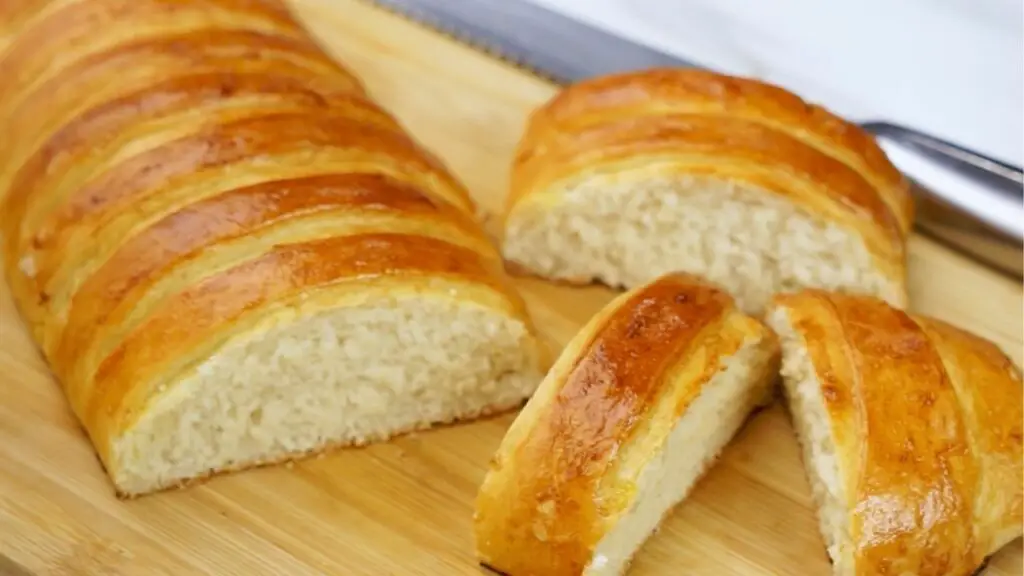
Once out of the oven, allow the bread to cool slightly, and then there’s nothing like a slice of warm bread with a generous smear of butter—it’s a classic for a reason. You can also go sweet with some jam or honey for a delightful treat.
Feeling savory? Use it to make sandwiches with your favorite fillings, or dunk it into a comforting bowl of soup.
And if you’re a cheese lover, pair it with your favorite cheese for a satisfying snack. The beauty of this homemade bread is its versatility; in my house, I can really use it for anything really.
Customization Ideas For This Bread Recipe
Elevate this simple homemade bread recipe with creative customizations that suit your taste.
Here are some delightful options to consider:
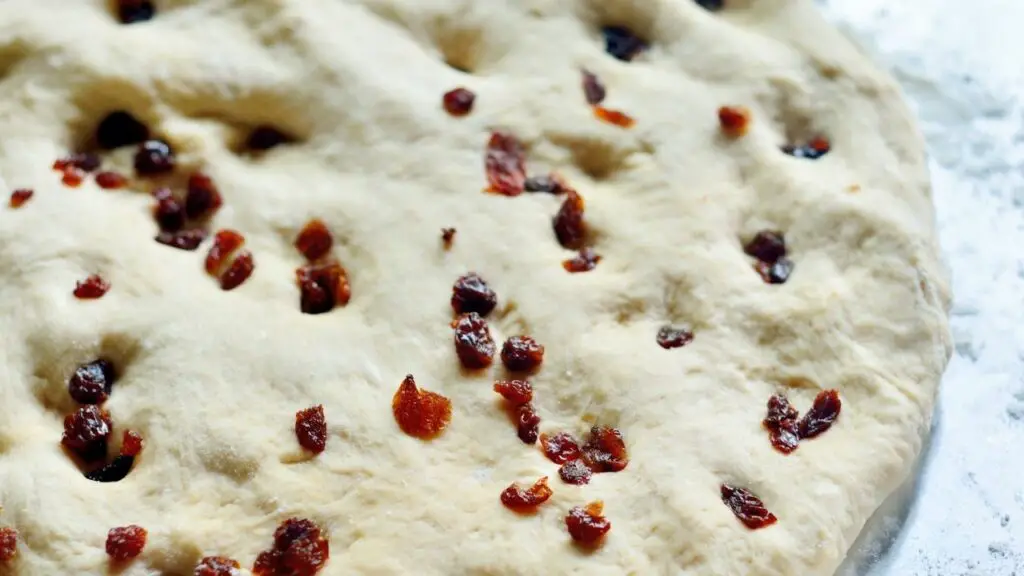
- Sweet Sensations: Incorporate dried fruits like raisins, cranberries, or apricots into your dough for a touch of natural sweetness and a chewy texture.
- Cheesy Marvel: Satisfy your cheese cravings by layering your favorite grated cheese, whether it’s cheddar, Parmesan, or Gouda, between the ribbons of dough for a savory delight.
- Spice It Up: Add a twist of flavor with spices such as cinnamon, nutmeg, or a pinch of chili flakes, infusing your bread with a unique and aromatic profile.
- Garlic and Herbed Butter: Create a delectable garlic bread variation by spreading a mixture of minced garlic and fresh herbs over the dough before rolling it, making it a perfect accompaniment for pasta or soups.
- Herb Infusion: Enhance the aroma and taste by incorporating herbs like rosemary, thyme, or oregano, either fresh or dried, finely chopped and added to the dough.
Feel free to experiment and combine these customization ideas to make your homemade bread truly unique and tailored to your palate.
Storing Your Homemade Bread for Freshness
To keep your homemade bread tasting its best, here are some simple tips. Once your bread has cooled, consider storing it in a paper bag instead of a plastic one. A paper bag allows the bread to breathe, maintaining its crust’s crispness.
If you plan to finish it within a day or two, it’s fine to leave it on the countertop but shield it from direct sunlight and heat.
Check Out Also: 2-Ingredient Flaxseed Bread Recipe (Low-Carb & Gluten-Free)!
Must-Try Easy Homemade Bread Recipes
Ready for a bread that looks fancy but is a breeze to make? Using just everyday ingredients, this easy homemade bread recipe gives you a loaf that’s soft on the inside with a unique ribboned look. It smells just like the comforting, fresh-baked bread we all love. Despite its standout appearance, it’s surprisingly easy to whip up!
10
servings1
hour25
minutes160
kcal1
hour25
minutesIngredients
300 g all-purpose flour (approximately 2 1/3 cups, though weight is more accurate for bread baking)
30 g granulated sugar (2 tablespoons)
4 g salt (2/3 teaspoon)
10 g dry yeast (2 1/4 teaspoons
2 tablespoons vegetable oil
200 ml lukewarm milk (just a smidge under 1 cup)
One egg for egg wash (for brushing the loaf)
Directions
- In a large mixing bowl, combine the flour, sugar, salt, dry yeast, vegetable oil, and lukewarm milk. Stir until the mixture is well combined and forms a dough.
- Move the dough to a floured work surface. Knead it for roughly 10 minutes, or until it feels smooth and elastic.
- Shape your dough into a ball. Then, with a rolling pin, flatten it into an oval shape.
- Roll the dough up tight, folding in the ends as you go. Stop once you have about 4 inches of dough left unrolled.
- With a dough cutter, section the remaining unrolled dough into even strips, as I will show you in the video below.
- Finish the roll, making sure to securely tuck in the strips. Check the video below.
- Set the loaf on a baking tray lined with parchment paper. Cover the loaf with a kitchen towel and let it rise for around 30 minutes, or until its size has roughly doubled.
- Heat your oven to 390°F (200°C).
- Give the loaf a generous brushing with your egg wash.
- Bake it it in the oven for 25 minutes, or until the top turns a lovely shade of golden brown and your kitchen fills with a mouthwatering scent.
- Once done, take it out of the oven and allow it to cool for a bit. Your soft, fluffy, homemade bread is now ready to be devoured!
Recipe Video
Notes
- Use a Kitchen Scale: Weighing your ingredients, especially the flour, can lead to more consistent results. It ensures you’re using the right amount of each component for the best texture and flavor.
- Temperature Matters: Ensure your lukewarm milk is around 110°F (43°C). Too hot can kill the yeast, and too cold won’t activate it properly. A kitchen thermometer can be handy.
- Patience is Key: Give the dough enough time to rise. A longer rise, even up to an hour, can develop more complex flavors. Make sure it doubles in size during this step.
- Preheat for Perfection: Ensure your oven is fully preheated before placing the bread inside. This helps achieve an even rise and a beautifully golden crust.
- Experiment with Flavors: Don’t hesitate to experiment with different herbs, spices, or even grated cheese to infuse unique flavors into your bread.
- Slice with a Serrated Knife: For clean, tear-free slices, use a serrated knife. This is especially useful if you’ve added nuts, seeds, or dried fruits to your bread.
- Enjoy Fresh, But Toast Later: While this bread is delightful fresh from the oven, it also toasts beautifully. You can enjoy it warm and soft one day, and crispy and toasted the next.
In Conclusion
With this simple homemade bread recipe from scratch, you’re all set to create the best, soft, aromatic, and truly delightful bread. Enjoy the process, get creative with customizations, and savor your bread with your favorite accompaniments. Whether you’re an experienced baker or just starting out, this recipe is your gateway to a warm, golden-brown slice of homemade perfection.
So, let’s get baking.
If you have any questions about this simple homemade bread recipe or if you’d like to share your own tips and experiences, please don’t hesitate to leave a comment below the video on YouTube. I love hearing from fellow bakers, and your feedback can be incredibly helpful to others too.