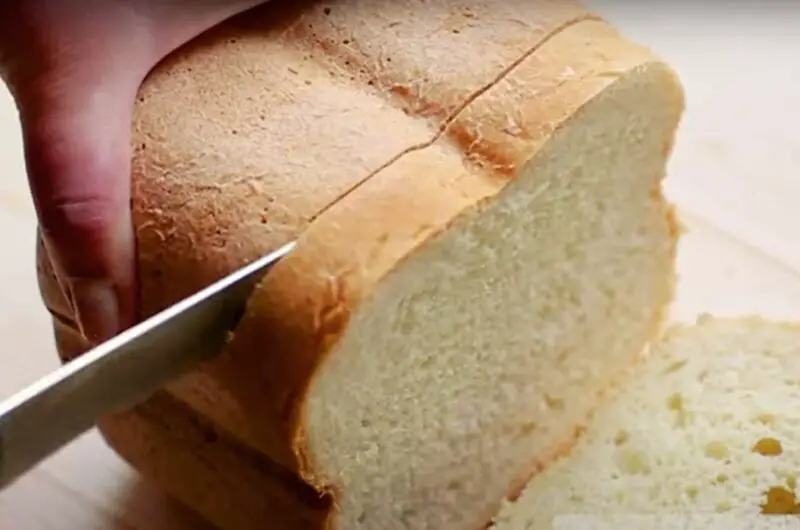
If you’re searching for a super easy bread machine white bread recipe, you’ve landed on the right page. Whether you’re a newcomer to baking bread in a breadmaker or just looking for a simple way to bake, this basic white bread recipe for a bread machine is light, soft, and fluffy, great for toast or sandwiches.
Come join me on Facebook here for easy recipes, cozy bakes, and little kitchen tips from my kitchen to yours.
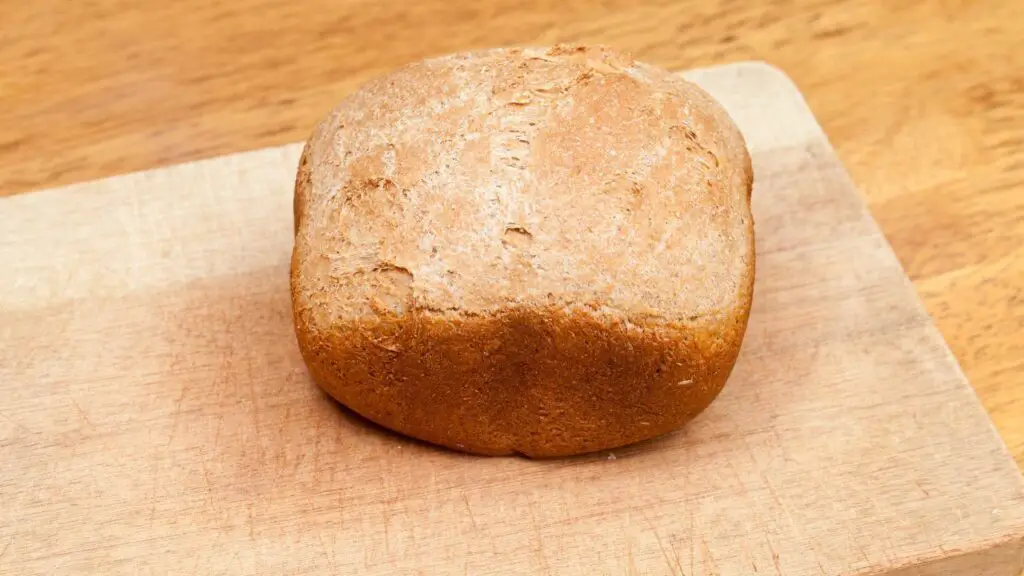
This recipe should produce approximately a 1 lb loaf. Let’s get baking!
Ingredients You’ll Need for this Simple Bread Machine Recipe
Essentials
- Water: 280 ml (1.18 cups or one cup and three tablespoons), lukewarm
- Salt: 1 teaspoon
- Sugar: 1 tablespoon (white or brown)
- Olive oil: 2 tablespoons
- Bread machine yeast or instant yeast: 10 grams (3 tsp)
- All-purpose flour or bread flour: 450 grams (3 5/8 cups)
Tools Required
- Any Bread machine
- Measuring cups and spoons
- Optional: Kitchen scale for precise measurement
White Bread Recipe for a Bread Machine – Instructions
1. Preparing the Bread Machine
Before adding any ingredients, ensure that the bread machine’s baking tin is clean. If it’s not non-stick, consider lightly greasing it with some oil or butter.
Note: The order in which ingredients should be added can vary depending on your bread machine model. Be sure to consult your machine’s user manual for the recommended sequence to achieve the best results.
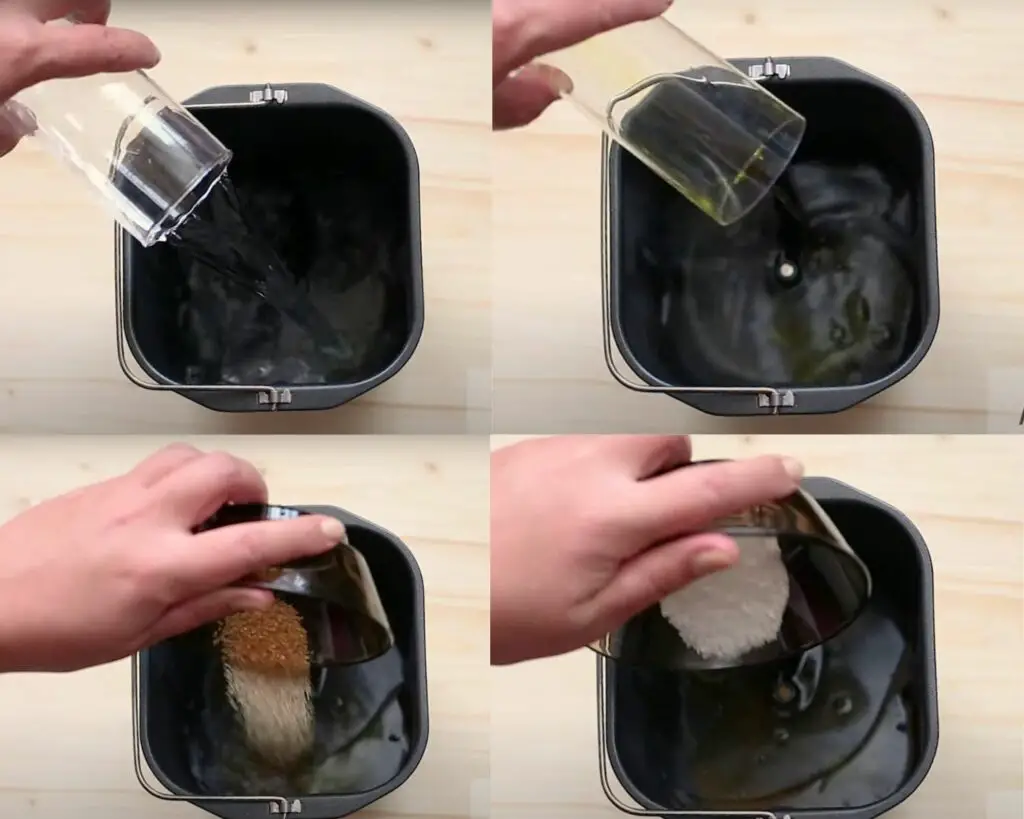
2. Adding the Water
Pour 280 ml (one cup and three tablespoons) of lukewarm water into the baking tin (make sure it’s not hot!). It’s important that the water is not hot; hot water can kill the yeast, affecting the rise of your bread.
Note: For the best yeast activation, I recommend using lukewarm water that’s around 110°F (45°C). This temperature is just right for getting your yeast going without the risk of killing it.
3. Incorporating Olive Oil
Add 2 tablespoons of olive oil to the water in the baking tin. Olive oil provides moisture and flavor to your bread.
4. Adding Sugar
Next, sprinkle 1 tablespoon of sugar over the water and oil mixture. Sugar not only sweetens the bread slightly but also helps to feed the yeast, ensuring a good rise.
5. Putting in Salt
Add 1 teaspoon of salt to the mixture. Just sprinkle it around, as you’ll be adding the yeast after this step. Dry to keeping the salt away from direct contact with the yeast at this point helps to make sure your bread rises the way it should.
6. Time for Yeast
Now it’s time for the yeast. Add 3 teaspoons of either bread machine yeast or instant yeast to the mixture.

Note: I prefer instant yeast over bread machine yeast mainly for its versatility. It’s the reason I always have a jar of it in my kitchen. You can use it in a variety of yeast-based recipes, not just bread machine recipes. Plus, it dissolves quickly and doesn’t require proofing, which is a real time-saver. Both types of yeast are generally interchangeable in equal amounts.
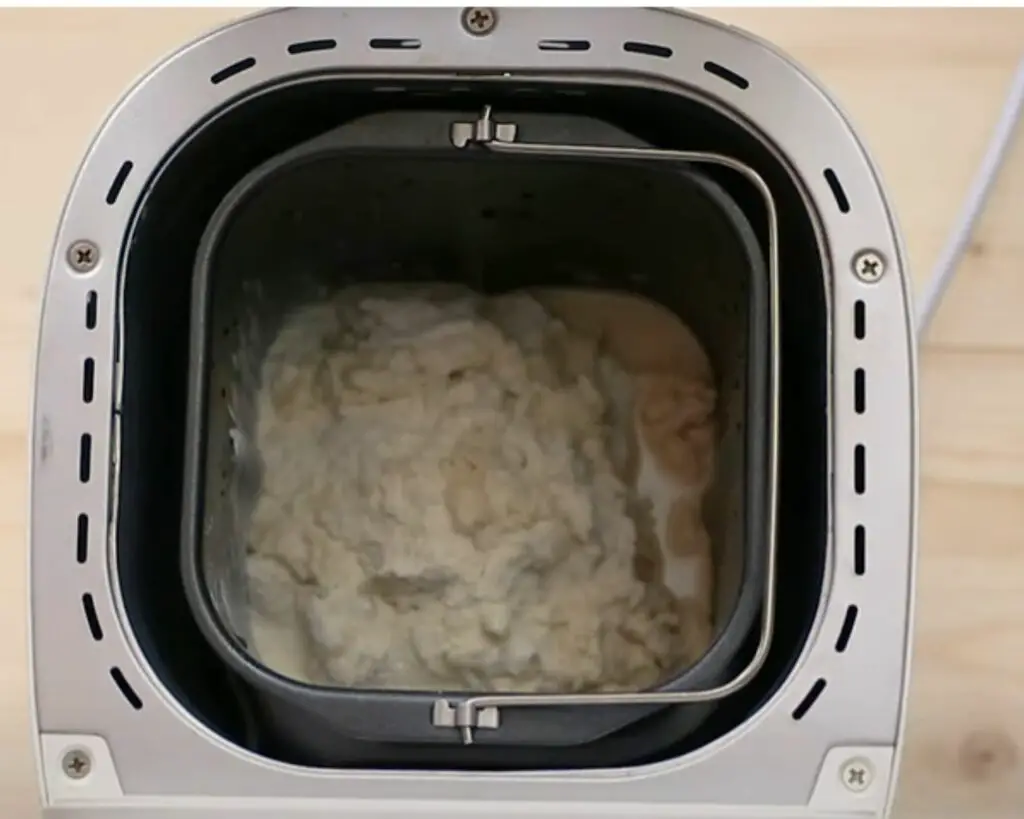
7. Adding Flour
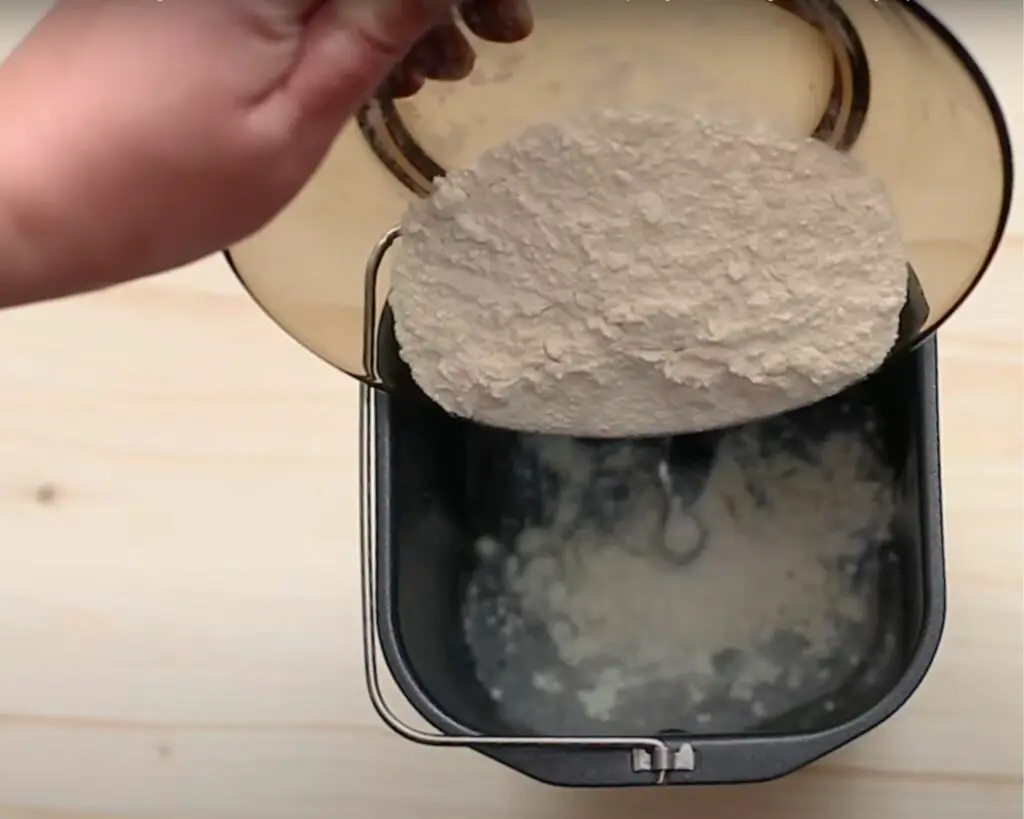
The final ingredient is the flour. Add 450 grams (3 5/8 cups) of either all-purpose or bread flour to your bread machine tin, covering the liquid and other ingredients.
Top Tip: Check the dough. During the kneading cycle, open the lid to touch and feel the dough. It should be slightly tacky but not overly sticky. If it’s too dry or wet, adjust by adding a tablespoon of water or flour.
8. Setting Up the Bread Machine
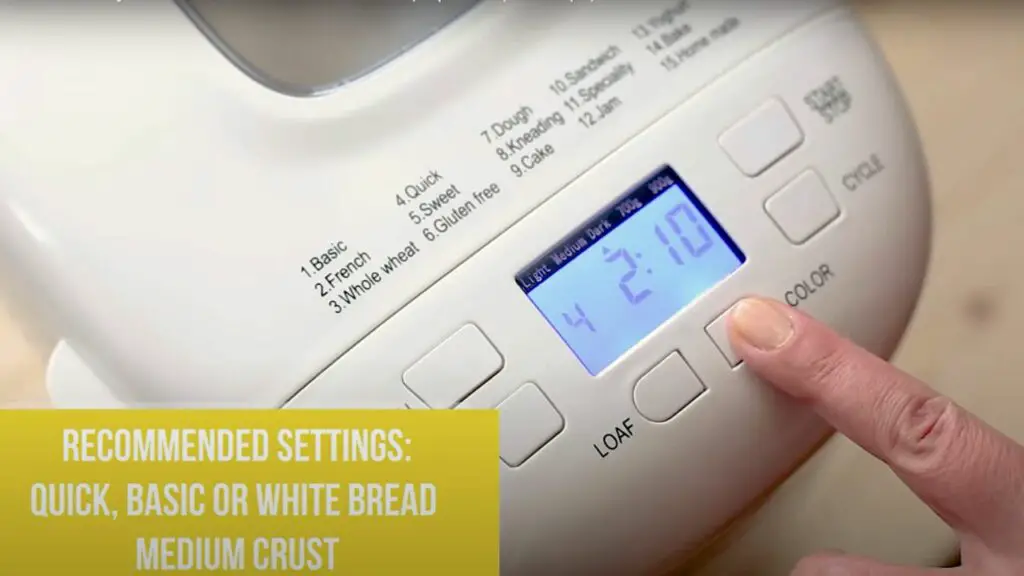
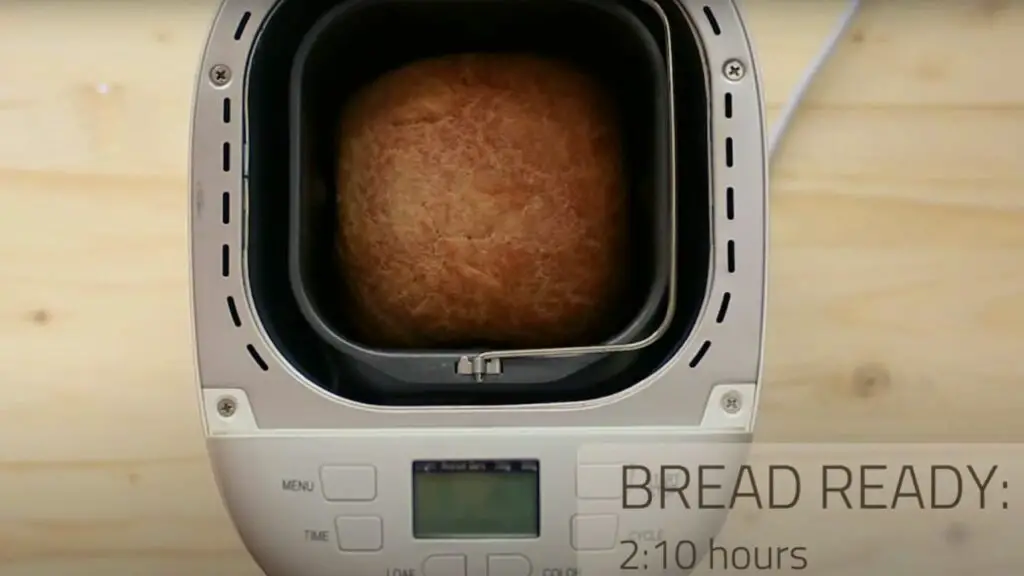
Place the baking tin into the bread machine, making sure it’s securely in place. Choose the appropriate settings for white bread, usually labeled as “Quick,” “Basic,” or “White Bread,” and then start the machine.
However, if your bread machine’s quick bake setting is less than 2 hours, then use Basic or White Bread Cycle and let it do its thing.
Top Tip: Try crust settings. Most bread machines have crust settings. Experiment with them to find your ideal crust thickness and texture.
9. Waiting and Cooling
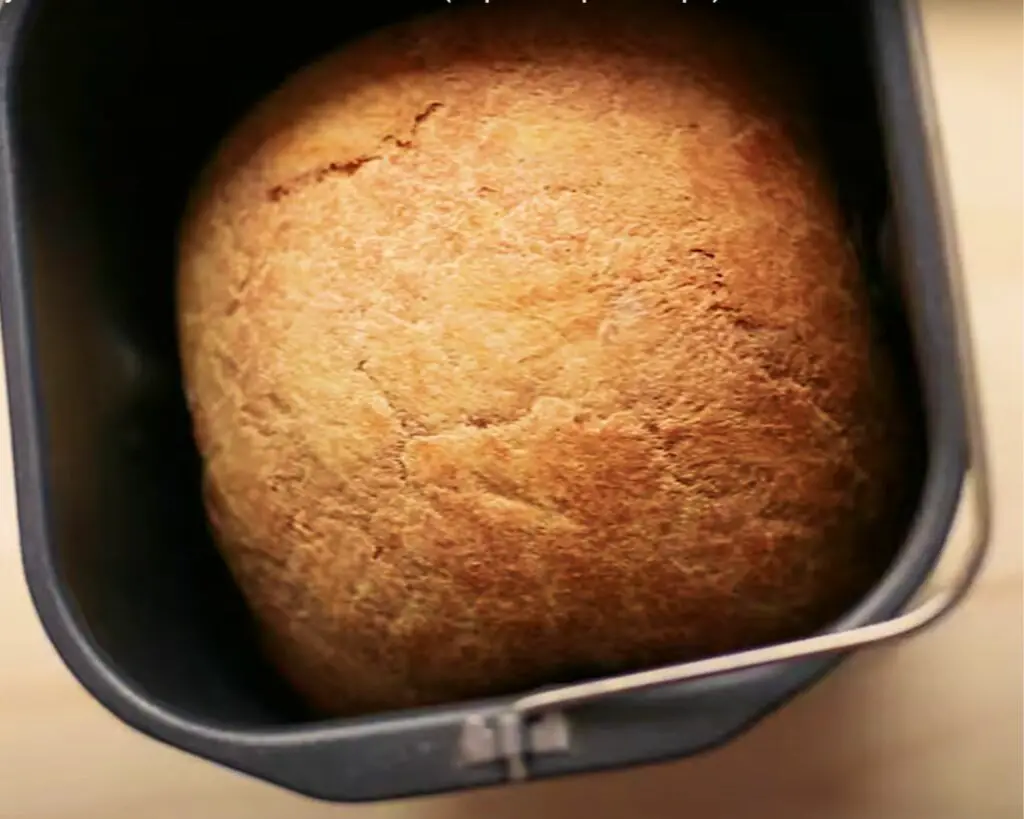
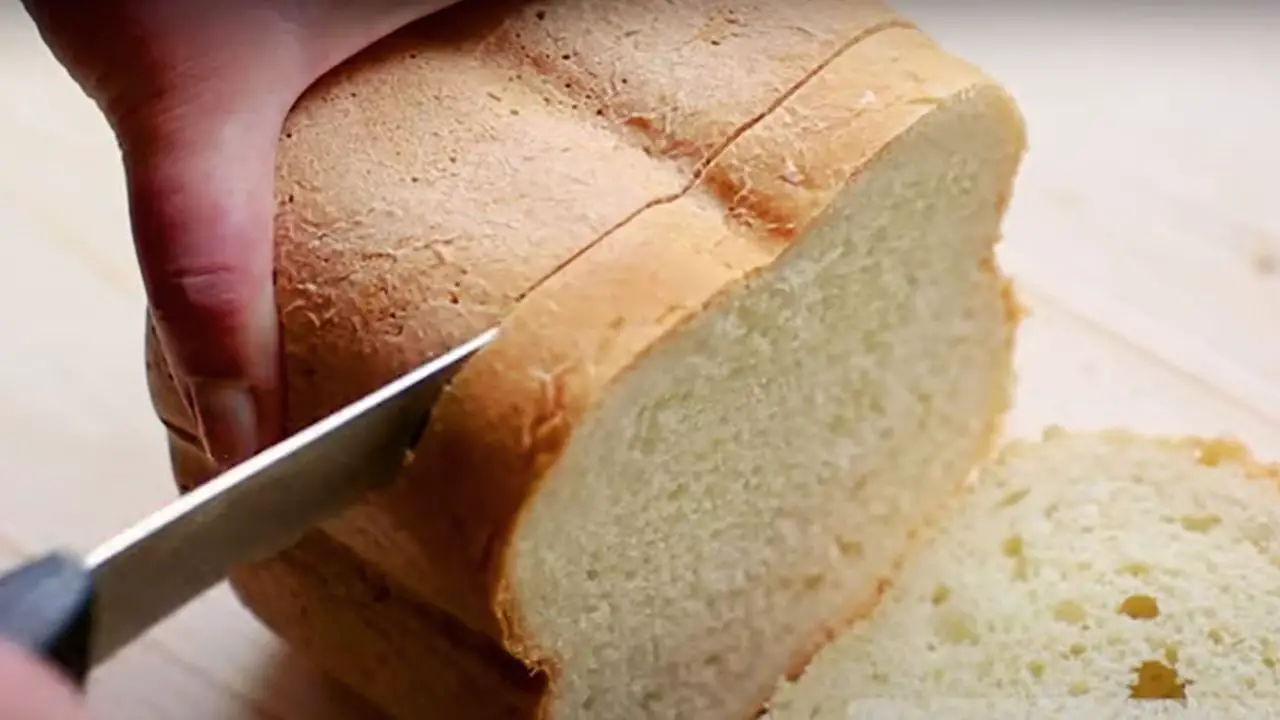
Once the bread machine cycle is complete, carefully remove the baking tin and let the loaf cool on a wire rack for at least 30 minutes. This makes slicing easier and improves the bread’s texture.
However, I often find it hard to wait that long—I love how butter melts so deliciously on warm bread! So, if you’re like me and can’t resist, go ahead and enjoy a slice a bit earlier.
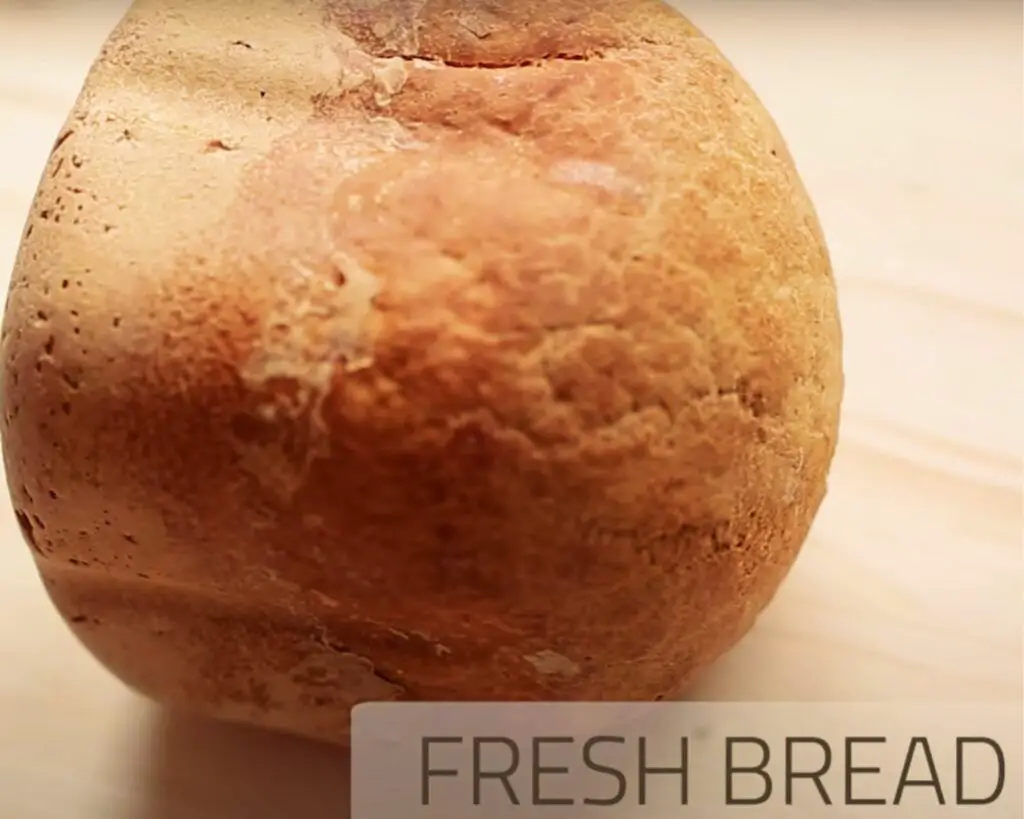
And there you have it—an easy, fuss-free recipe making your own simple white bread recipe for a bread machine. Whether you’re a beginner or a seasoned baker looking for convenience, this easy bread machine recipe is a great go-to.
Check Out Also: Simple Honey Oat Bread Machine Recipe (Moist And Fluffy).
Simple White Bread Recipe for a Bread Machine
Just got your hands on a new bread machine, and not sure where to start? Look no further! This basic white bread recipe for a bread machine is not only beginner-friendly but also churns out a loaf that’s incredibly fluffy. It’s the ideal recipe to help you make the most of your new kitchen gadget. This recipe should produce approximately a 1 lb loaf.
8
servings5
minutes2
hours10
minutes95
kcal2
hours15
minutesIngredients
Water: 280 ml (1.18 cups)
Salt: 1 teaspoon
Sugar: 1 tablespoon (white or brown)
Olive oil: 2 tablespoon
Bread machine yeast/instant yeast: 10 grams (3 teaspoons)
All-purpose flour or bread flour: 450 grams (3 5/8 cups)
Directions
- Add Water: Pour 280 ml of lukewarm water into the baking tin of your bread machine. Make sure the water is not hot, as it can kill the yeast.
- Add Olive Oil: Add 2 tablespoons of olive oil to the water.
- Add Sugar: Add 1 tablespoon of sugar into the mix. You can use either white or brown sugar.
- Add Salt: Add 1 teaspoon of salt to the tin
- Add Yeast: Sprinkle 3 teaspoons (or 10 grams) of bread machine yeast or instant yeast over the wet ingredients.
- Add Flour: Finally, add 450 grams of all-purpose or bread flour on top of the yeast.
- Select Setting: Insert the baking tin into your bread machine and select the “Quick Bake” setting. If your bread machine’s quick bake setting is less than 2 hours, opt for the “Basic” or “White Bread Cycle” instead.
- Start Baking: Close the lid and start the bread machine. Let it run through its cycle, which will include kneading, rising, and baking.
- Check the Bread: When the cycle is done, carefully remove the baking tin and tip it over to release your freshly baked bread.
- Serve: Allow the bread to cool a bit on a wire rack before slicing.
Notes
- Water Temperature is Key: Ensure the water you use is lukewarm, as hot water can be detrimental to the yeast, and cold water may not effectively activate it. The ideal water temperature is about 110°F (45°C).
- Use Fresh Yeast: Check the expiration date on your yeast package. Using fresh yeast can make a world of difference in the outcome of your bread.
- Sequence Matters: Always add the ingredients in the order recommended by your bread machine’s manufacturer.
- Watch the First Knead: Take a peek during the initial kneading cycle. If the dough looks too dry or too wet, you can adjust by adding a tablespoon of water or flour as needed.
- Use Bread Flour for a Chewier Crust: If you like your bread with a bit more chew to the crust, consider using bread flour instead of all-purpose flour.
- More Bread Machine Tips For Beginners To Get You Started.
Troubleshooting: Solving Common Bread Machine Issues
Bread-making can be both an art and a science, and while using a bread machine takes a lot of the guesswork out, things don’t always go as planned. Here are some common issues you might encounter and how to resolve them:
Bread is Too Dense
- Possible Reasons: Not enough yeast, old yeast, or the wrong type of flour.
- Solution: Make sure your yeast is fresh and that you’re using the correct amount. Also, check to ensure you’re using the appropriate type of flour for your recipe.
Bread is Too Crumbly
- Possible Reasons: Too much flour, not enough water, or overmixing.
- Solution: Double-check your measurements and try adding a bit more liquid next time. Avoid overmixing, as this can also make your bread crumbly.
Bread Didn’t Rise
- Possible Reasons: Yeast is old, the water temperature was too hot or too cold, or possibly the salt came into direct contact with the yeast.
- Solution: Always proof your yeast if you’re unsure about its freshness. Use lukewarm water to activate the yeast and avoid letting salt come into direct contact with it.
Bread is Doughy in the Middle
- Possible Reasons: Not enough baking time, or the loaf is too large for your machine.
- Solution: Extend the baking time if your machine allows it. If the loaf size is the issue, reduce the amount of each ingredient proportionally.
Bread Has a Thick, Hard Crust
- Possible Reasons: Over-baking or using a setting that produces a thicker crust.
- Solution: Use a lighter crust setting if your machine has one, or remove the bread a few minutes before the cycle is complete to avoid over-baking.
Check out more common bread machine baking problems and solutions here.
Remember, it may take a few tries to get your bread exactly how you like it, and that’s perfectly okay! The more you bake, the more you’ll get to know both your bread machine and your own taste preferences.
Storing Bread Machine White Bread
To keep your homemade bread fresh, store it at room temperature in a bread box or paper bag for 1-2 days. For longer storage, you can keep it in the fridge for up to a week in an airtight plastic bag, or freeze it for up to 3 months. If you opt for freezing, it’s a good idea to slice the bread beforehand for easier thawing. Reheat using an oven or toaster for the best results.
In Summary
So there you have it! This is a super easy, basic white bread recipe for a bread machine, and it doesn’t have to be intimidating or complicated. In fact, with this easy bread machine recipe, it’s pretty much a “set it and forget it” affair. Trust me, the moment you take that first bite of warm, fluffy freshly-baked bread, you’ll know it was all worth it.
Remember, the kitchen or bread machine is your playground—don’t be afraid to experiment a bit once you’ve got the basics down.