How did I not know this?! I just discovered how to make butter at home and was amazed at how simple it really is. The butter turned out incredibly creamy with a pure, fresh taste that store-bought simply cannot match. All you need is heavy cream and a little patience.
Check out my video below where I show you how to make this butter from start to finish! If you enjoy this recipe, please like and subscribe to my YouTube channel for more easy homemade recipes every week.
What You Will Need
Before starting, gather everything you’ll need for this easy butter-making process.
Homemade Butter Ingredients List
- 500ml (2 cups) heavy cream or whipping cream
- Cold water for rinsing
- Ice cubes
- Pinch of salt (optional)
Equipment:
- Electric mixer or stand mixer
- Large mixing bowl
- Strainer
- Wooden spoon or spatula
- Parchment paper
- Paper towels
How to Make Butter From Double Cream
Making butter at home follows a simple process of whipping, separating, and washing. Here’s how to do it:
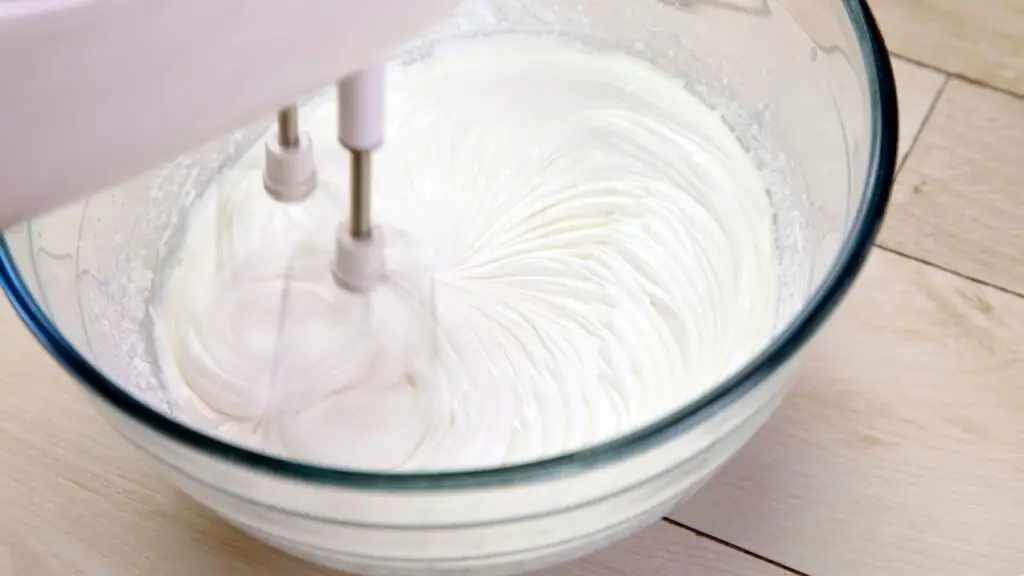
Step 1: Whip the Cream
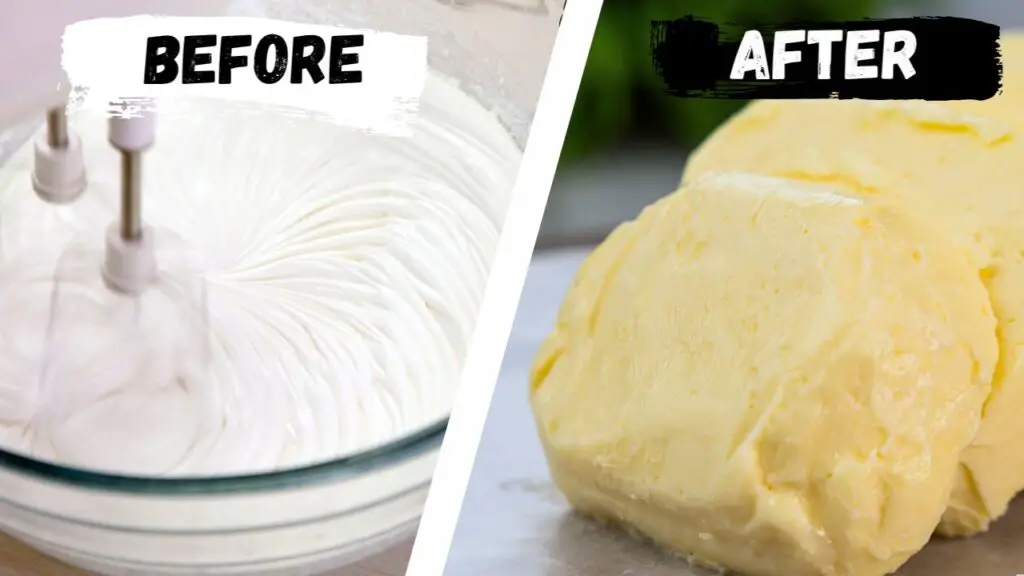
Using an electric mixer, start whipping the cream at medium speed. First, you’ll see bubbles forming on top of the cream. After about 2 minutes, the cream gets thicker and starts to hold its shape a little.
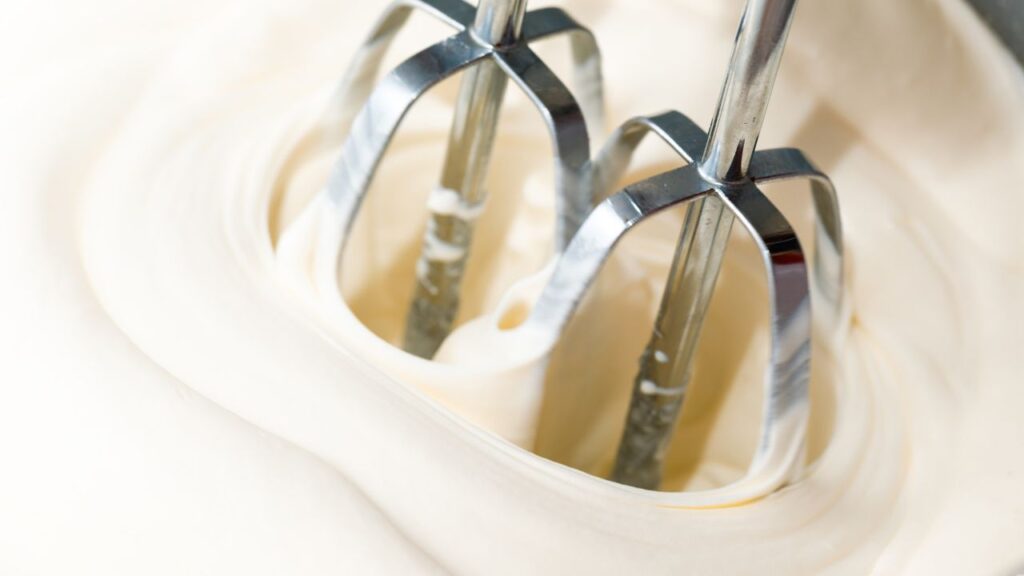
Keep whipping, and the cream turns into soft whipped cream – it makes gentle peaks when you lift the beaters. Whip a bit more, and it becomes stiff whipped cream that stands up straight, like what you’d put on top of a pie.
Don’t stop there. Keep whipping past the whipped cream stage. After about 5-7 minutes total, the cream suddenly changes – it gets grainy looking and then separates into solid yellow butter chunks and thin white liquid buttermilk.
You’ll actually hear the sound of your mixer change when this happens. Keep mixing until most of the butter clumps together in bigger pieces.
Top Tip: Cold cream from the refrigerator separates much faster than room temperature cream. I once tried making butter with cream that had been sitting out, and it took nearly twice as long.
Step 2: Drain and Rinse

Next, pour the mixture through a strainer to separate the butter from the buttermilk. The buttermilk will drain through while the butter solids stay behind. You can save this buttermilk for baking if you want.
Then rinse the butter by pouring cold water over it while it’s still in the strainer. Gently press the butter with a spatula to release more buttermilk. Repeat rinsing 2-3 times until the water runs mostly clear. This washing step helps your butter last longer.
Note: Don’t skip the rinsing steps! Any buttermilk left in your butter will make it spoil much faster and can give it a sour taste after a few days.
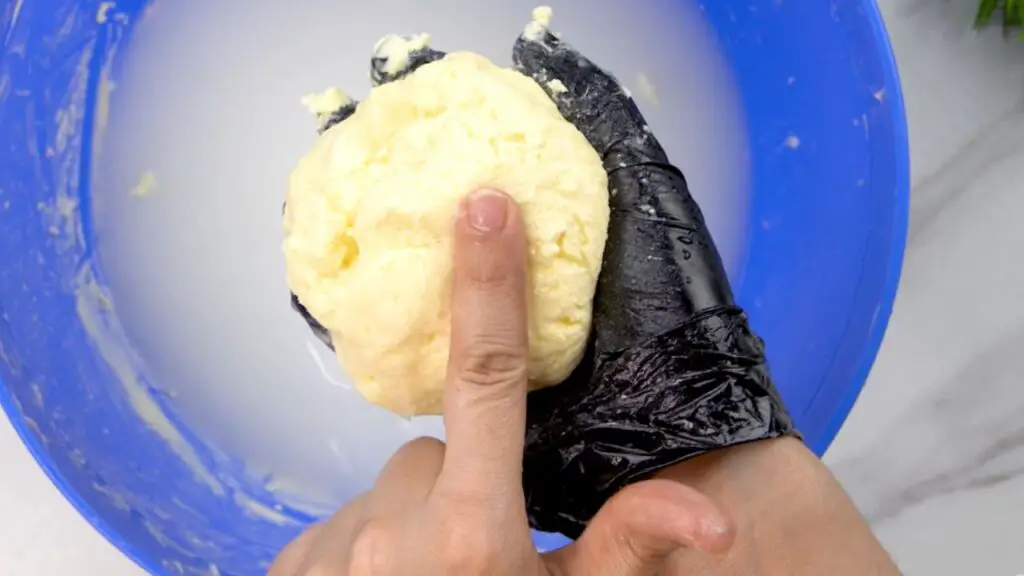
Step 3: Knead in Ice Water
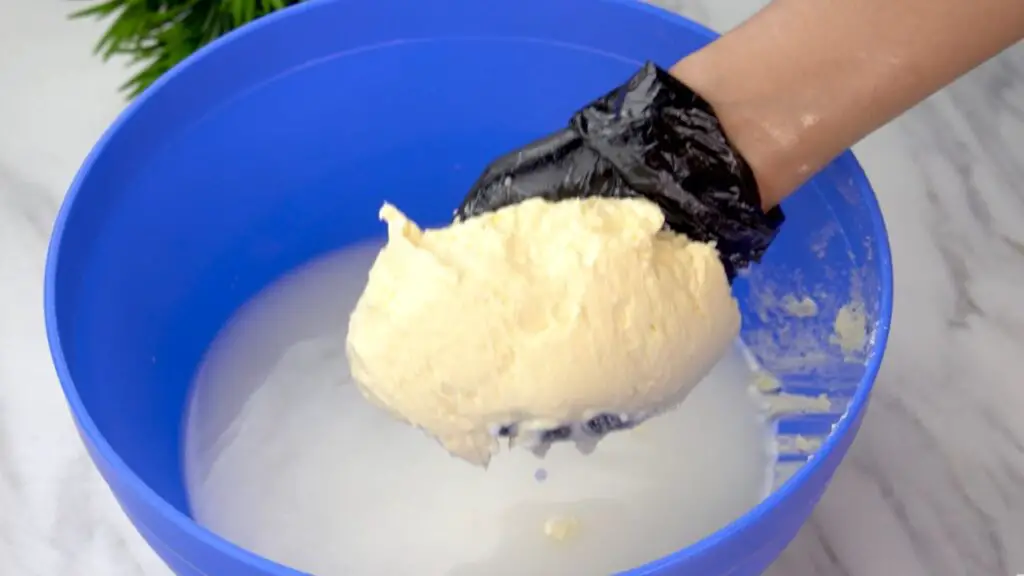
Now, in a clean bowl, add some cold water and add some ice cubes in there also, then add the strained butter mixture. The ice water helps firm up the butter and makes it easier to work with.
Using your hands or a wooden spoon, knead the butter under the cold water for about 3-5 minutes. This kneading helps remove any remaining buttermilk trapped inside the butter. You might need to change the water once or twice if it becomes very cloudy.
You will know it is ready when the water stays clear and the butter feels firm. The texture should be smooth, not grainy, and it should stick together in one piece.
When you press it, almost no liquid should come out. The color will be a pale yellow all the way through. Now your butter is clean and ready for the final steps.
Did You Know? This kneading process is similar to how butter was traditionally made in wooden churns for centuries before modern equipment existed.
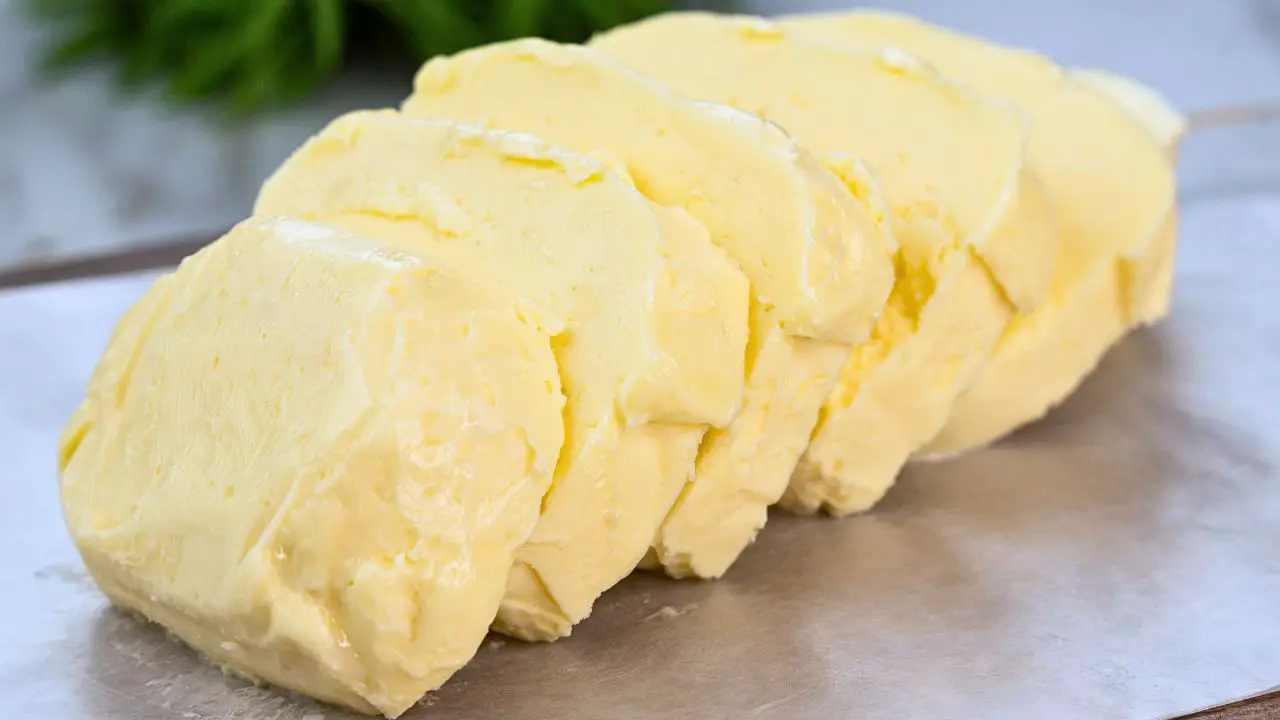
Step 4: Shape and Store
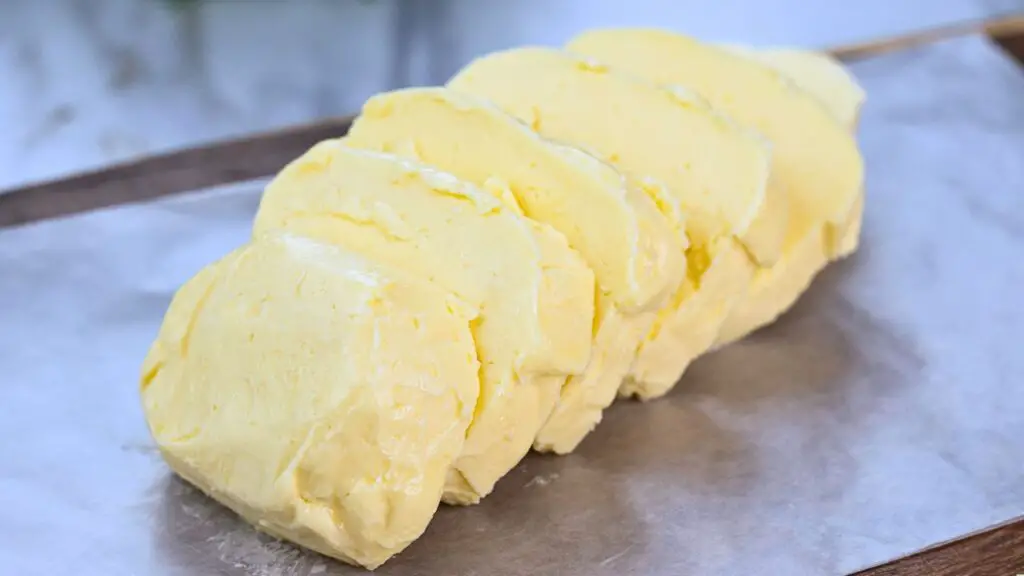
Next, take some parchment paper and place your butter on it. Pat the butter dry with a paper towel if needed to remove any water droplets on the surface.
Use the paper to help you shape the butter into a block or roll. Fold the parchment paper over the butter and press gently to create your desired shape. This makes a nice wrapper for storing your butter too.
Then, place it in the fridge for at least 1 hour to firm up completely. This helps the butter set into its final texture and makes it easier to slice later.
Your homemade butter will keep in the refrigerator for about 2-3 weeks. You can also freeze it for longer storage – it stays good in the freezer for up to 6 months.
The Final Result

The homemade butter has a fresh, smooth, and creamy taste that my family likes so much better than store-bought. It has no additives or preservatives – just pure cream.
This butter also melts perfectly on warm toast. Since we made it unsalted, you can really taste the pure dairy flavor that often gets masked in commercial butter.
The first time I made this, my kids were amazed watching the cream suddenly transform into butter and buttermilk. They now ask for “special butter” whenever we have fresh bread.
Related Recipe: This butter is great on this delicious crusty homemade bread, and pairs perfectly with my easy homemade cheese.
Easy Homemade Butter Recipe
Simple homemade butter recipe using just heavy cream. Creamy and fresh taste.
4
servings30
minutes40
minutes300
kcal1
hour10
minutesKeep the screen of your device on
Ingredients
2 cups heavy cream
Directions
- Take 500 ml or 2 cups of cold heavy cream from the fridge. Pour it into a large bowl with enough room to work.
- Using an electric mixer, whip the cream at medium speed. After 2 minutes, the cream will thicken and start to hold shape.
- Continue whipping the cream past the whipped cream stage until it separates into butter and buttermilk.
- Pour the mixture through a strainer to separate the butter from the buttermilk. Reserve the buttermilk for baking.
- In a bowl, add cold water and ice cubes, then add the strained butter. Knead for 3-5 minutes to remove trapped buttermilk.
- When the water stays clear and the butter becomes firm, it is ready. Ensure the texture is smooth and cohesive.
- Place the butter on parchment paper, pat dry to remove excess water. Shape the butter into a block or roll.
- Wrap with parchment paper and refrigerate for at least 1 hour to firm up completely before use.
- Store the homemade butter in the refrigerator for 2-3 weeks or freeze for up to 6 months for longer storage.
Recipe Video
Notes
- Storage Instructions: Store homemade butter wrapped in parchment paper inside an airtight container for up to 3 weeks in the refrigerator. For longer storage, freeze for up to 6 months – portion it first so you can thaw only what you need.
- Cold Cream Works Best: Use cream straight from the refrigerator for faster separation. Room temperature cream can take twice as long to turn into butter and often produces a softer final product that’s harder to shape.
- Washing Prevents Spoilage: Don’t skip rinsing the butter in cold water at least 3 times. Any buttermilk left inside will cause the butter to turn sour within days instead of lasting weeks. Change the water until it remains clear.
- Salt After Draining: If adding salt, do it after all buttermilk has been drained and rinsed away. Start with ¼ teaspoon per cup of butter and adjust to taste by kneading it in thoroughly for even distribution.
Nutrition Facts
- Total number of serves: 15
- Calories: 85kcal
- Fat: 9g
- Carbohydrates: 0g
- Protein: 1g
- Chloride: 1mg
Troubleshooting
If you run into any issues while making your butter, here are some common problems and solutions:
- Butter not forming: Your cream might not have enough fat content. Make sure to use heavy cream or whipping cream with at least 35% fat.
- Butter too soft: The cream was probably too warm. Try using colder cream and adding more ice to your washing water.
- Butter turns rancid quickly: You likely didn’t remove all the buttermilk. Be more thorough with the rinsing and kneading steps.
- Grainy texture: This often happens if you stop the process too early. Keep kneading under cold water a bit longer.
Butter Variations
While the basic unsalted butter is versatile for all cooking needs, you can also try these simple variations:
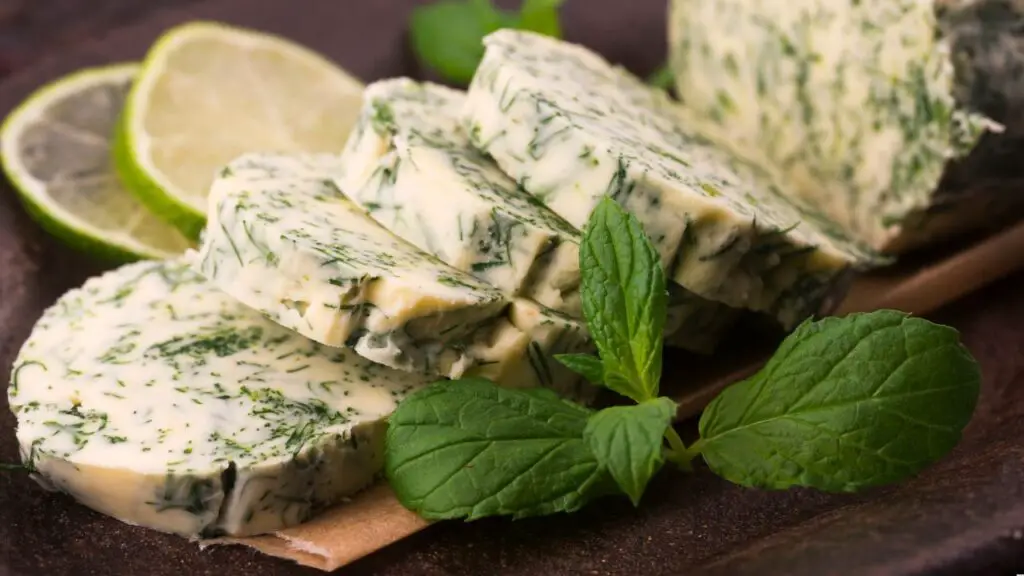
- Salted butter: Add ¼ teaspoon fine salt per cup of cream after draining the buttermilk
- Herb butter: Mix in finely chopped fresh herbs like thyme, rosemary, or chives
- Honey butter: Fold in 1-2 tablespoons of honey for a sweet spread perfect for breakfast
More From-Scratch Recipes

If you enjoyed making this kitchen staple from scratch, here are two more basics you can make at home:
- How To Make Clarified Butter Without Cheesecloth – Learn how to remove milk solids from butter for a pure cooking fat, no special equipment needed.
- Vanilla Buttercream Recipe – Another simple recipe that tastes better when you use quality ingredients.
Did you try making butter at home? Leave a comment below and let me know how it turned out! If you have any questions about the process or want to share your favorite way to use homemade butter, I would love to hear from you.