Struggling to make naan at home? I totally was too, thinking I needed a fancy tandoor oven. But guess what? My friend Ananya showed me this super simple naan recipe that’s a total game-changer. No yeast, no oven, no problem!
Come join me on Facebook here for easy recipes, cozy bakes, and little kitchen tips from my kitchen to yours.
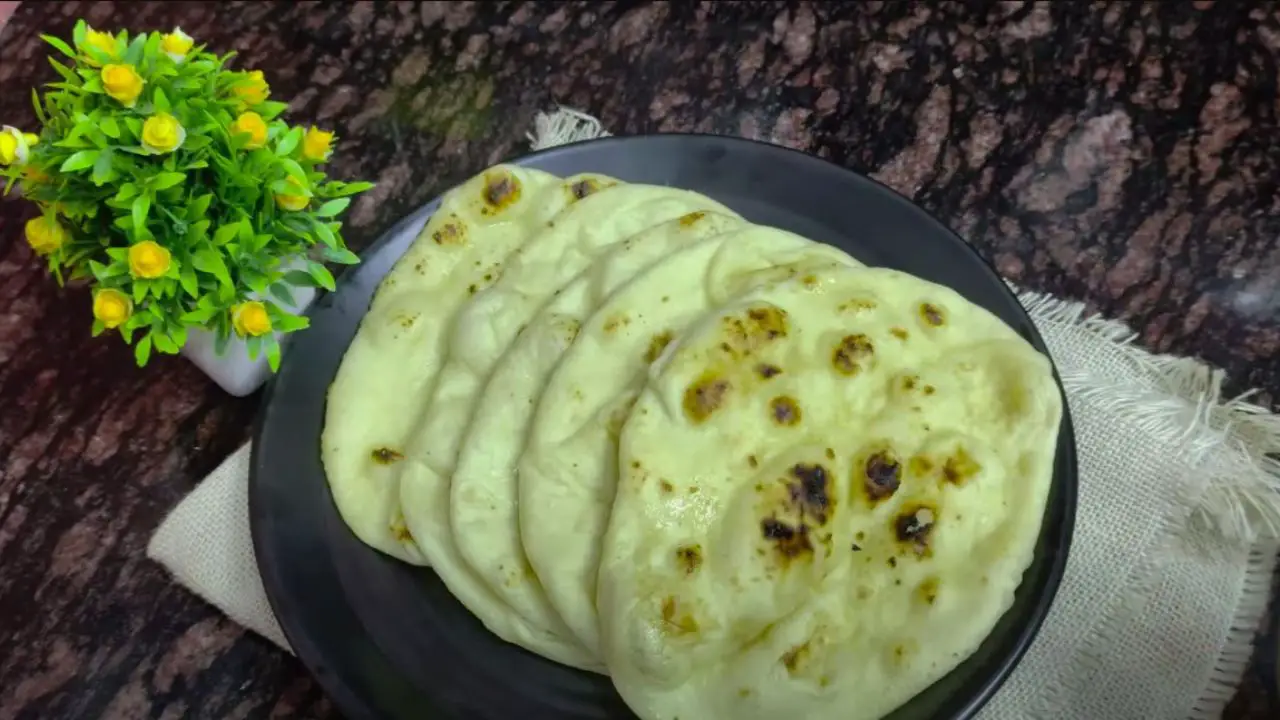
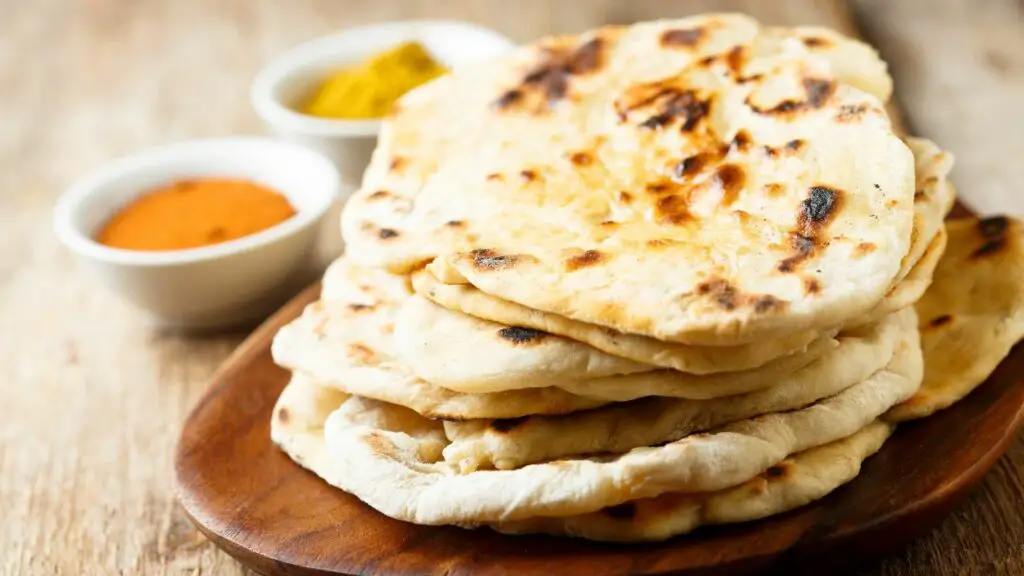
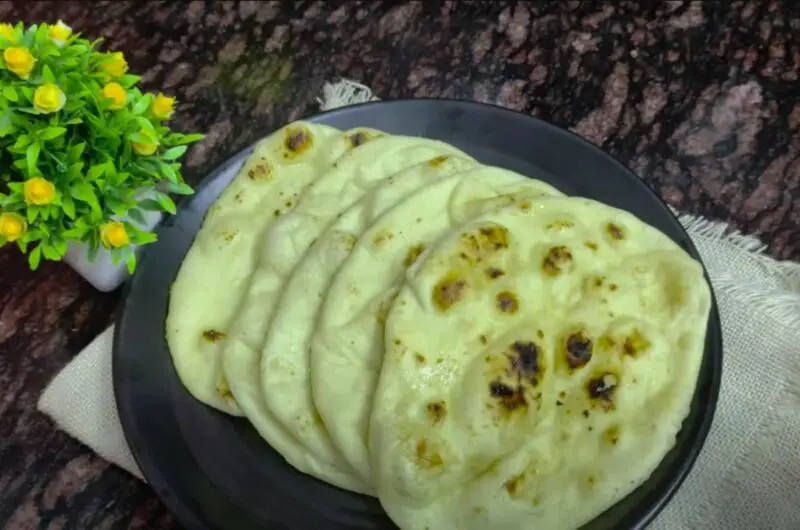
This homemade naan made on Tawa gets you that perfect naan – fluffy, chewy, and those tasty bubbles, all without an oven. It’s ideal for dipping, scooping, or just enjoying warm.
So, ready to make some authentic naan magic in your kitchen? Trust me, it’s easier and more fun than you think!
Ingredients You Need To Make Naan At Home (Without Tandoor Oven)
Ananya’s recipe is a traditional variant of naan bread that doesn’t need yeast or even an oven. It’s as delicious as it is easy to make and only needs basic ingredients that you probably already have in your pantry.
1. All-Purpose Flour: While plenty of people will insist that naan has to be made with maida flour, the truth is that you can get the same deliciously chewy results with plain all-purpose flour. Just be careful if you plan to use other flour alternatives, as they can drastically change the texture.
2. Sugar and Salt: The same old, reliable flavor enhancers. You don’t need anything fancy and can stick to the basics you have at home. I suggest you stick to refined sugar because brown sugar has extra moisture you don’t want!
3. Baking Soda: Many traditional naan bread recipes call for yeast as the leavening agent, but baking soda works just as well and yields delicious results.
4. Plain Yogurt: You need plain unflavored yogurt for this recipe. Avoid Greek yogurt, as it has a strong flavor that can overshadow the gentle taste of naan bread. You can’t skip this ingredient—we need the yogurt’s acidity to activate the baking soda.
5. Cooking Oil: Any cooking oil you prefer is good to go, but Ananya suggests olive oil—and I agree with her! Go for extra virgin if you want extra flavor, antioxidants, and vitamins.
6. Butter or Ghee: You don’t need much—just a dash to brush on top of the bread. Including butter or ghee is optional, but it definitely makes a difference in the final result!
7. Tawa: Even if you don’t need a tandoor oven for this recipe, you still must have a reliable tawa to cook the naan bread. If you don’t have one, I suggest using a flat griddle or skillet. The secret? It can’t be non-stick! We need the naan bread to stick slightly to the surface.
The Easiest Homemade Naan Bread Recipe You Can Find!
After my countless attempts—and failures—at making the perfect naan bread, I thought I was a lost cause. Maybe there were too many variables to consider, and I didn’t have it in me to make it work.
I was wrong. Making the perfect tawa naan is not impossible.
The secret to how to make naan at home is just one: the right recipe. And Ananya gave me the perfect one that works every time, in any kitchen, and at any skill level—no fuss, no stress.
And I promise you, it’s a lot easier than you think. Here is how to make naan at home on Tawa.
1. Combine Dry Ingredients
Choose a clean and wide bowl and pour all dry ingredients—the two cups of all-purpose flour, followed by the sugar, salt, and baking soda. If you want, you can combine them with a fork thoroughly, but this step is optional.
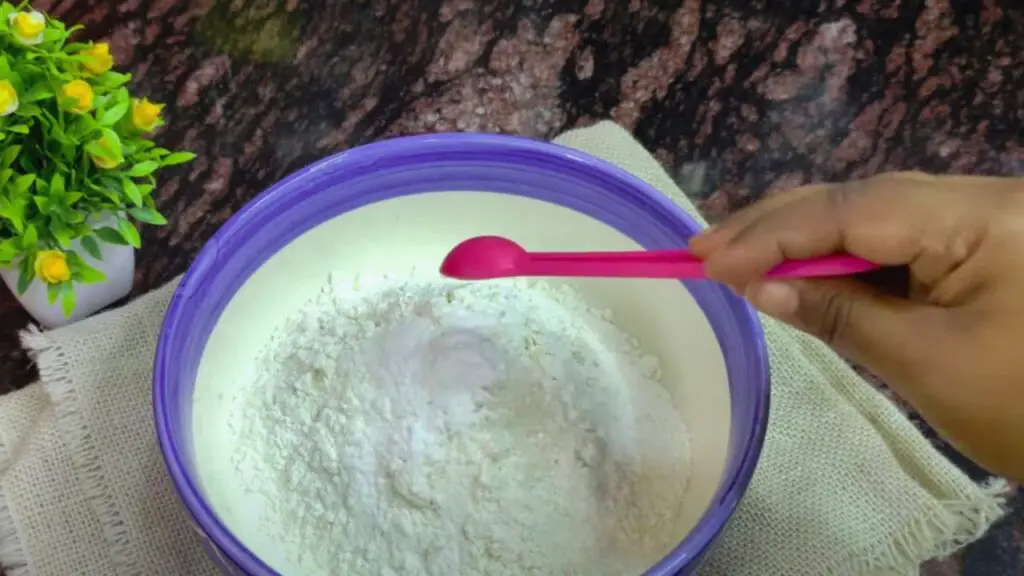
Keep in mind that flour tends to clump, so it may be a good idea to sift it beforehand to avoid tiny pockets of flour and make the future kneading easier on you.
2. Add the Wet Ingredients and Mix
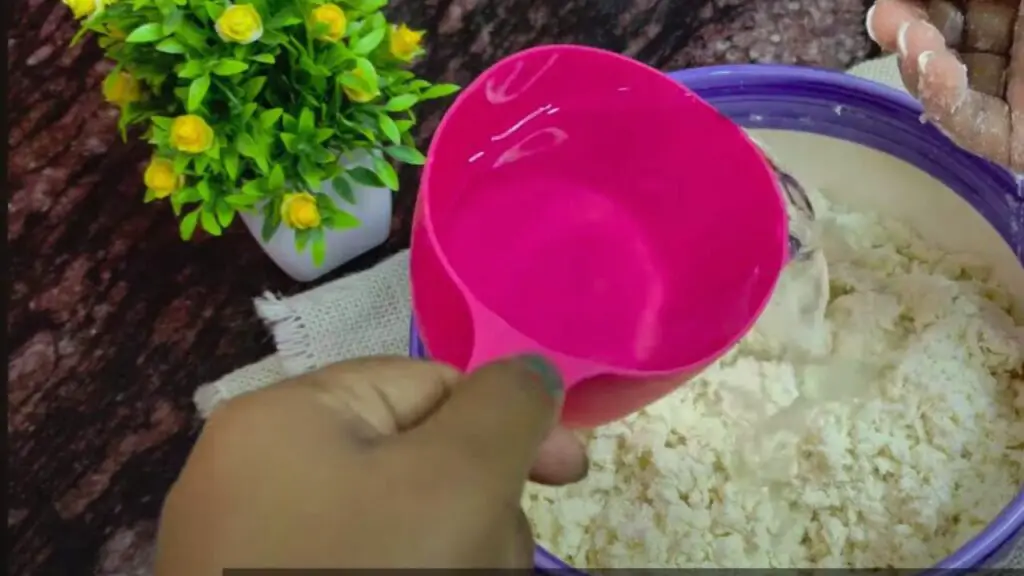
After incorporating the dry ingredients, it’s time to add the cooking oil and unflavored yogurt, then mix thoroughly to ensure all dry ingredients are coated with the wet ones.
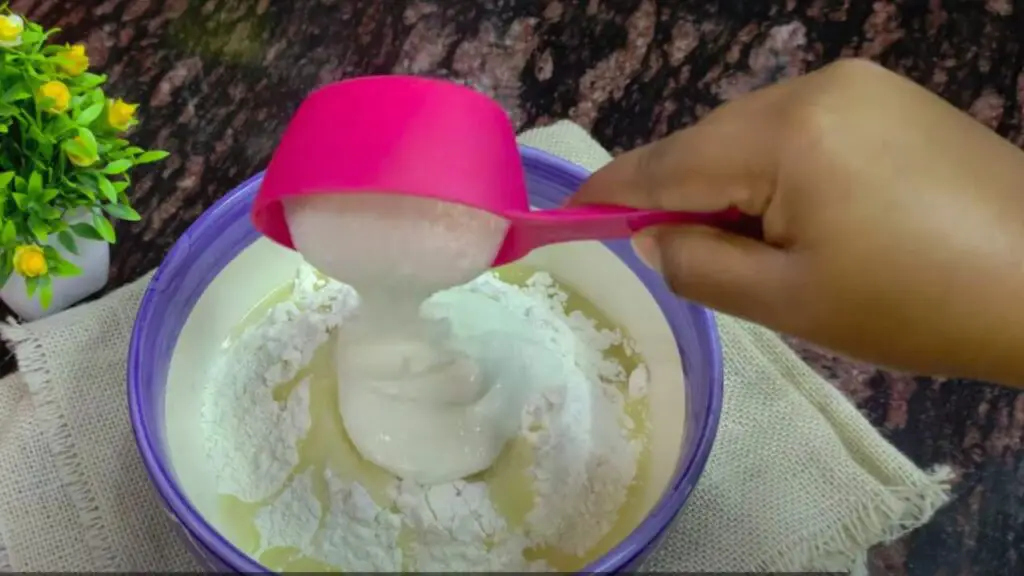
At this point, the mixture will be very dry and crumbly, so it will be hard to compact. To make it easier, gradually add up to five tablespoons of lukewarm water until the dough comes together. Be sure not to add more than that, or you risk making the dough too watery.
3. Knead, Knead, Knead!
Once you see the dough start to compact, it’s time to knead. You must keep going until the dough turns smooth, elastic, and easy to manage. I understand it can be hard to know the consistency you need, so check the video tutorial to know exactly how the dough should look.
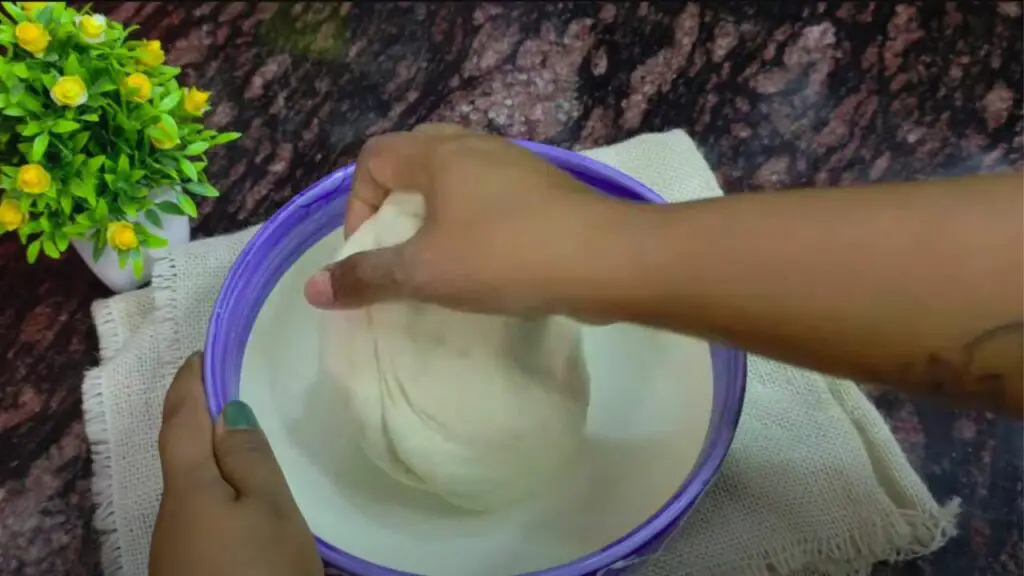
Ananya advises kneading the dough with your hands since it gives you a better grasp of how the texture is coming along, but you can use a mixer with the dough attachment if it’s easier for you. Just be sure not to overmix!
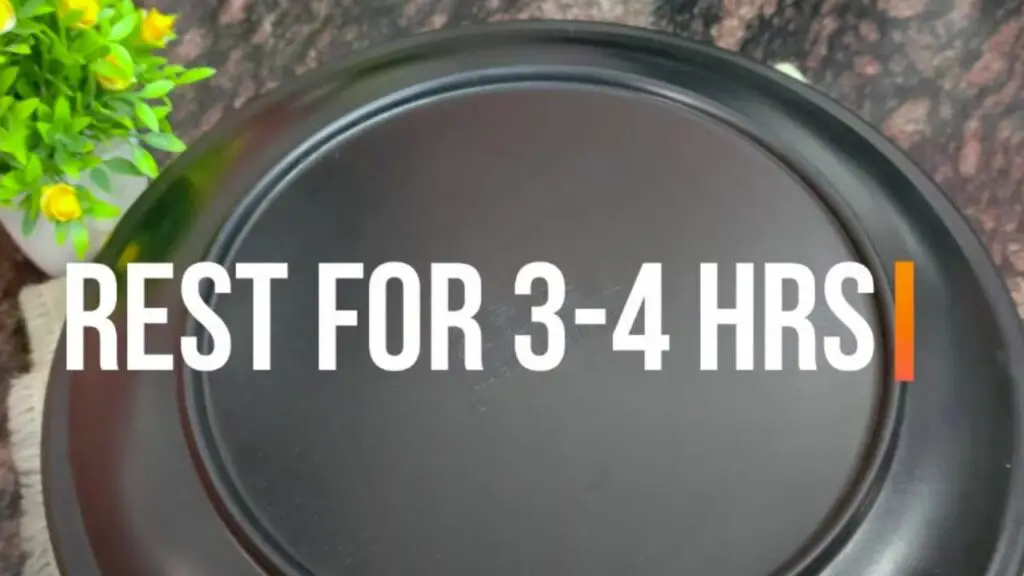
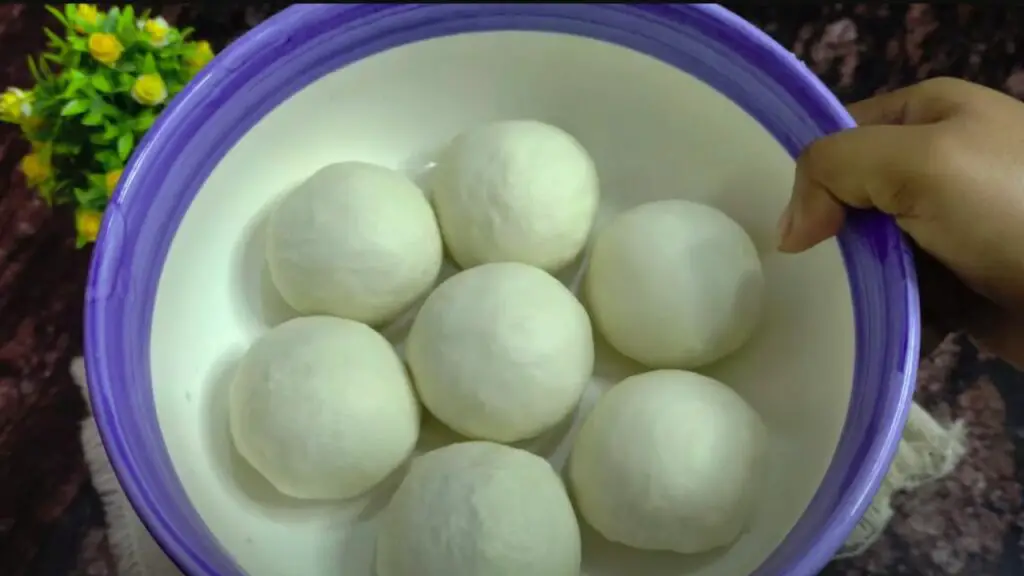
Once done, shape the dough into a ball and coat it with cooking oil. Cover it and set aside to let it rest for three to four hours.
4. Time to Shape the Bread
The dough developed the gluten after letting it rest, making it a lot smoother and stretchy. Give it another gentle knead and split it into seven equal-sized balls—they will turn into seven naan bread pieces.
Lightly dust flour atop a flat surface and place the dough balls on top, then flatten them into oval disks with the help of a rolling pin. Ideally, they should be approximately 1/8 inch (4 mm) thick to ensure the bread is light and thin.
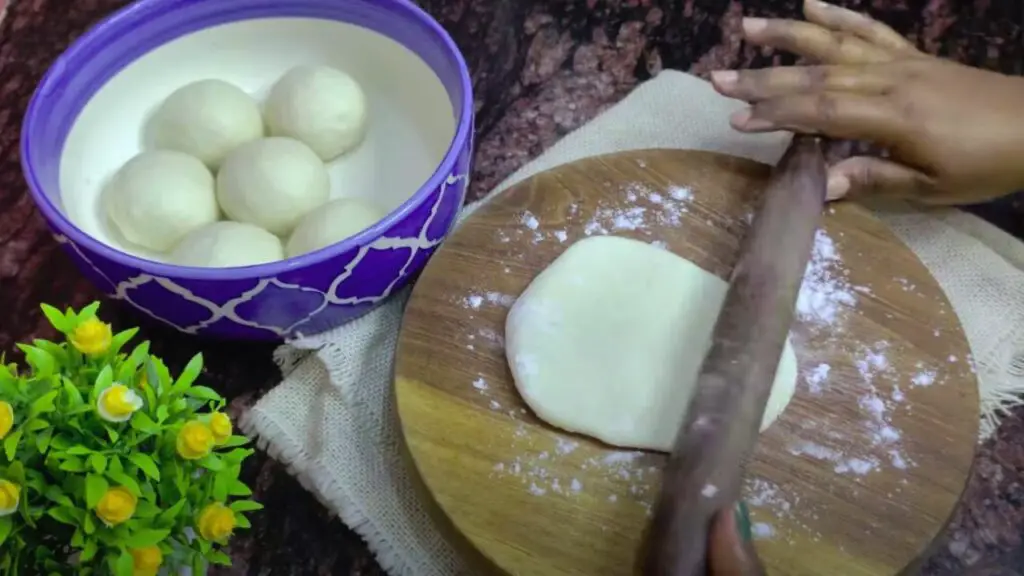
You can shape all breads individually or shape and cook them one by one—it’s your call!
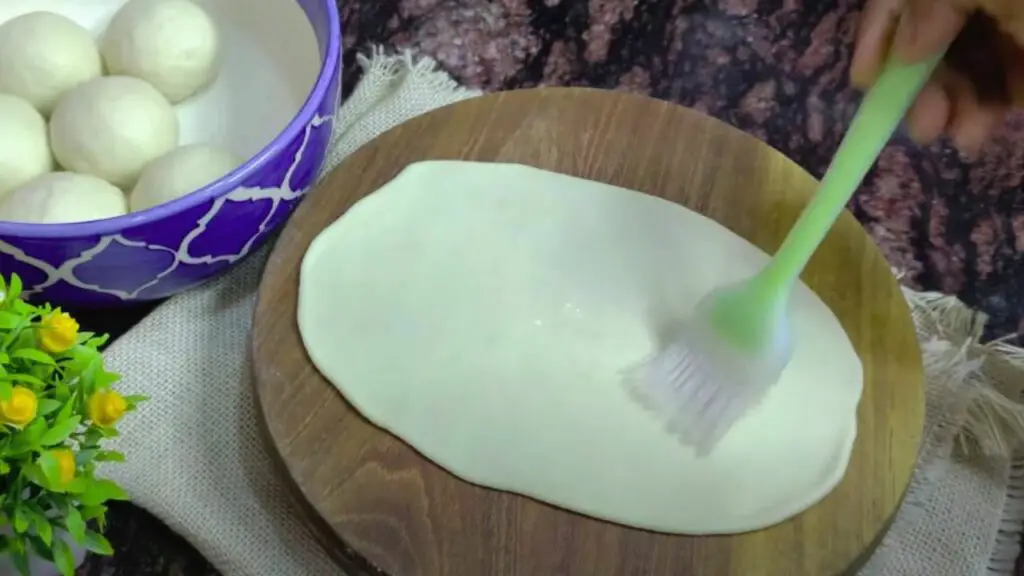
5. Cook the Naan and Enjoy!
Set the Tawa or griddle atop a gas cooktop and let it get hot. Meanwhile, grab a basting brush and coat some water atop one side of the naan bread—only one side, not both!
After the Tawa is hot and ready, place the naan disk atop the surface, ensuring the wet side faces down. Let it cook for approximately 40 seconds or until you see those tasty bubbles start to form and notice the dough looks considerably dry.

Here comes the tricky part. Now you have to cook the other side of the naan bread, but you won’t flip the bread itself—you have to flip the Tawa so that the flame can brown the bubbles in the dough.
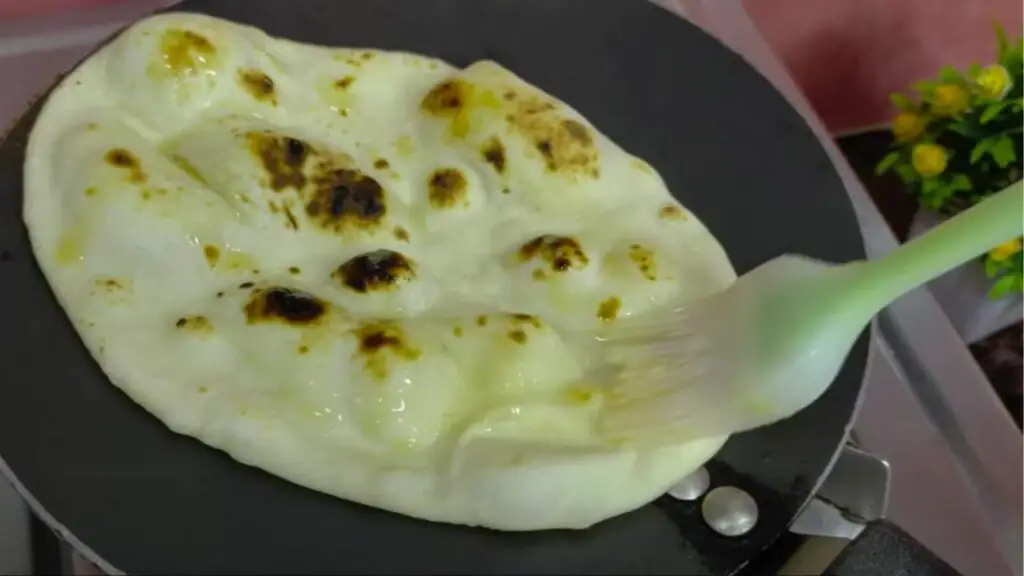
The perfect browning point depends on each person, but once you reach it, flip the Tawa back and brush it with the butter or ghee. Immediately after, use a spatula to take the naan bread out and serve it to enjoy.
Can You Customize This Homemade Naan Bread Recipe?
In short? Yes!

Naan is one of those recipes that are so simple and delicious that they can have countless variations. Each country and its regions have particular recipes, modifications, and techniques worth trying—who knows which one will be your favorite!
1. Garlic Butter Naan: Brush the flatbread with garlic butter instead of regular butter or ghee to turn your naan into garlic heaven. You can also incorporate chopped garlic into the flour mixture when kneading for an extra flavor punch.
2. Green Garnish: You can also enhance the baseline flavor of the naan bread by adding chopped green chili, cilantro, or any other herb you prefer. This adds a touch of freshness and some heat, elevating the naan bread to the next level.
3. Cheesy Delight: After letting the dough rest, roll it into flat circles and place two or three tablespoons of mozzarella cheese at the center, then roll into a ball and continue with steps 4 and 5 as instructed. You’ll get a delightfully cheesy flatbread in no time!
Here Is How To Make Naan at Home On Tawa
This no-yeast, no-oven naan recipe breaks down the myth that you need a tandoor to make authentic naan at home. You can enjoy warm, fluffy, and slightly crispy naan any day with simple pantry staples and a stovetop. Whether you’re dipping it in curry or eating it by itself, this naan recipe promises a taste of traditional Indian cuisine right from your kitchen.
7
servings15
minutes42
minutes210
kcal180
3
hours57
minutesIngredients
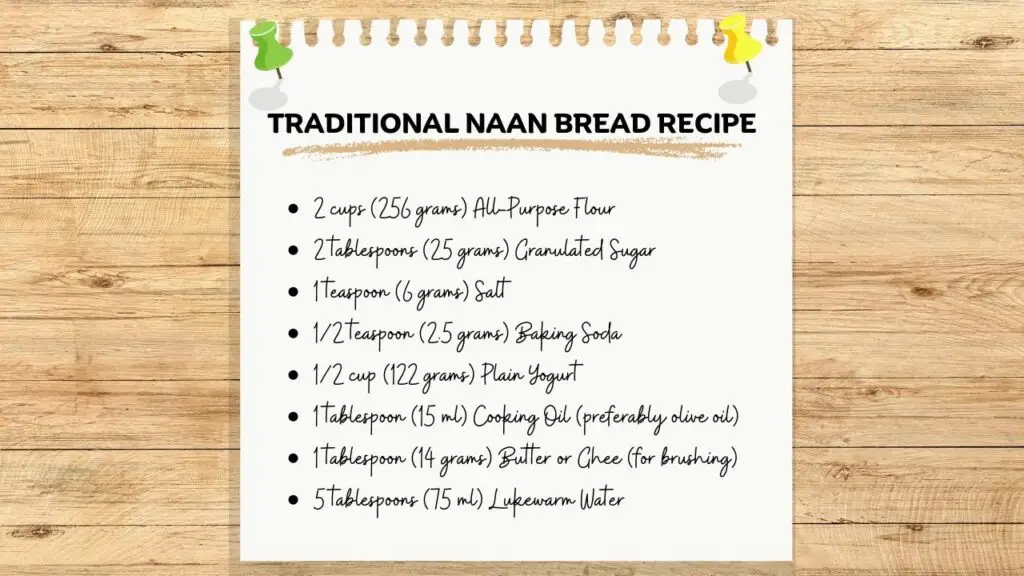
2 cups (256 grams) All-Purpose Flour
2 tablespoons (25 grams) Granulated Sugar
1 teaspoon (6 grams) Salt
1/2 teaspoon (2.5 grams) Baking Soda
1/2 cup (122 grams) Plain Yogurt
1 tablespoon (15 ml) Cooking Oil (preferably olive oil)
1 tablespoon (14 grams) Butter or Ghee (for brushing)
5 tablespoons (75 ml) Lukewarm Water
Directions
- Combine Dry Ingredients: In a large bowl, mix 2 cups (256 grams) all-purpose flour, 2 tablespoons (25 grams) granulated sugar, 1 teaspoon (6 grams) salt, and 1/2 teaspoon (2.5 grams) baking soda. Sifting is recommended to avoid lumps.
- Add Wet Ingredients: Introduce 1/2 cup (122 grams) plain yogurt and 1 tablespoon (15 ml) cooking oil to the dry mixture. Stir until all ingredients are partially combined. The mixture will be dry and crumbly.
- Knead the Dough: Gradually add 5 tablespoons (75 ml) of lukewarm water to form a cohesive dough. Knead until the dough is smooth and elastic, about 8–10 minutes. Then, coat the dough ball lightly with cooking oil, cover it, and let it rest for 3-4 hours.
- Shape the Naan: After resting, divide the dough into seven equal parts. Roll each part into balls, then flatten into oval shapes about 1/8 inch (3 mm) thick on a lightly floured surface.
- Cook the Naan: Preheat a Tawa or cast-iron skillet (not non-stick) over medium heat. Moist a dough disc slightly with water on one side and place it wet side down on the Tawa. Cook until bubbles form (about 40 seconds), then flip the Tawa (not the bread) to toast the bubbly side directly over the flame for another 20–30 seconds. Brush the cooked naan with butter or ghee immediately.
Recipe Video
Notes
- Dough Consistency: The key to soft naan lies in the dough. It should be soft and slightly sticky but manageable. If the dough is too dry, add a little more water, one teaspoon at a time. If it’s too wet, sprinkle in a bit more flour. The right consistency will ensure your naan is soft and fluffy.
- Resting Time: Don’t rush the resting process. Allowing the dough to rest for 3-4 hours is crucial as it helps in gluten development, making the naan soft and stretchy. If possible, set the dough in a warm place to aid in the rising process.
- Rolling the Dough: When rolling out the dough, aim for an even thickness to ensure uniform cooking. If the dough starts to stick to the rolling pin or surface, lightly dust it with flour. However, avoid using too much flour, as it can make the naan dry.
- Cooking Surface: A cast-iron skillet or Tawa works best for making naan. These retain high heat and distribute it evenly, creating the perfect cooking environment. Make sure your cooking surface is hot before placing the naan on it, as this helps in creating those characteristic bubbles and charred spots.
- Moistening the Dough: Before placing the naan on the Tawa, dampen one side with water. This helps the naan stick to the skillet and creates steam while cooking, which contributes to the naan’s softness.
- Flipping the Tawa: For those cooking on an open flame, flipping the Tawa to cook the top side of the naan directly over the flame can be tricky. If you’re uncomfortable with this step, you can use a large spatula to hold the naan directly over the flame instead. This method also gives you more control over how much char you want on your naan.
- Adding Flavors: Customizing your naan with garlic, herbs, or cheese can add a delightful twist. If adding toppings like minced garlic or chopped cilantro, press them gently into the dough before cooking to ensure they adhere properly.
- Keeping Naan Warm: If you’re making multiple naans and want to keep them warm, stack them in a clean kitchen towel and cover them. The towel traps the steam, keeping the naan warm and soft until ready to serve.
Conclusion
Learning the technique of how to make naan at home on tawa was a genuine eye-opener for me, I have to tell you! It’s the perfect mix of soft, chewy, and slightly crisp – a true tribute to the traditional Indian culinary arts.
What’s more astonishing is how incredibly simple it is to make. Gear up for this enchanting, aromatic voyage, and dive into the making of this unique bread recipe.
If the soft yet slightly crisp texture of this Indian bread has you longing for more, get ready for another gastronomic marvel. You’re bound to fall in love with the moist, fluffy essence that awaits in my upcoming quest: Best Stuffed Potato Cheese Bread – Loaded With Cheesy Goodness! Come along as we delve deeper into the wonders of culinary delights.
This naan recipe is absolute gem!
Making naan at home can sometimes feel like a bit much for me. It takes time and energy that I don’t always have. Kneading the dough and waiting for it to cook can be a real chore. While homemade naan is tasty, I just grab the store-bought kind instead. It’s just simpler and saves me a ton of effort.