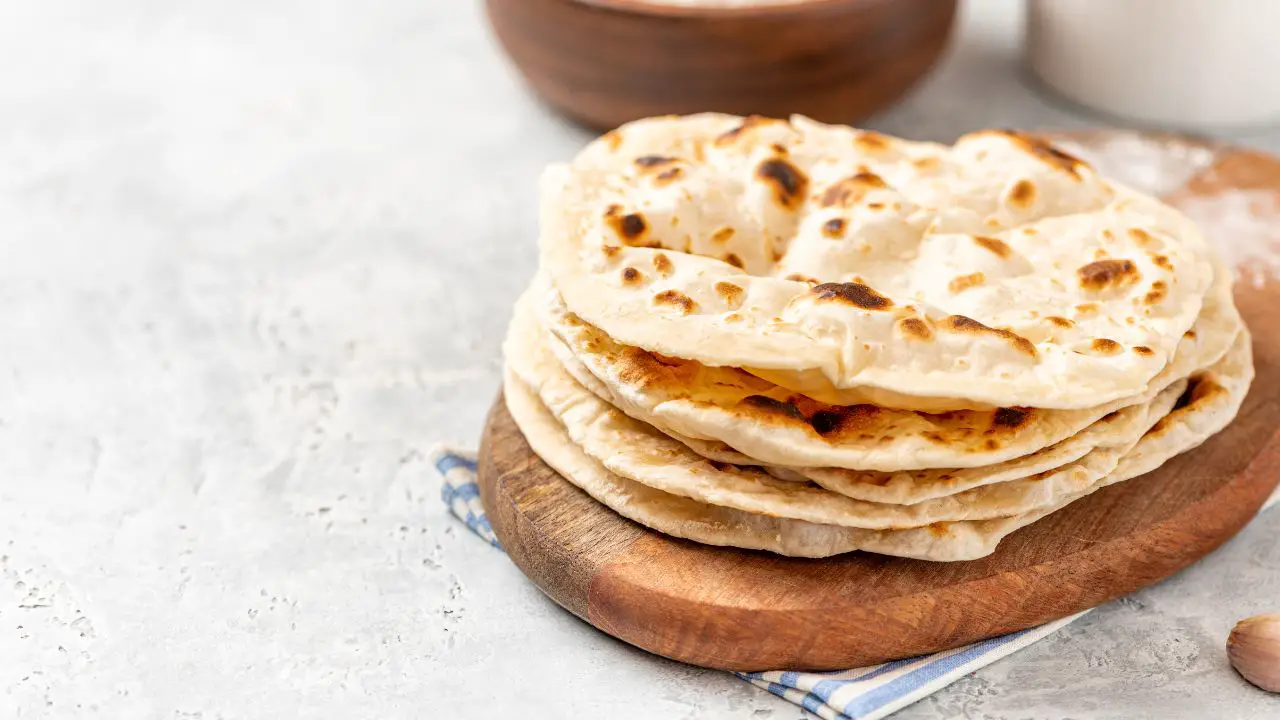
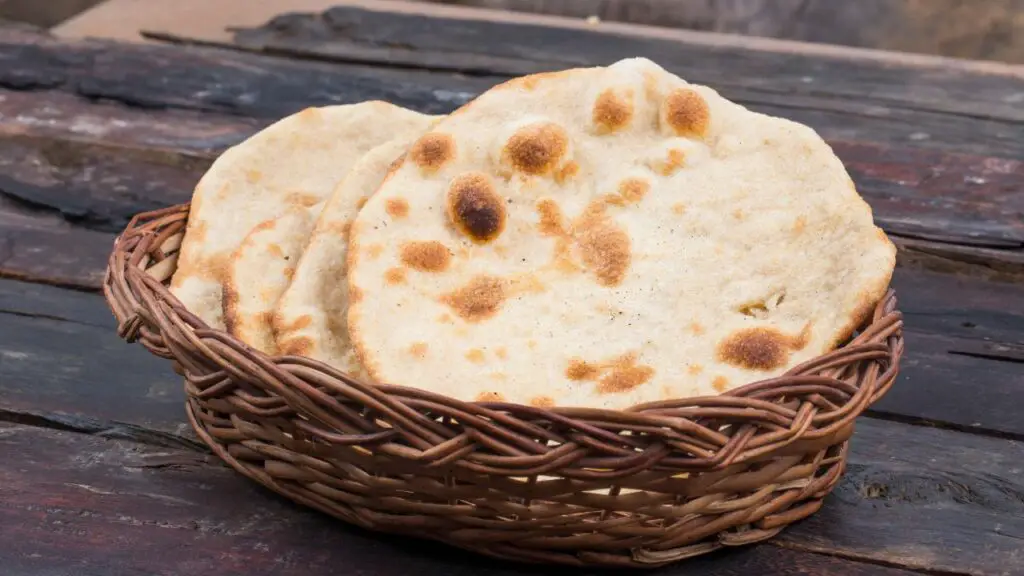
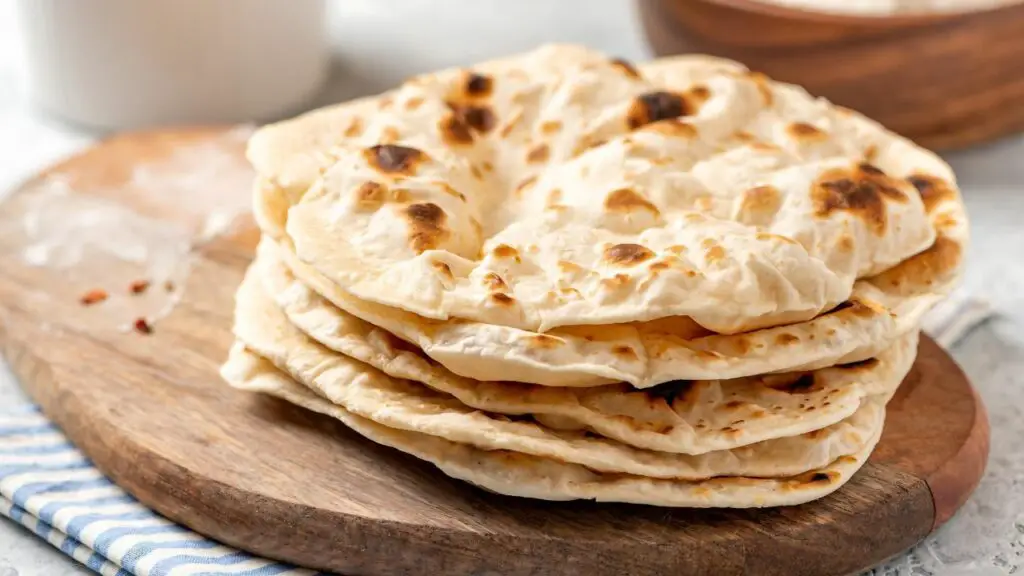
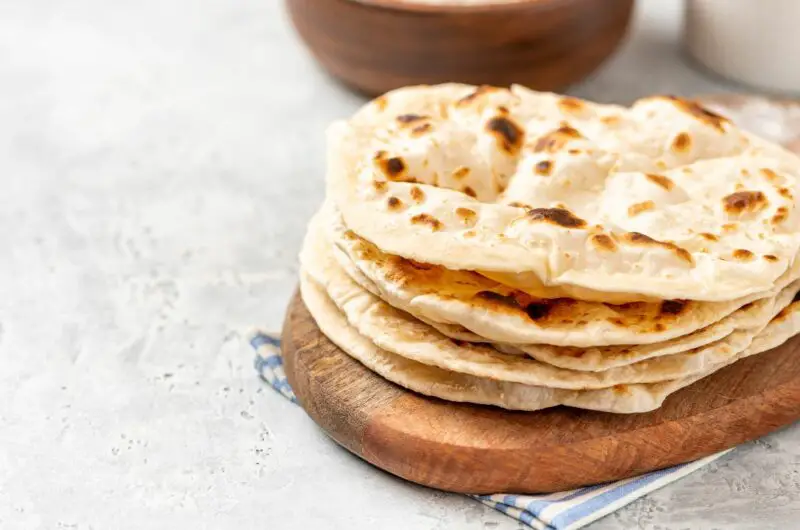
I have been making a lot of Roti instead of naan lately. It is quicker and simpler, and all you need is a few basic ingredients. No fuss at all, and suddenly, you’ve got this awesome flatbread that is great for dipping into a curry or eating with a bit of butter.
Come join me on Facebook here for easy recipes, cozy bakes, and little kitchen tips from my kitchen to yours.
My friend Nadee shared with me this video below for a super easy way to make Roti fast. So, check out how simple it is to have fresh Roti whenever you want.
How To Make Roti Fast With Just 4 Simple Ingredients
For making roti, you really only need four simple ingredients. It’s as straightforward as it gets!
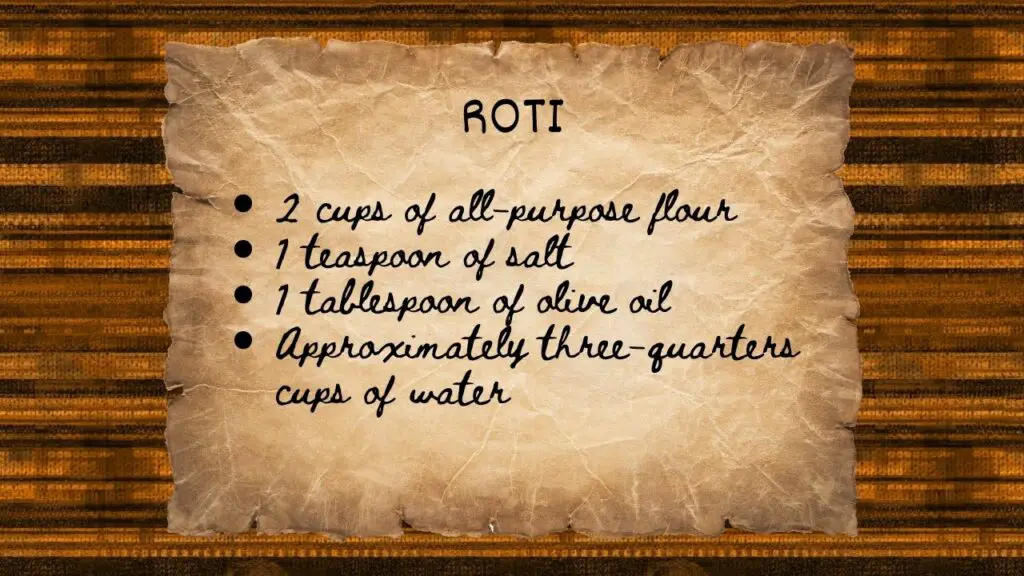
- 2 cups of all-purpose flour
- 1 teaspoon of salt
- 1 tablespoon of olive oil
- approximately three-quarters cups of water
All-Purpose Flour: In the video below, Nadee uses all-purpose flour for her roti recipe, but I only had whole wheat flour at home. I was a bit worried it wouldn’t turn out well, but it actually turned out great, perhaps just slightly denser than if I had used all-purpose flour.
Top Tip: If you’re looking for a softer texture but want to keep it healthier, I recommend a mix of whole wheat and all-purpose flour. It’s a simple trick for a lovely balance.
Salt: Table salt is fine; nothing fancy is needed here. A pinch of salt improves the texture and taste of the dough significantly.
Olive Oil: Any mild-flavored cooking oil will work, but olive oil adds a little something extra. Oil introduces a touch of moisture and richness, keeping the dough soft but not overly chewy.
Water: Although Nadee does not mention it in the video, I did ask her later and she said that lukewarm water is recommended for making roti dough, as it helps in mixing the dough well and ensures it’s soft and smooth.
Here Is How To Make Roti Fast
Ready to make some quick roti? I’ve laid out the simple steps that Nadee also shows in the video below and are quite easy to follow. Trust me, it is easier than you think, and pretty soon, you will have fresh, warm roti ready to enjoy.
Let’s get started!
1. Mixing the dough
Add the flour, salt, and olive oil to a large mixing bowl. Use your hands to combine everything until well mixed. While mixing with one hand, slowly add the water. Mix after each addition until the dough comes together. Keep adding water until the dough feels firm and dry. I recommend watching Nadee’s video on making roti to see the perfect consistency for the dough.
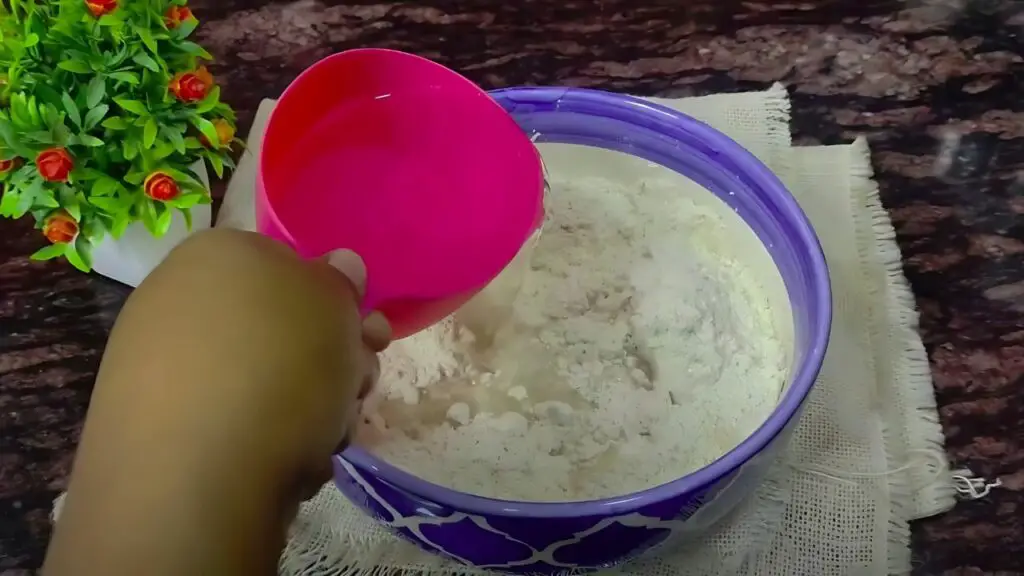
Top Tip: Start with less water. If it seems there’s not enough, it’s easier to add a little extra than to rescue a large paste mess. The dough should be workable and not really stick to your fingers.
2. Kneading
Turn the dough onto a floured surface and knead for about 5 minutes until smooth and elastic. Kneading helps develop the gluten in the dough, which gives roti its characteristic chewy texture. Cover and let it rest for 10 minutes.
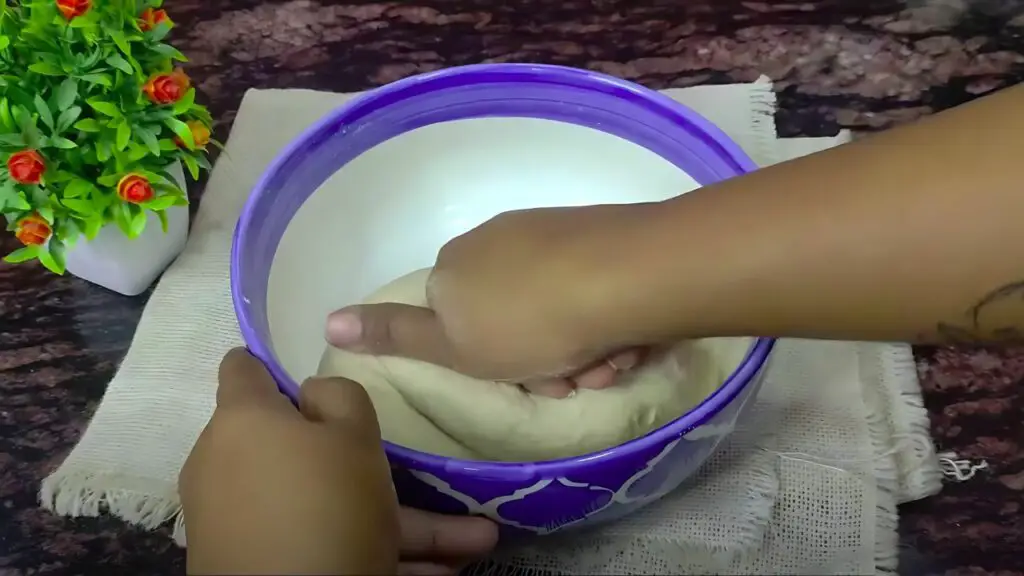
Top Tip: Feeling the dough stick? A little sprinkle of flour is your best friend. Just remember, a light touch is all you need to keep things moving smoothly without turning your dough too hard.
3. Rolling Out the Roti
Divide your dough into even balls and get ready to roll them out on a surface sprinkled with flour. Divide the dough into 5 equal pieces and roll each into a ball. Roll from the center out, flipping and turning the dough frequently. Make the circles as evenly round as possible for nicely shaped roti. I recommend rolling the dough out on a lightly floured wooden board for best results.
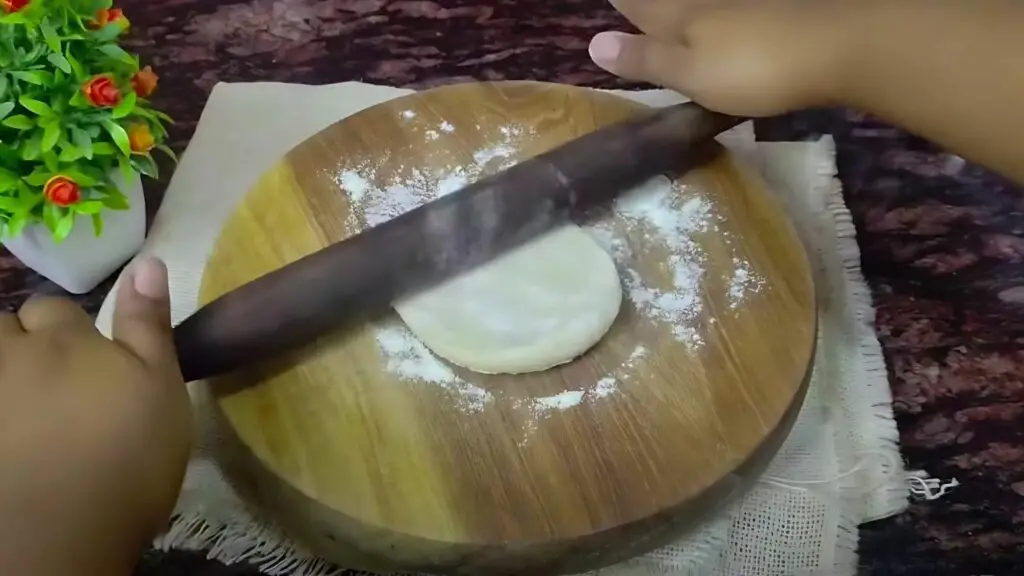
Top Tip: That stubborn dough can be tamed with patience. If it tries to shrink back, let it rest for a while. This brief pause lets the gluten relax, making your job a whole lot easier and your roti round and ready for the pan.
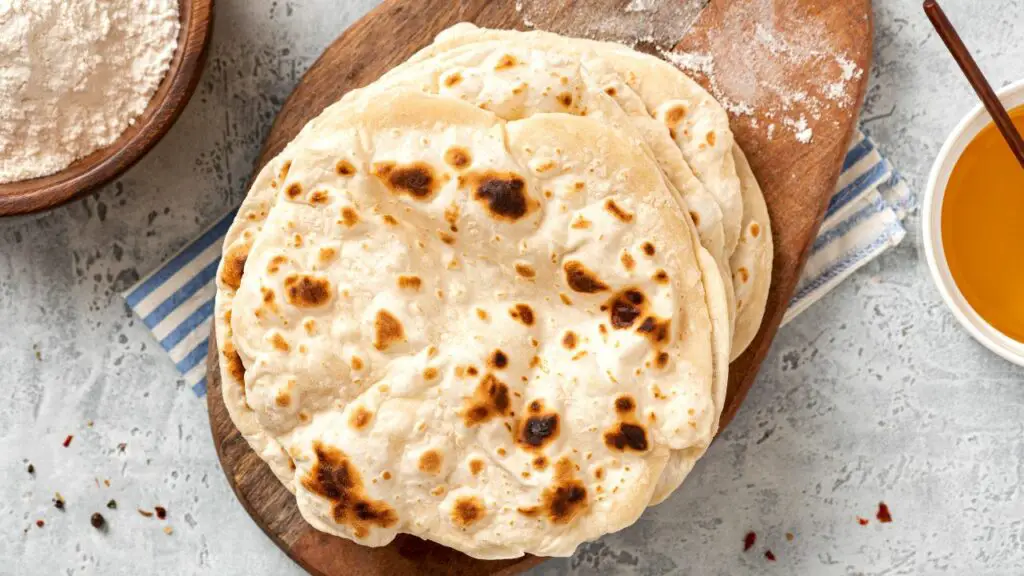
4. Cooking the Roti
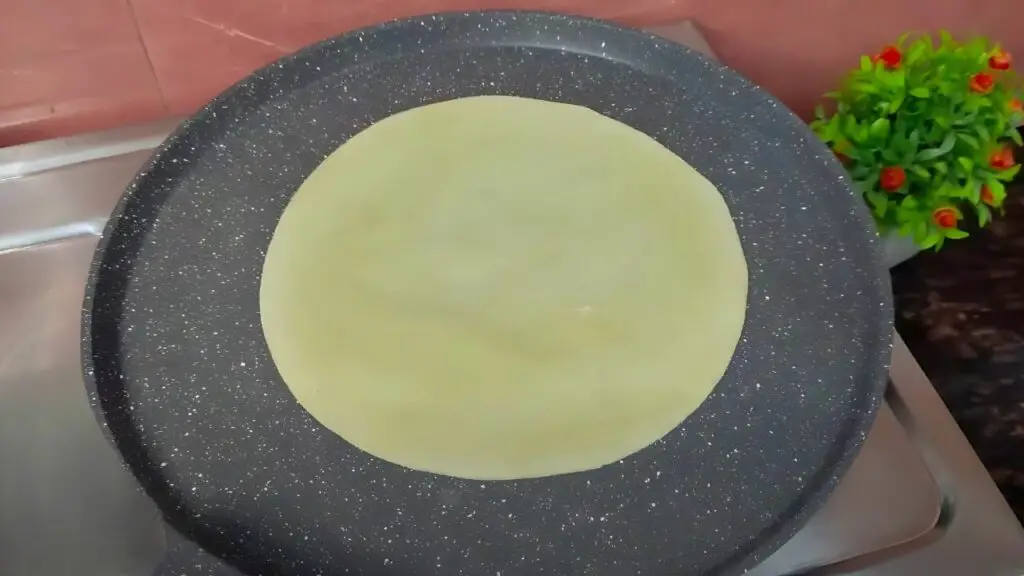
Now the fun part begins — cooking the roti. Warm up the pan and cook it till you see those bubbles popping up, as you can see in the video below. Then, flip it over once you notice those light brown spots on the bottom. But hey, don’t overdo it. The roti is pretty thin, so it barely takes a minute or even less on each side to cook.
The next bit is a bit trickier, throwing the roti straight onto the open flame. Not gonna lie, I totally burned it my first go, but after a bit of practice, I’ve gotten pretty darn good at it, if I do say so myself.
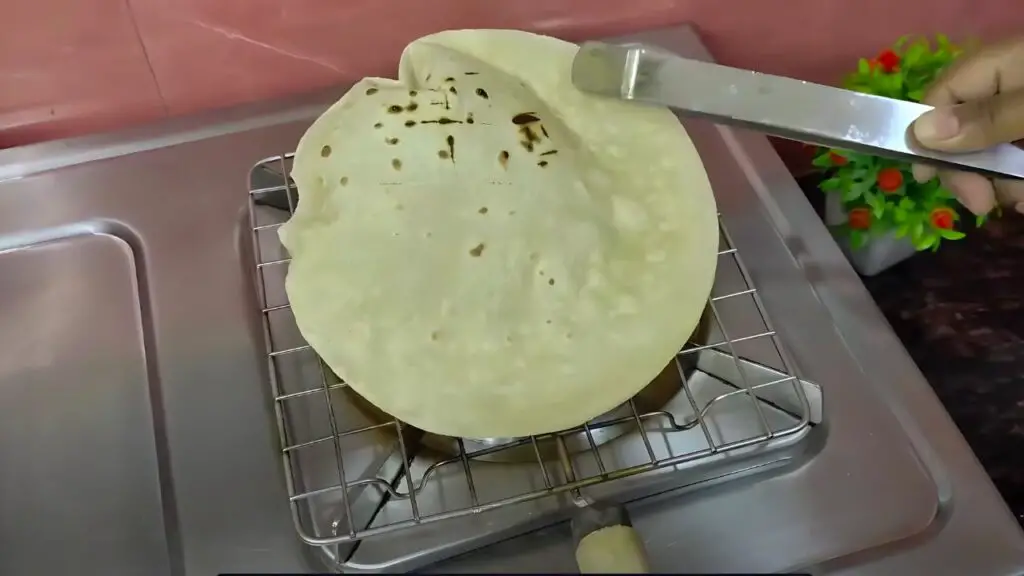
Finishing it off on the flame makes the roti puff up and gives it that amazing charred, smoky taste that’s just bang on. But keep your eyes peeled! You gotta snatch it off quickly to dodge burning. It’s a bit of a fine line, but once you’ve got it down, there’s nothing better.
Top Tip: If you only have an electric stove, then keep your roti in the pan a bit longer and press down lightly to get those char marks. You won’t get the puff like with a gas flame, but with a little extra time, you will still get that charred look.
Everyday Roti Is Simple and Versatile
Roti is one of those simple essentials in my kitchen that goes with everything. Here’s a no-nonsense rundown of how I use roti across different meals. It’s not just for curry or dinner; it’s for breakfast, lunch, quick snacks, and even desserts. Roti’s versatility is unmatched, and here are some real ways I make the most of it every day.
Curries: When I make curry, I always have roti with it. It just fits. The last time I made chicken curry, using roti to eat it made the meal complete.
Stews and Soups: I regularly use roti to eat with turkey barley soup. It’s a satisfying meal, especially when it’s colder outside. Just a simple piece of roti to soak up the soup does the trick.
Wraps and Rolls: Roti wraps are a regular thing in my family. I use whatever vegetables or chicken I have, put them in a roti, and that’s lunch sorted. It’s straightforward and fills you up.
Breakfast: Using roti for breakfast was something new I tried, and I’ve kept doing it. Putting avocado or eggs and bacon on roti is a good change from my usual breakfast and keeps me full longer.

With Dips: If I have chutney or any dip, I prefer to eat it with roti. It works better than anything else for getting all those flavors.
Make Rotis Like a Pro With This Simple Recipe!
This recipe is all about making roti in a simple way with stuff you already have in your kitchen. We’re aiming for that awesome authentic taste and just-right texture.
5
servings15
minutes10
minutes160
kcal10
minutes35
minutesIngredients
2 cups (256 grams) all-purpose flour
1 teaspoon (5 grams) salt
1 tablespoon (15 ml) olive oil
approximately 3/4 cup (180 ml) lukewarm water
Directions
- Prepare the Dough: In a large mixing bowl, combine flour with salt and olive oil. Gradually add in lukewarm water while mixing with your hands, ensuring the dough begins to form. Aim for a firm yet pliable dough that doesn’t stick to your fingers.
- Knead the Dough: Turn the dough out onto a lightly floured surface and knead for about 5 minutes, or until it’s smooth and elastic. This process is crucial for developing the gluten, which gives the roti its characteristic texture. Cover the dough with a clean cloth and let it rest for 10 minutes.
- Roll Out the Roti: Divide the dough into 5 equal portions, rolling each into a ball. On a floured surface, roll out each ball into a thin circle. Aim for uniform thickness to ensure even cooking.
- Cook the Roti: Heat a pan over medium heat. Place a rolled-out roti on the pan and cook until bubbles form on the surface, then flip. Look for light golden-brown spots to form, indicating it’s time to turn. For the final touch, place the roti directly on an open flame until it puffs up and gets charred spots, being careful not to burn it.
- Serve and Enjoy: Once cooked, remove the roti from the flame and serve warm. Roti pairs wonderfully with curries, dals, or even just a dab of butter for a simple treat.
Recipe Video
Notes
- Achieve the Right Dough Consistency: The key to soft rotis lies in the dough. It should be soft and pliable but not sticky. If the dough feels too sticky, add a bit more flour; if it’s too dry, add a little more water. The right balance will make the dough easy to roll out and cook.
- Let the Dough Rest: Allowing the dough to rest for at least 10 minutes after kneading is crucial. This resting period helps the gluten strands relax, making the dough softer and easier to roll out. Additionally, rested dough results in softer rotis.
- Roll Evenly: When rolling out the dough, aim for even thickness throughout to ensure uniform cooking. Rotis that are too thin in some areas and thicker in others will cook unevenly.
- Preheat the Pan: Ensure your pan is properly preheated before starting to cook the rotis. A hot pan helps to puff up the roti quickly, creating desirable air pockets that make the roti soft and delicious.
- Avoid Overcooking: Rotis cook quickly, often needing just about a minute on each side. Overcooking them can lead to hard or crispy rotis rather than soft and pliable ones. Watch for the color change and small bubbles to form before flipping.
- Direct Flame Technique: For those comfortable with the direct flame method, it can add a great charred flavor and help puff up the roti. If using an electric stove, achieve similar effects by pressing down gently with a spatula to encourage pockets to form.
- Keep Them Warm: To keep rotis soft after cooking, store them in a container lined with a clean kitchen towel. The towel traps steam and keeps it soft until you’re ready to serve.
FAQs
1. My roti doesn’t puff up on the pan. What am I doing wrong? Getting roti to puff up beautifully is often about the dough’s moisture content and how thin you roll it out. Make sure your dough is not too stiff, and try to roll your rotis evenly. A very hot pan is also crucial for that puff.
2. What’s the best way to reheat roti so it feels fresh? Reheating roti so it feels fresh is simple. Sprinkle a little water over it and warm it on a hot pan for a few seconds on each side. You can also wrap it in a damp paper towel and microwave it for 10-20 seconds.
3. How can I add flavor to my roti? Adding flavors to your roti dough is a great way to mix things up. You can incorporate spices like cumin, ajwain (carom seeds), or dried fenugreek leaves (kasuri methi) into the dough. For something different, try adding pureed spinach or grated vegetables for a colorful and nutritious twist.
4. Can roti dough be frozen for later use? Yes, roti dough freezes well. Portion the dough into balls, wrap each tightly in plastic wrap, and place them in a freezer bag. When you’re ready to use them, let them thaw overnight in the refrigerator, then bring them to room temperature before rolling and cooking.
5. How do I make my roti more nutritious? To boost the nutritional value of your roti, you can mix in other flour like chickpea flour, millet flour, or oat flour with your regular wheat flour. This not only adds different nutrients but also introduces new flavors to your rotis.
Another Must-Try Recipe
If you liked this fast and easy roti recipe, you will probably like the Golden and Crunchy Roast Paan recipe as well. Check it out here: I Baked This Roast Paan Recipe And It Came Out Golden And Crunchy To Perfection.
Do you have a comment or question?
If you’re having any trouble making roti or you have a helpful tip, leave your comments below or in the video’s comment section on YouTube. I’m here to help with any questions you have about making roti. I look forward to hearing from you and will respond as quickly as possible.