These oven baked chicken drumsticks are juicy, golden, and packed with warm spices… and the method is a little different in the best way.
Come join me on Facebook here for easy recipes, cozy bakes, and little kitchen tips from my kitchen to yours.
I learned this chicken trick from a street food chef at the food market, then tried my own version at home in the oven. Let’s be honest… once chicken drumsticks come out this flavorful with such simple ingredients, how can you not make them again?!
Watch my oven baked chicken drumsticks recipe video below to see exactly how I make them golden, juicy, and full of flavor. If you enjoy the video, please like it and subscribe to my YouTube channel for more easy chicken recipes!
Why You’ll Love These Oven Baked Chicken Drumsticks
This is such an easy chicken drumstick recipe, but it does not taste boring at all. The chicken is seasoned first, then mixed with egg and a little cornstarch, which helps everything cling nicely to the drumsticks before baking.
I also love that most of the mixing happens inside a plastic bag, so there is less mess on the counter and less seasoning stuck to your hands. So satisfying!
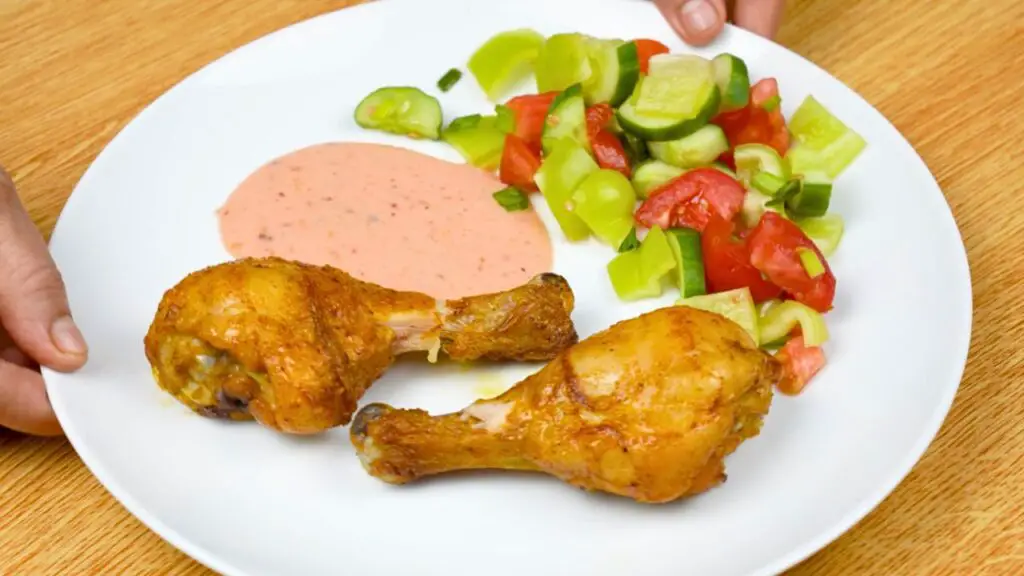
This chicken drumsticks recipe oven method is also very flexible. You can serve the drumsticks with rice, potatoes, flatbread, salad, roasted vegetables, or just a simple dipping sauce on the side.
Texture + Flavor
These chicken drumsticks come out juicy inside with a golden, flavorful outside. Since I use skinless drumsticks here, they are not the same as deep-fried chicken, but they still get a lovely baked finish in the oven.
The flavor is warm, savory, and slightly smoky from the paprika, with turmeric adding that beautiful color. The garlic, black pepper, and salt keep everything simple but super delicious.
Did You Know: Cornstarch is often used in chicken recipes because it helps create a light outer layer and helps seasonings cling better to the meat.
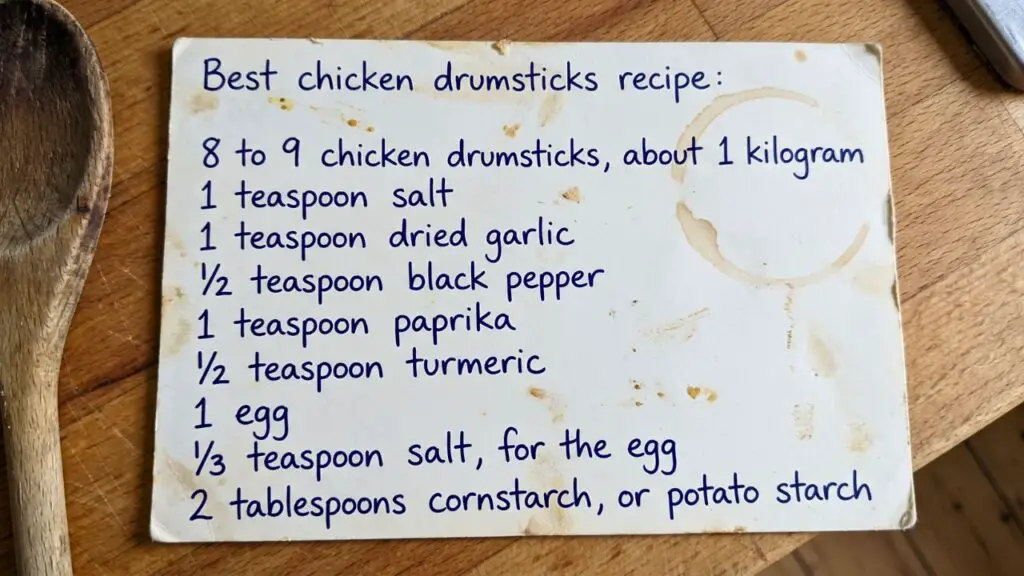
Oven Baked Chicken Drumsticks Ingredients
For the chicken drumsticks
- 8 to 9 chicken drumsticks, about 2.2 pounds (1 kilogram)
- 1 teaspoon salt
- 1 teaspoon dried garlic
- 1/2 teaspoon black pepper
- 1 teaspoon paprika
- 1/2 teaspoon turmeric powder
- 1 large egg
- 1/3 teaspoon salt, for the egg
- 2 tablespoons cornstarch, about 16 grams, or potato starch
For the simple sauce
- Mayonnaise
- Ketchup
- Mustard
- Yogurt or sour cream
- Chili flakes
For the quick salad
- Bell pepper
- Cucumber
- Tomatoes
- Spring onion
- A little salt
Equipment
- Large mixing bowl
- Plastic food-safe bag
- Small bowl
- Fork or small whisk
- Baking sheet
- Parchment paper
- Tongs
- Meat thermometer, if you have one
Let Me Show You How To Make These Chicken Drumsticks
Step 1: Season the chicken
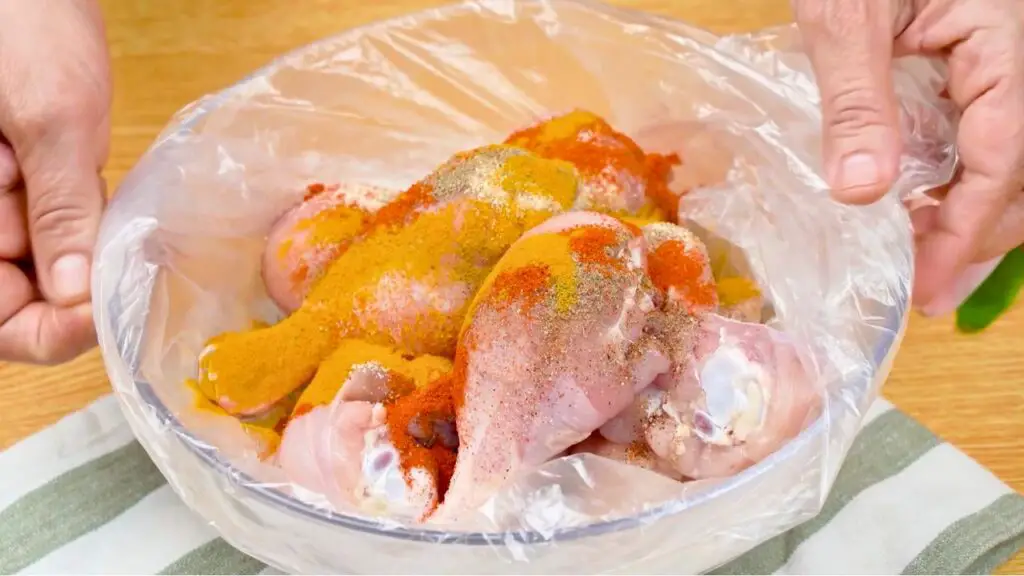
Place a plastic bag inside a large bowl, so it stays open and is easier to fill. Add the chicken drumsticks to the bag.
Sprinkle in the salt, dried garlic, black pepper, paprika, and turmeric. Seal the bag, then massage the chicken through the bag until the seasoning is spread all over the drumsticks.
Let the chicken marinate for 30 minutes.
Note: The street food chef used skin-on chicken drumsticks, and honestly, that is probably the tastier way if you love a richer finish. I use skinless drumsticks here because that is what my family prefers.
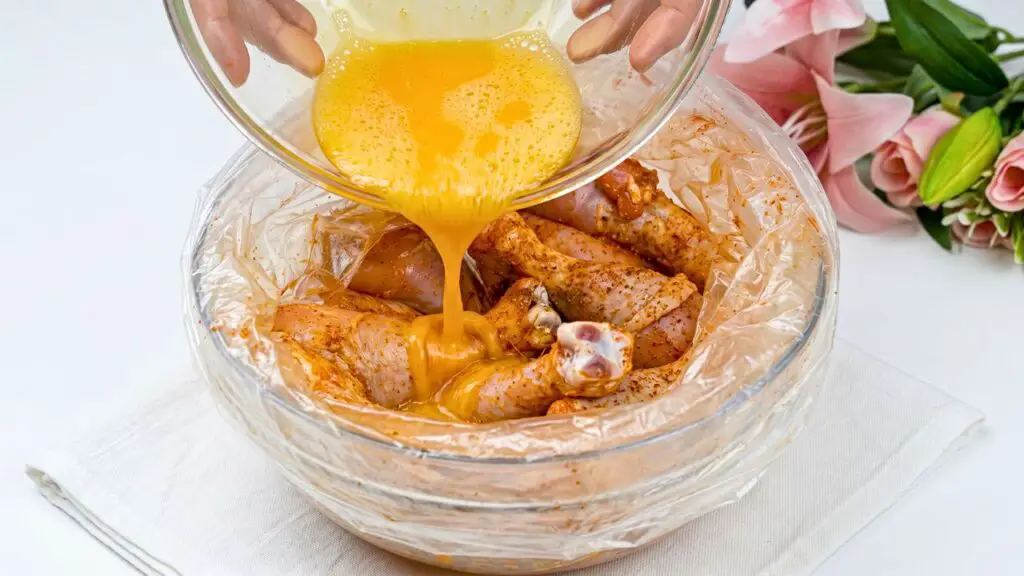
Step 2: Whisk the egg
While the chicken is marinating, crack the egg into a small bowl. Add 1/3 teaspoon salt, then whisk it for a few seconds until the yolk and white come together and the egg looks smooth.
Step 3: Add the egg to the chicken
Open the plastic bag and pour the whisked egg over the chicken drumsticks.
Seal the bag again, hold the top closed, and massage the chicken through the bag until the egg coats each piece evenly.
Top Tip: Do not pour the egg in before the chicken has had time to sit with the dry seasonings. That first 30 minutes give the salt and spices time to settle into the chicken instead of getting diluted straight away.
Step 4: Add the cornstarch
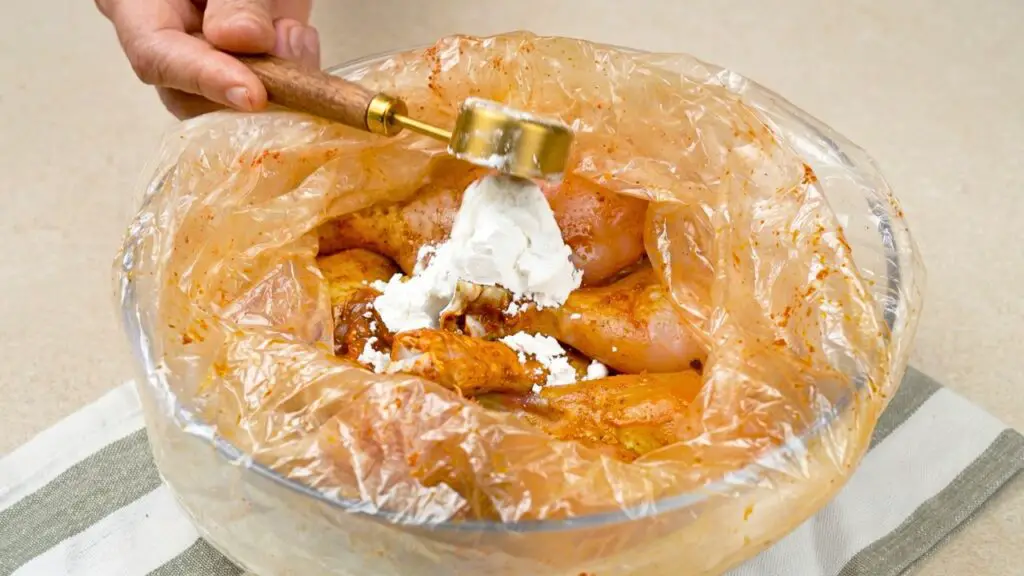
Open the bag again and add the cornstarch. Seal the bag one more time, then massage and turn the drumsticks through the bag until each piece looks evenly covered.
The starch helps take away that slippery egg feeling and gives the chicken a light, even layer before it goes into the oven.
Note: I use cornstarch, but potato starch works too. Use whichever one you already have.
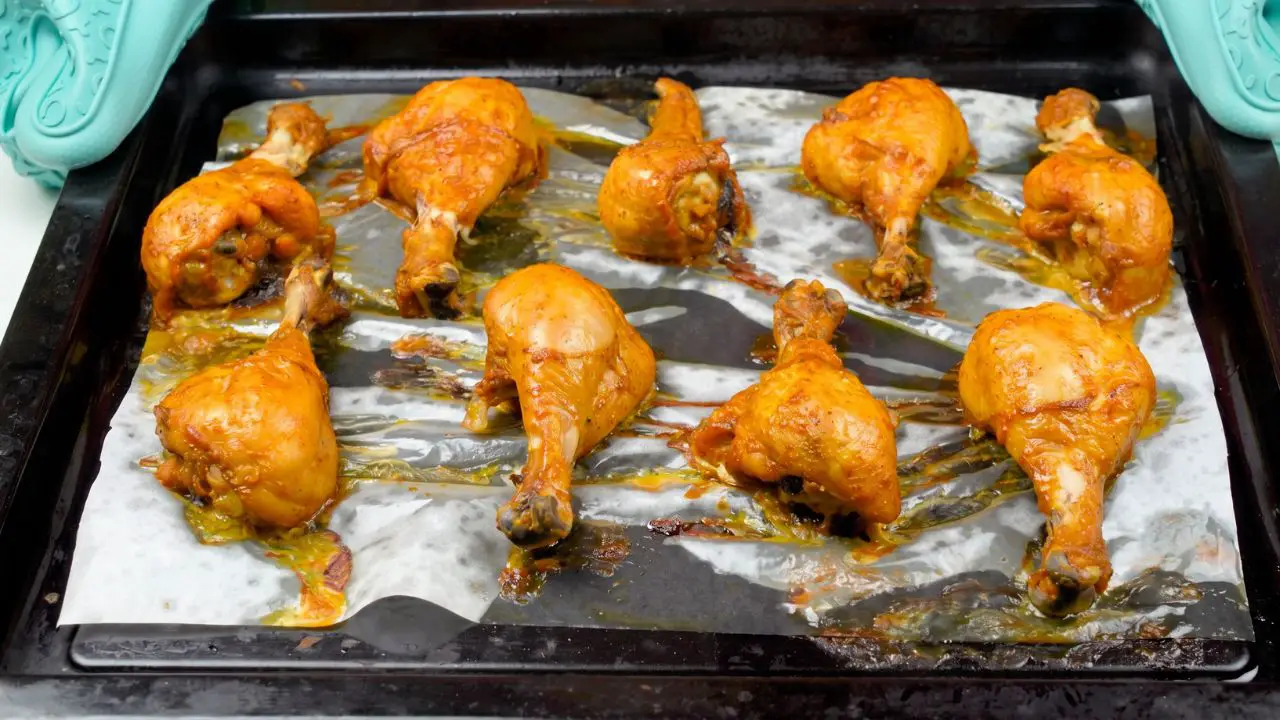
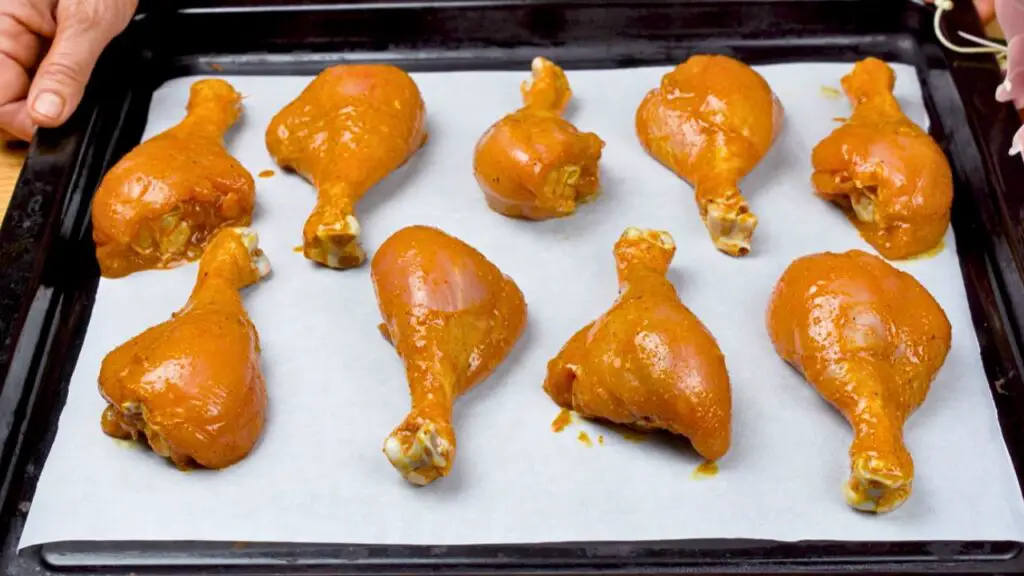
Step 5: Bake the drumsticks
Line a baking sheet with parchment paper and place the chicken drumsticks on top in a single layer.
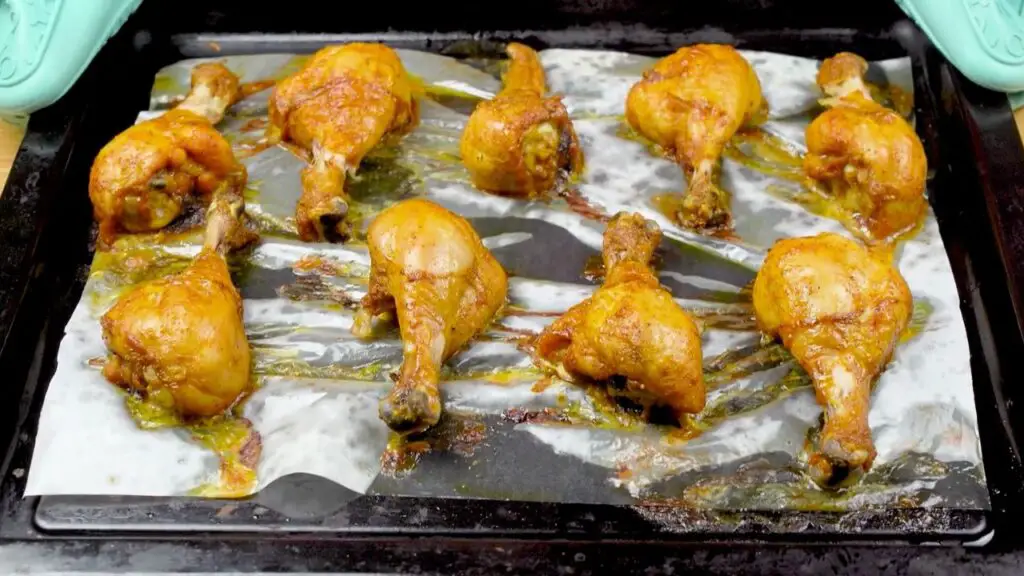
Bake in a preheated oven at 400°F (200°C) for about 40 to 45 minutes, or until the chicken is cooked through and the outside looks golden.
Start checking around 40 minutes. The safest way to check is with a meat thermometer. The thickest part of the drumstick should reach 165°F (74°C), without touching the bone.
Top Tip: Give the drumsticks a little space on the baking sheet. If they are too close together, they steam more and the outside will not bake as nicely.
Step 6: Make the sauce and salad
While the chicken is in the oven, stir together mayonnaise, a little ketchup, mustard, yogurt or sour cream, and chili flakes until smooth.
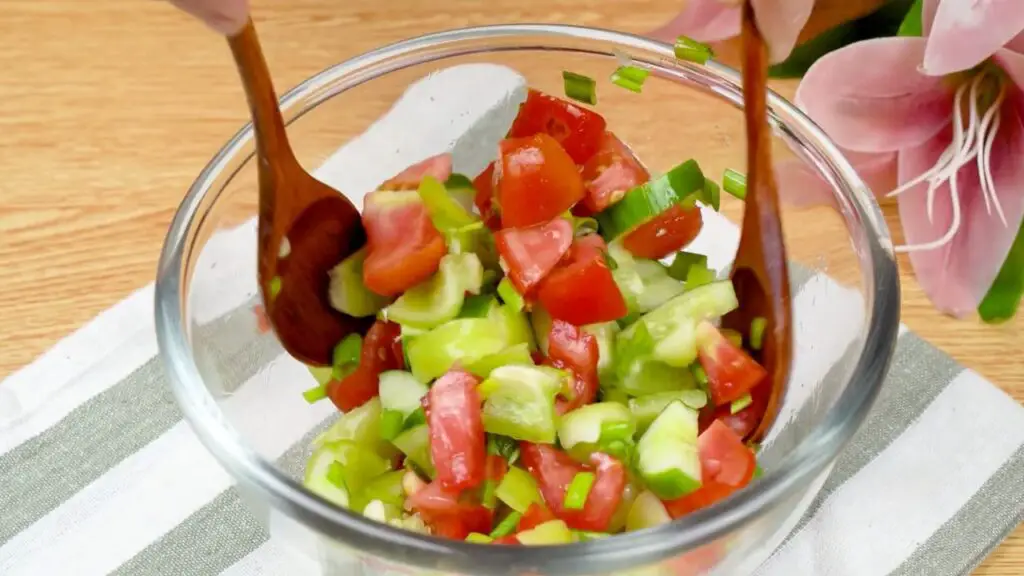
For the salad, chop bell pepper, cucumber, tomatoes, and spring onion, then add a little salt. I love having something fresh next to these drumsticks… it balances the warm spices so well.
How Long To Cook Drumsticks In Oven
For this recipe, the drumsticks bake at 400°F (200°C) for about 40 to 45 minutes.
The exact time can change depending on the size of your drumsticks and your oven, so always check the thickest piece. The chicken should be fully cooked inside, the juices should run clear, and the internal temperature should reach 165°F (74°C).
If your drumsticks are very large, they may need a few extra minutes. If they are smaller, start checking a little earlier.
Related Recipes: If you liked this easy chicken drumstick recipe, hit the like button and check out my latest recipe here. I think you will really enjoy those too.
This Is My New Favorite Way to Make Chicken Drumsticks
These oven-baked chicken drumsticks are juicy, golden, and full of flavor, with a simple little trick I learned from a street food chef. The best part is that most of the mixing happens in a bag, so the prep is easy, less messy, and so satisfying!
4
servings40
minutes45
minutes240
kcal1
hour25
minutesIngredients
8 to 9 pieces 8 to 9 (about 1 kg) chicken drumsticks
1 teaspoon 1 (5 g) salt
1 teaspoon 1 (3 g) dried garlic
½ teaspoon ½ (1 g) black pepper
1 teaspoon 1 (2–3 g) paprika
½ teaspoon ½ (1 g) turmeric powder
1 piece 1 egg
⅓ teaspoon ⅓ (2 g) salt for egg
2 tablespoons 2 (16 g) cornstarch or potato starch
- For the simple sauce
as needed to taste as needed mayonnaise
as needed to taste as needed ketchup
as needed to taste as needed mustard
as needed to taste as needed yogurt or sour cream
as needed to taste as needed chili flakes
- For the quick salad
1 piece 1 bell pepper
1 piece 1 cucumber
2 pieces 2 tomatoes
2 pieces 2 spring onion
to taste dash to taste salt
Directions
- Place a plastic bag in a bowl and add chicken drumsticks.
- Season with salt, dried garlic, black pepper, paprika, and turmeric.
- Seal the bag and massage to coat the drumsticks with seasoning. Marinate for 30 minutes.
- Crack an egg into a small bowl, add salt, and whisk until smooth.
- Pour the whisked egg over the marinated chicken in the bag. Seal and massage to coat evenly.
- Add cornstarch to the bag, seal, and massage until evenly coated.
- Lay drumsticks on a parchment-lined baking sheet.
- Bake at 200°C (400°F) for 40-45 minutes until crispy and golden.
- Mix mayonnaise, ketchup, mustard, yogurt, and chili flakes for the sauce.
- Make a quick salad with bell pepper, cucumber, tomatoes, spring onion, and salt.
Notes
- Cornstarch or Potato Starch: Cornstarch works really well here, but potato starch also works if that is what you have. Use only 2 tablespoons, because too much starch can make the outside feel powdery instead of light.
- Skin-On or Skinless Drumsticks: Skin-on drumsticks will usually come out more golden and richer, but skinless drumsticks still work well with this method. If you use skin-on chicken, place the skin side facing up so it can bake better.
- Check the Thickest Piece: Drumsticks can look golden before they are fully cooked near the bone. Use a meat thermometer if you can, and make sure the thickest part reaches 165°F.
- Do Not Crowd The Tray: Leave a little space between the drumsticks on the baking sheet. If they sit too close together, they steam instead of baking nicely.
- Storage and Reheating: Store leftovers in an airtight container in the fridge for up to 3 to 4 days. Reheat them in the oven or air fryer until hot all the way through, so the outside tastes better than it would from the microwave.
- Easy Serving Ideas: These drumsticks are great with rice, roasted potatoes, flatbread, or a quick salad. The simple mayo, ketchup, mustard, yogurt, and chili sauce also make them feel more like a full meal.
Nutrition Facts
- Total number of serves: 4
- Calories: 240kcal
- Carbohydrates: 4g
- Protein: 30g
What To Serve With Chicken Drumsticks
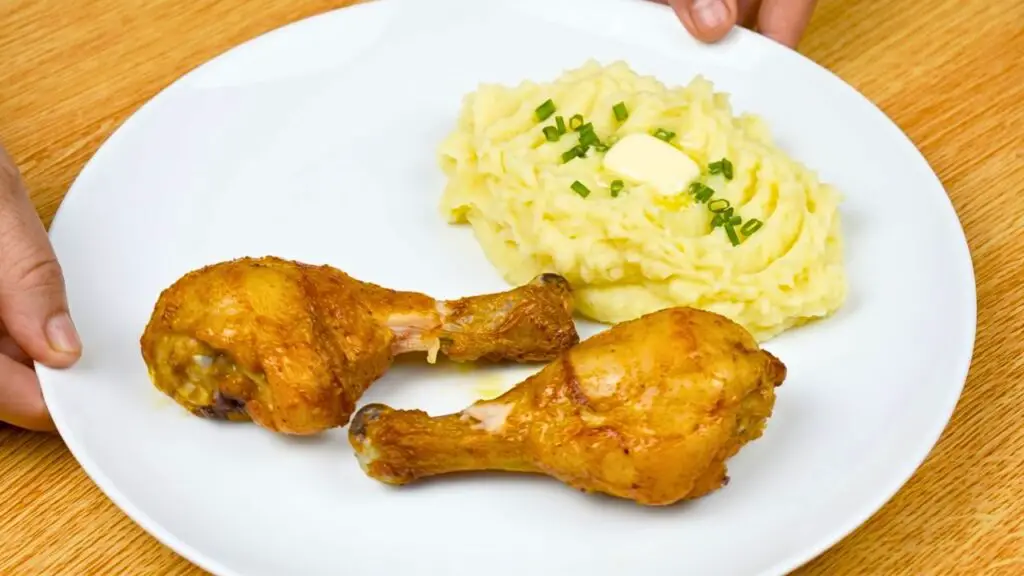
These oven baked chicken drumsticks are so easy to turn into a full meal. I usually serve them with the quick salad and sauce, but there are so many simple sides that work.
They are lovely with rice, creamy mashed potatoes, roasted potatoes, flatbread, steamed vegetables, or a big crunchy salad. In my opinion, rice and the little creamy sauce are especially good here because they make the whole plate feel extra satisfying.
Storage + Reheating

Let leftover chicken drumsticks cool, then store them in an airtight container in the fridge for up to 3 days.
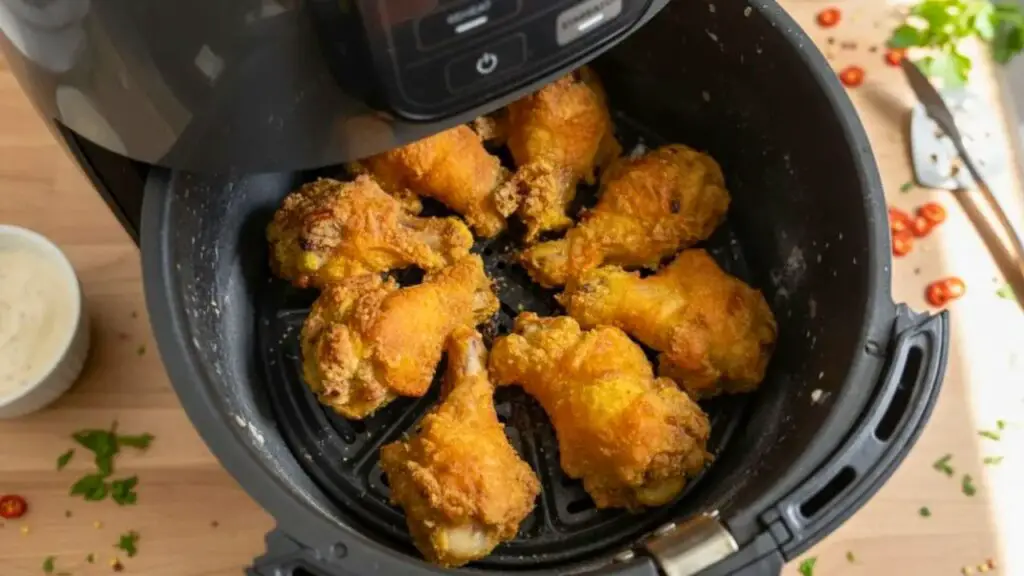
To reheat, place them in the oven at 350°F (180°C) until hot all the way through. You can also reheat them in the air fryer if you want the outside to firm up a little again.
Try not to microwave them for too long, because chicken drumsticks can dry out if they are overheated.
Easy Swaps
You can use potato starch instead of cornstarch if that is what you have.
You can also use skin-on drumsticks if you prefer a richer, more golden outside. Skin-on chicken will usually taste a little more indulgent… let’s be honest, chicken skin has a lot of flavor.
For the sauce, yogurt makes it a little lighter, while sour cream makes it creamier. Both work, so I would just use what is already in the fridge.
More Easy Chicken Recipes
If you liked these oven-baked chicken drumsticks, check out more easy chicken recipes below.
- How to Cook Chicken Breast in a Pan with Butter – This simple pan-seared chicken breast stays tender and juicy thanks to a buttery finish. It’s an easy recipe that’s perfect for quick weeknight dinners.
- Crispy Air Fryer Chicken Nuggets with Only 3 Ingredients! – These homemade chicken nuggets are crispy, juicy, and made with just three simple ingredients for an easy, family-friendly meal.
- Crispy Air Fryer Chicken Strips – Golden and crunchy on the outside with tender chicken inside, these air fryer chicken strips are perfect for dipping or serving with your favorite sides.
And if you make this chicken drumsticks recipe oven method, leave a comment or question in the comment section below, or in the YouTube video comments.
I try to reply to all the comments and questions, and I love hearing how the recipe turned out for you!